background image

Before any maintenance or cleaning work is carried
out, DISCONNECT the appliance from the ELEC-
TRICITY supply.

Internal cleaning

Clean the inside and accessories with warm water
and bicarbonate of soda (5ml to 0.5 litre of water).
Rinse and dry thoroughly.

NEVER USE DETERGENTS, ABRASIVE POW-
DERS, HIGHLY PERFUMED CLEANING PROD-
UCTS OR WAX POLISHES, TO CLEAN THE INTE-
RIOR AS THESE WILL DAMAGE THE SURFACE
AND LEAVE A STRONG SMELL.

External cleaning

Wash the outer cabinet with warm soapy water. Do
NOT use abrasive products.

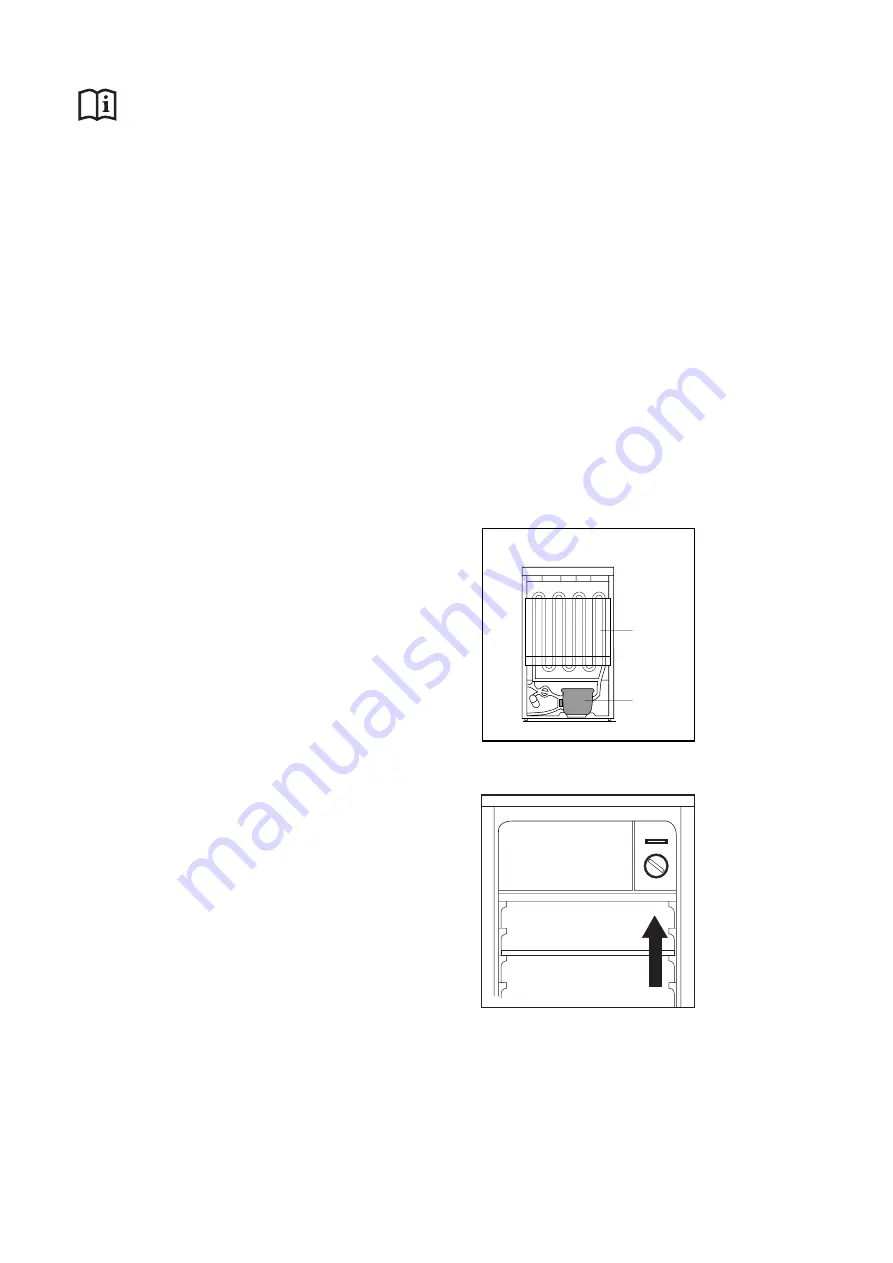
Once or twice a year dust the condenser (black grill)
and the compressor at the back of the appliance,
with a brush or vacuum cleaner, see figure.

You MUST ensure that the appliance is switched
OFF. An accumulation of dust will affect the perfor-
mance of the appliance and cause excessive elec-
tricity consumption.

Changing the light bulb

Should the interior light fail to work, switch off and
disconnect the appliance from the electricity supply.
Replace the bulb as follows:

1. Remove conveyor

2. Unscrew light bulb

3. Replace with a 12 watt bulb available from your 

nearest Zanussi Service Force Centre.

4. Replace conveyor

D358

CONDENSER

COMPRESSOR

When the appliance is not in use

When the appliance is not in use for long periods,
disconnect from the electricity supply, empty all
foods and clean the appliance, leaving the door ajar
to prevent unpleasant smells.

D359

Maintenance and Cleaning

9

Summary of Contents for ZT 51/2 R

Page 1: ...REFRIGERATOR ZT 51 2 R 2222611 87 INSTRUCTION BOOKLET...

Page 2: ...Fresh food refrigeration 6 Health and safety guidelines 7 Defrosting 8 Maintenance and Cleaning 9 Internal cleaning 9 External cleaning 9 Changing the light bulb 9 When the appliance is not use 9 Som...

Page 3: ...not allow children to tamper with the controls or play with the product There is a risk of suffocation Keep packaging material away from children During Use This appliance is designed for domestic us...

Page 4: ...compartment B Can storage shelf with egg tray C Bottle storage shelf D Salad drawer E Glass shelf G Storage shelves H Conveyor K Freezer compartment L Thermostat control Description of the Appliance...

Page 5: ...e way in When frozen food is not stored in the star compartment and when the ambient temperature is higher than 25 C return the conveyor to its initial position This reduces the temperature in the ref...

Page 6: ...or bubbling sounds when the refrigerant is pumped through the coils or tubing at the rear and the cooling evaporator When the compressor is on the refrigerant is being pumped round and you will hear...

Page 7: ...od as quickly as possible but do NOT place in the refrigerator until cool Leave food in a cool place in order that it can then be placed in the refrigerator as soon as possible Do NOT mix raw and cook...

Page 8: ...f the thermostat knob To accelerate defrosting place a bowl of hot water inside the compartment with a piece of cardboard underneath the bowl as protection 5 When defrosting is completed dry thoroughl...

Page 9: ...f the appliance with a brush or vacuum cleaner see figure You MUST ensure that the appliance is switched OFF An accumulation of dust will affect the perfor mance of the appliance and cause excessive e...

Page 10: ...is not jammed Check the thermostat in the fridge is turned to the correct setting relative to ambient conditions Check the ambient temperature is within the appliances operating limits of 10 C to 32 C...

Page 11: ...under the heading Something Not Working When you contact the Service Centre you will need to give the following details 1 Your name address and post code 2 Your telephone number 3 Clear and concise d...

Page 12: ...incurred for calls to put right an appliance which is improperly installed or calls to appliances outside the United Kingdom Appliances found to be in use within a commercial environment plus those w...

Page 13: ...or rooms where the ambient temperature reaches above 32 degrees C or drops below 10 degrees e g conservatories You should also ensure that air can circulate freely around the back and the top of the...

Page 14: ...n the left hand side 5 Unscrew the foot at the base 6 of the appliance and refit it on the opposite side 6 Refit the door and the bottom hinge to the left hand side When the bottom hinge is screwed in...

Page 15: ...neutral wire to the terminal in the plug which is marked with the letter N or coloured black Connect the brown live wire to the terminal in the plug which is marked with the letter L or coloured red...

Page 16: ...oard monitors software tv dvd and othes Manual users user manuals user guide manual owners manual instruction manual manual owner manual owner s manual guide manual operation operating manual user s m...

Reviews: