26
Door reversal
Unplug the appliance before all operations.
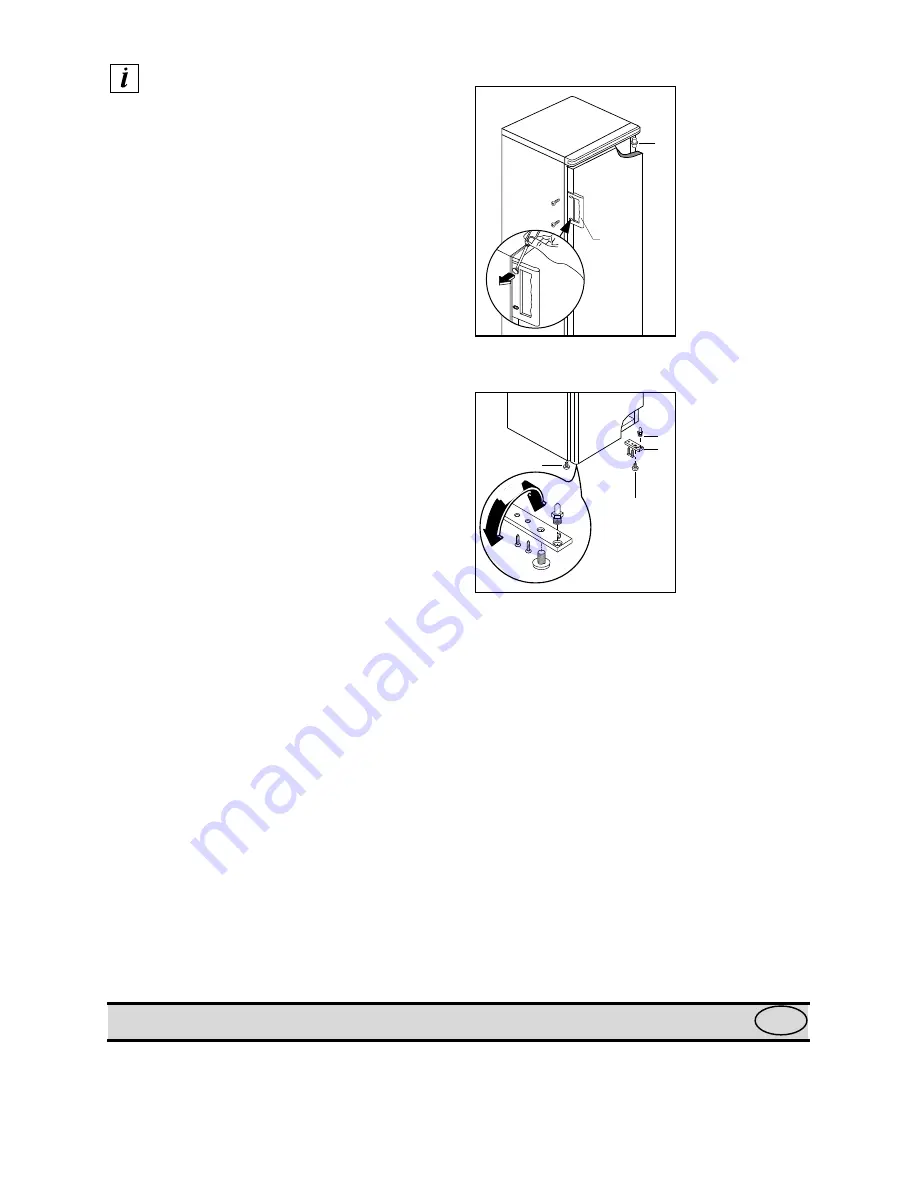
To reverse the door, proceed as follows:
dismantle the lower hinge (3), pin (1) and the screw
(2);
slide the door out from pin (5), unscrew the pin and
reposition on the opposite side;
unscrew the left front foot and reposition on the
opposite side;
unscrew the two screws which mask the holes for
fixing the hinge from the left front side;
reassemble the door;
reassemble the lower hinge (turning it 180
°
), the pin
and the screw on the opposite side, as shown in the
figure;
dismantle the handle (6) and reassemble it on the
opposite side.
The holes that are not used are to be masked with the
plastic plugs removed.
Attention
After completion of the door reversibility operation,
verify that the door gasket is adherent to the cabinet.
If the ambient temperature is cold (i.e. in Winter), the
gasket may not fit perfectly to the cabinet. In that
case, wait for the natural fitting of the gasket or
accelerate this process by heating up the part involved
with a normal hairdrier.
Electrical connection
Before plugging in, ensure that the voltage and
frequency shown on the serial number plate
correspond to your domestic power supply.
Voltage can vary by
±
6% of the rated voltage.
For operation with different voltages, a suitably sized
auto-transformer must be used.
Fig. 3
Fig. 3a
D193
6
5
180°
1
3
2
D299
2
TECHNICAL SPECIFICATION
The technical data is indicated in the rating plate on the left side inside the appliance.
GB


