background image


Monster LED User Manual


Zap Lighting – A brand of  


P

HYSICAL INSTALLATION


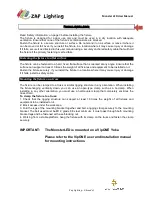
Read ‘Safety information’ on page 3 before installing the fixture. 
The  fixture  is  designed  for  indoor  use  only  and  must  be  used  in  a  dry  location  with  adequate 

ventilation. Ensure that none of the fixture’s ventilation slots are blocked. 

Fasten the fixture to a secure structure or surface. Do not stand it on a surface or leave it where it 

can be moved or fall over. If you install the fixture in a location where it may cause injury or damage 
if it falls, secure it as directed in this user manual using a securely anchored safety cable that will hold 

the fixture if the primary fastening method fails. 
 

Fastening the fixture to a flat surface 

The fixture can be fastened to a hard, fixed, flat surface that is oriented at any angle. Ensure that the 

surface can support at least 10 times the weight of all fixtures and equipment to be installed on it. 

Fasten the fixture securely. If you install the fixture in a location where it may cause injury or damage 

if it falls, install a safety cable. 


Mounting the fixture on a truss 

The fixture can be clamped to a truss or similar rigging structure in any orientation. When installing 

the  fixturehanging  vertically  down,  you  can  use  an  open-type  clamp  such  as  a  G-clamp.  When 
installing in any other orientation, you must use a half-coupler clamp that completely encircles the 
truss chord. 

To clamp the fixture to a truss: 

1.  Check  that  the  rigging  structure  can  support  at  least  10  times  the  weight  of  all  fixtures  and 

equipment to be installed on it. 

2. Block access under the work area. 
3. Fold the legs of the mounting bracket together and bolt a rigging clamp securely to the mounting 

bracket. The bolt used must be M12, grade 8.8 steel minimum. It must pass through both mounting 
bracket legs and be fastened with a self-locking nut. 

4. Working from a stable platform, hang the fixture with its clamp on the truss and fasten the clamp 

securely. 


IMPORTANT:  The MonsterLED is mounted on a VipONE Yoke. 
 

Please refer to the VipONE user and installation manual 
for mounting instructions. 


Summary of Contents for Monster LED

Page 1: ...Monster LED User Manual Rev 02...

Page 2: ...ents SAFETY INFORMATION 3 INTRODUCTION 5 CONTROL FUNCTIONS 6 FEATURES 6 OPERATION 6 PHYSICAL INSTALLATION 7 FASTENING THE FIXTURE TO A FLAT SURFACE 7 MOUNTING THE FIXTURE ON A TRUSS 7 CONNECTIONS 8 PO...

Page 3: ...ntil repairs have been completed Before using the fixture check that all power distribution equipment and cables are in perfect condition and rated for the current requirements of all connected device...

Page 4: ...y support If suspending from a rigging structure fasten the fixture to a rigging clamp Do not use safety cables as the primary means of support In case the fixture is hanged up on trellis and its posi...

Page 5: ...instructions given in this manual to ensure the fitting is installed used and serviced correctly and safely Before using the product for the first time 1 Read Safety information on page 3 before insta...

Page 6: ...osition Upright or truss mounted with EZ clamps Primary zoom 34 70 Dimensions including Yoke H 1227 mm x W 802 mm x L 918 mm Stand alone version W o yoke Available Weight Including Yoke VipONE 130 Kg...

Page 7: ...rely If you install the fixture in a location where it may cause injury or damage if it falls install a safety cable Mounting the fixture on a truss The fixture can be clamped to a truss or similar ri...

Page 8: ...Voltage range Fuse protection Power supply transformer 150VA Primary 208 V 230 V Secondary 22 V Power input Input fuse holder FA 16 A 230V Operating power Zone Voltage Connection Electrical Absorptio...

Page 9: ...Zap Lighting A brand of 9 DMX 5 pole socket for connection of a DMX controller After the reset sequence is completed DMX signal connection can be controled by checking the flashing green LED on the di...

Page 10: ...Monster LED User Manual Zap Lighting A brand of 10 DMX chain With extended cable runs the last device in the chain may require a terminating resistor in order to prevent system malfunctions...

Page 11: ...arameters are added the dedicated head DMX parameters It will make a single unique DMX machine From a DMX console Any type of DMX console or controller can control the Monster Led as long as it follow...

Page 12: ...er 6 Brightness CDE Red 7 Red dimmer channel 0 255 Green 8 Green dimmer channel 0 255 Blue 9 Blue dimmer channel 0 255 Cold White 10 Cold White dimmer channel 0 255 Hot White 11 Hot White dimmer chann...

Page 13: ...t from stage effects building structures and fittings or the natural environment at outdoor events for example If one or more of these factors is present inspect fixtures within their first 100 hours...

Reviews: