41
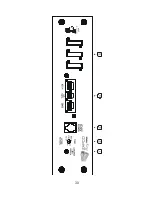
Control Plate Features
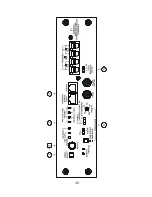
1. Mode select: Assigns the function of the adjustment knob as
needed.
2. Adjust Knob: Multi- function knob for set-up adjustments on
9.0XD.
3. LED bank: LEDs indicate function of adjustment knob and the
levels within each function.
4. Program/Display port and IR Remote port: Allows use of remote
control and remote display as well as PC interface.
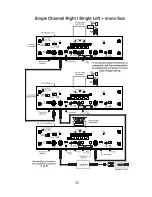
5. Bridge in Select: Configures amp as single channel R. or L. amp.
6. Bass crossover controls.
Items 1 through 3 operate the basic amp controls. This is done by
selecting the function (or mode) of the digital encoder knob, and then
making adjustments using the LEDs as a guide.
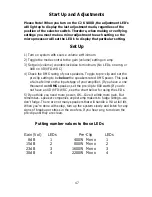
There are three basic functions you need to adjust at installation. The
first is volume. This is the same as input sensitivity, and should be left all
the way down at initial setup. The last is turn-on delay. This allows you to
extend the delay to be sure the amp is the last piece of equipment to turn
on, thus eliminating any “turn-on pop”. The adjustment in the middle is
probably one you haven’t seen before. It’s called pre-clip. Pre-clip is a fail-
safe system for your speakers. It operates as a governor on the input side
of the amp and, once set, puts an absolute limit on how much input the
amp will accept. Worried about someone hopping into the car and
cranking up your system? Don’t! Once you’ve set the pre-clip, nobody can
give your speakers more than you’ve set them for.
When adjusting the amp, the first three LEDs indicate the function of
the encoder and the next four LEDs show the relative level within each
function.
Item 4 refers to the ports provided for options and programming.
Item 5 is the bridge channel select switch. If your system is to be set
up with a right channel amp and a left channel amp, this switch will put
each amp to its proper channel.
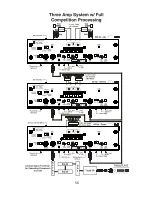
Item 6 is the crossover control section. The 9.0XD will operate full
range or as a bass amp. When engaged, the crossover can be set
anywhere from 38Hz to 500Hz. If the amp is used mono, switch the input
switch to L & R SUM MONO and switch the crossover into 48dB.
Summary of Contents for C2K
Page 1: ......
Page 17: ...16...
Page 19: ...18...
Page 21: ...20 C2K 2 0X Power VS Distortion and Specifications...
Page 23: ...22 C2K 3 0X Power VS Distortion and Specifications...
Page 25: ...24 C2K 6 0X Power VS Distortion and Specifications...
Page 27: ...26 C2K Crossover Response...
Page 29: ...28...
Page 31: ...30...
Page 33: ...32 C2K 2 5X Power VS Distortion and Specifications...
Page 35: ...34 C2K 4 0X Power VS Distortion and Specifications...
Page 41: ...40...
Page 43: ...42...
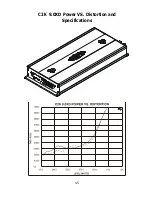
Page 46: ...45 C2K 9 0XD Power VS Distortion and Specifications...
Page 51: ...50...
Page 52: ...51...
Page 53: ...52...
Page 54: ...53...
Page 55: ...54...
Page 56: ...55...
Page 57: ...56...
Page 58: ...57...
Page 59: ...58...
Page 60: ...59...
Page 61: ...60...
Page 62: ...61...
Page 63: ...62...
Page 64: ...63...
Page 65: ...64...
Page 66: ...65...
Page 67: ...66...
Page 68: ...67...
Page 69: ...68...
Page 71: ......

