12
Quick Start Guide
Using Internal Drive
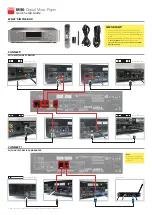
To insert the internal 3.5’’ SATA HDD, please open the rack door, then insert the drive into the internal
enclosure until 3/4, then complete the installation by closing the door. This operation will complete the
installation of the disk into the rack. The Zappiti media player is compatible with drives formatted in
NTFS, ExFAT, FAT16, FAT32, HFS, EXT2/3. It is not possible to format hard drives via the Zappiti. You
must use a computer for this purpose.
Multiple partitions are not supported!
Note:
Please make sure that your hard drive is correctly formatted before you insert it in the tray.
More info: zappiti.uservoice.com/knowledgebase
Connecting USB Drives
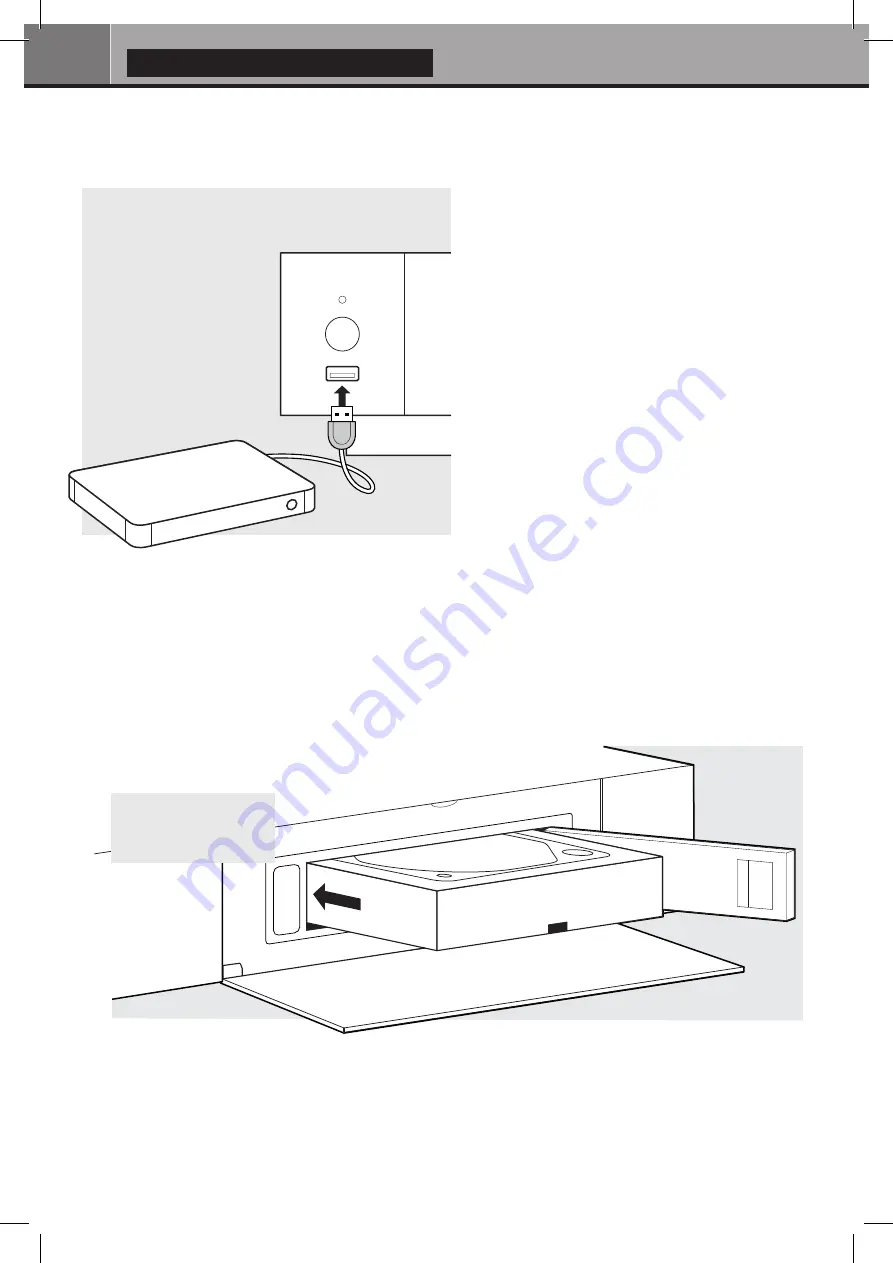
You can connect your USB drives to one of the
available USB ports. If you want to play video
files, USB 2.0 is enough to support very high
bitrate (up to 480 Mbps). If you want to transfer
files, we advise you to use USB 3.0 or USB
Type-C (not available on Zappiti Mini 4K HDR
model).
Note:
A dedicated USB icon located on the
home page can help you detect if the drive is
properly connected.
Power provided by USB ports may not be
enough to allow the USB drive to function
correctly; depending on the drive. Please do not
disconnect or switch off the USB drive during
write (copy / transfer) operations.
The Zappiti players are compatible with
UASP
HDD docking stations
as well as
USB hubs
.
Using SD / MMC Memory Cards
To use a memory card, insert it in the memory card slot located on the left side of the media player. It will be
detected as USB device (USB icon on the home page). Some SD memory cards may not be recognized by
the player or may work incorrectly ; in such case, please use a different model of memory card.
External
Drives
If you are using an
external HDD 2.5’’,
please use the USB
cable provided with
your HDD for best
performance.
External HDD
Zappiti
Front View
Open the tray and insert the HDD,
keeping the connectors inside the bay.
Pre-formated HDDs are
available on sale here:
http://zappiti.store


