4)
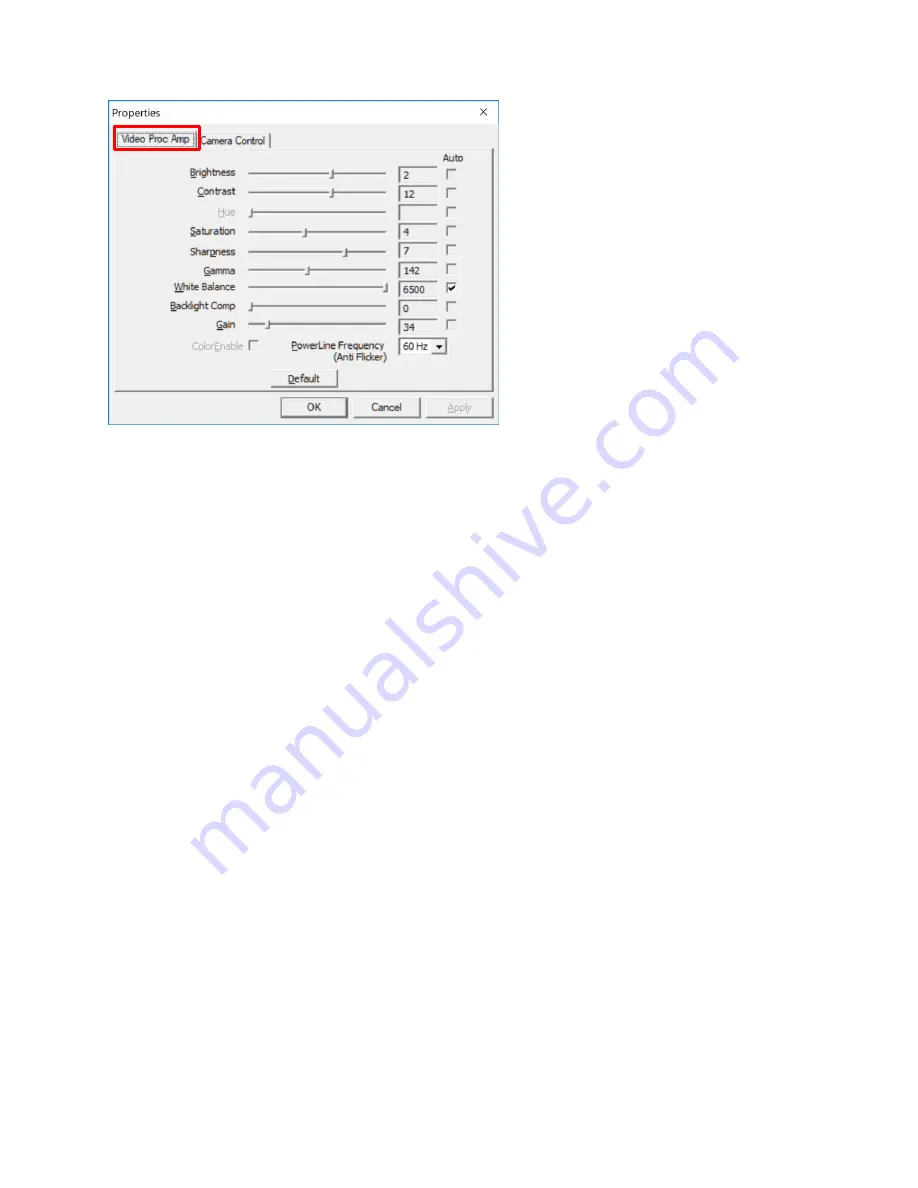
Click the “Video Proc Amp” tab to return to the previous settings display.
You can further adjust the image with these sliders. We recommend the settings above to start. Then adjust
the sliders to enhance the image quality. The controls are as follows:
Brightness
: Overall light level in the image. Slide left for a darker image, right or a brighter image
Contrast
: Transition from dark to light. Slide left for a slow transition, right for a fast transition
Saturation
: Intensity of color in the image. Slide left for low color level, right for high color level
Sharpness
: Sharpness of the edges in the image. Slide left for less edge sharpness, right for more.
Gamma
: Similar to contrast but more pronounced. Slide left for darker but clear image, right for brighter but
less defined.
White Balance
: Control for color shift from lighting. Usually set to auto.
Backlight Compensation
: Compensates for bright backgrounds. Left is off, right is on.
Gain
: Similar to brightness. Use as fine adjustment when the auto exposure is turned off.
PowerLine Freqency
: Compensates for flicker from AC voltage line noise. US uses 60 Hz.
5)
Once the MiScope-MP2 exposure and camera settings have been adjusted, press the OK button to close the
Properties window.
6)
(Optional) How to Save these exposure settings in the software. If you would like to save these settings into the
software (so that the MiScope-MP2 will always start in manual exposure) then click the SETTINGS button in
Video
ToolBox Pro and select “Program Settings” from the list on the left side.


