13
Overview
This section begins with installation instructions for
gates that open
into
the property or “pull-to-open”
gates.
To mount the opener on a brick, masonry, or rock col-
umn, refer to
page 24
.
If you have a push-to-open gate, you must use a push-
to-open bracket (sold separately). See
Push-to-Open
Installation on page 22
.
For any installation, having another person assist the
installer is helpful.
Bracket Mounting
The proper position of the mounting brackets is crucial
to the efficiency and leverage of the gate opener. The
distance between the gate opener (actuator) and the
gate is also determined by the proper position of the
mounting brackets.
NOTE:
Ensure a minimum 2” space exists between the
gate and the gate opener (actuator) for safety reasons.
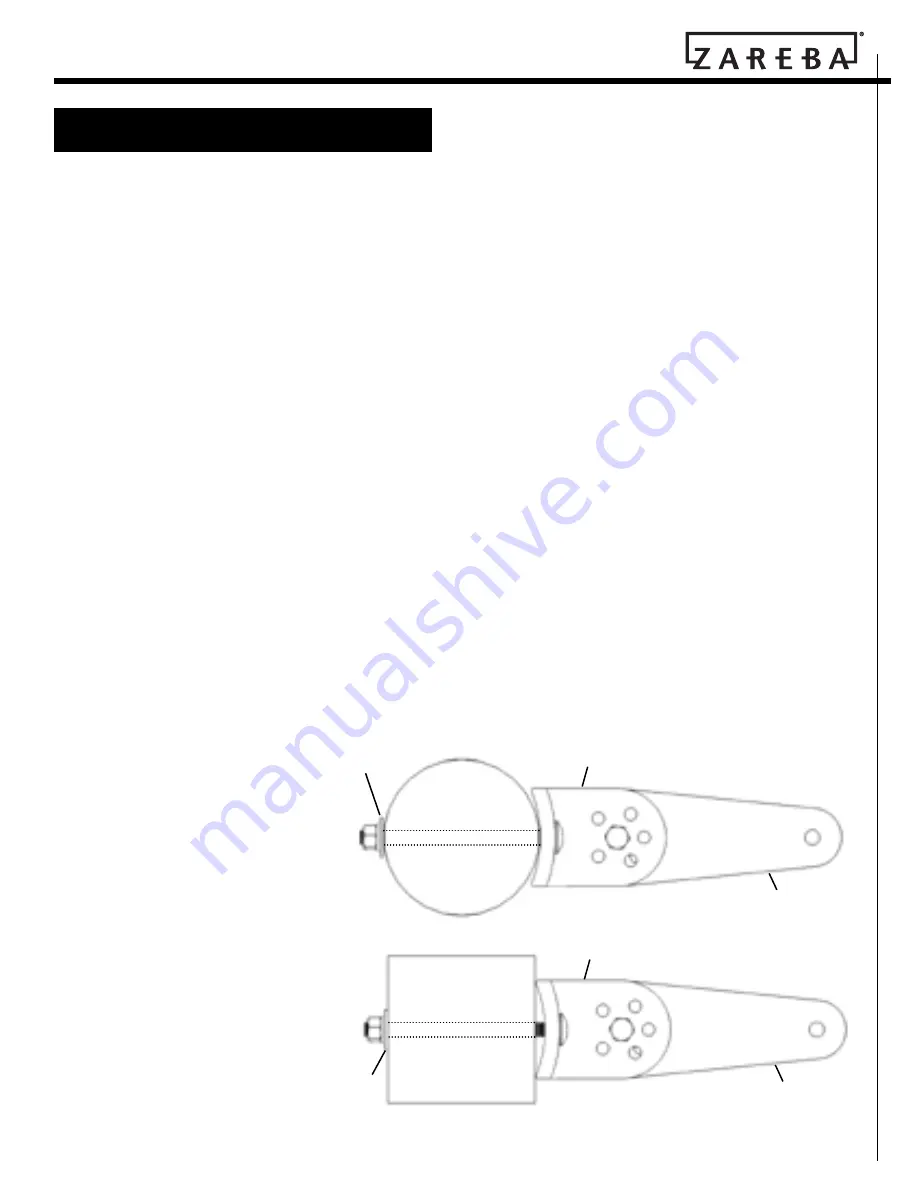
The curved design of the post brackets accommodates
either round or square posts. When mounting the post
brackets (see
fig. 10
), use bolts
long enough to pass through
the entire post. When mounting
the post brackets to wooden
posts, use a larger-size washer or
metal plate between the bolts
and the wood post to ensure the
stability of the fastening hard-
ware when thrust is applied.
If you are using gate posts small-
er than 6” diameter or square,
they should be (1) made of
metal, and (2) set in cement to
ensure the stability of the post.
Gate Reinforcement Methods
(fig. 11)
IMPORTANT:
Use wood or metal reinforcement plates
or pipes (not included) when mounting the gate brack-
et to thin-walled tube gates or panel gates.
Identify the Correct Mounting Positions of
the Gate Bracket and the Post Mount
Bracket Assembly
This section presents instructions for identifying the cor-
rect mounting position of the gate bracket and the post
mount bracket assemblies for pull-to-open gates. For
push-to-open gates, see
Push-to-Open Installation on
page 22
.
Step 1
(fig. 12)
Assemble both the post mount bracket assemblies by
placing the post pivot bracket between the two post
mount brackets. Insert the 3/8” x 2” hex bolt through
the center hole of the two post mount brackets and the
post pivot bracket. Place a 3/8” washer, a 3/8” lock
washer, and a 3/8” hex nut on the bottom of the 3/8” x
2” hex bolt and hand tighten.
INSTALLATION
Metal plate or
large washer
Wooden post
Post pivot bracket
Post mount bracket
Metal plate or large
washer
Wooden post
Post mount bracket
Post pivot bracket
Figure 10


