Chapter 2
______________________________________________________
Zaxcom Fusion User’s Manual
38
To load a configuration once it has been saved, simply press the
Preset
button
until the number displayed is the
one you‟re expecting. At that point, examine the configuration; it will be as you had saved it. If, at any time, you
need to update the configuration, inset your changes, they are automatically saved.
NOTE:
The Limit column settings are not saved in a specific preset #.
Analog/Digital In Toggle button
To select either analog or digital inputs use the
Analog/Digital In Toggle
button
. Selecting the button once
changes it, selecting it again changes it back.
Pre-/Post-Fader button
This button allows you to choose whether each selection is pre- or post-fader. For example, you can record the
microphone on one channel of the Fusion post-fader and on another pre-fader, so it is unaffected by the mix.
Pre-Fader: “A” (analog input) or “D” (digital input) – the letter is white.
Post-Fader: “A” or “D” – the letter is black.
-MORE- button
This button cycles the buttons that are displayed on the bottom of the page.
Clear All button
This button removes all selections and empties the contents of the current preset.
NOTE:
The Limit column settings are not cleared when this button is pressed.
Phase Invert button
This button reverses phase of the selected input. A reversed phase input appears with a bar over the letter A or
D.
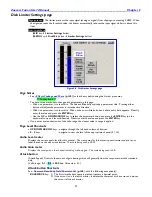
Limiter Settings button
Pressing it takes you to the
Disk Limiter Settings page
{
p.39
}.
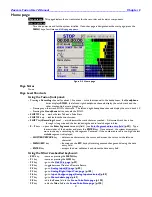
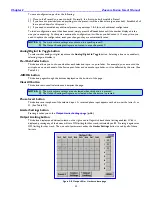
Limiting button
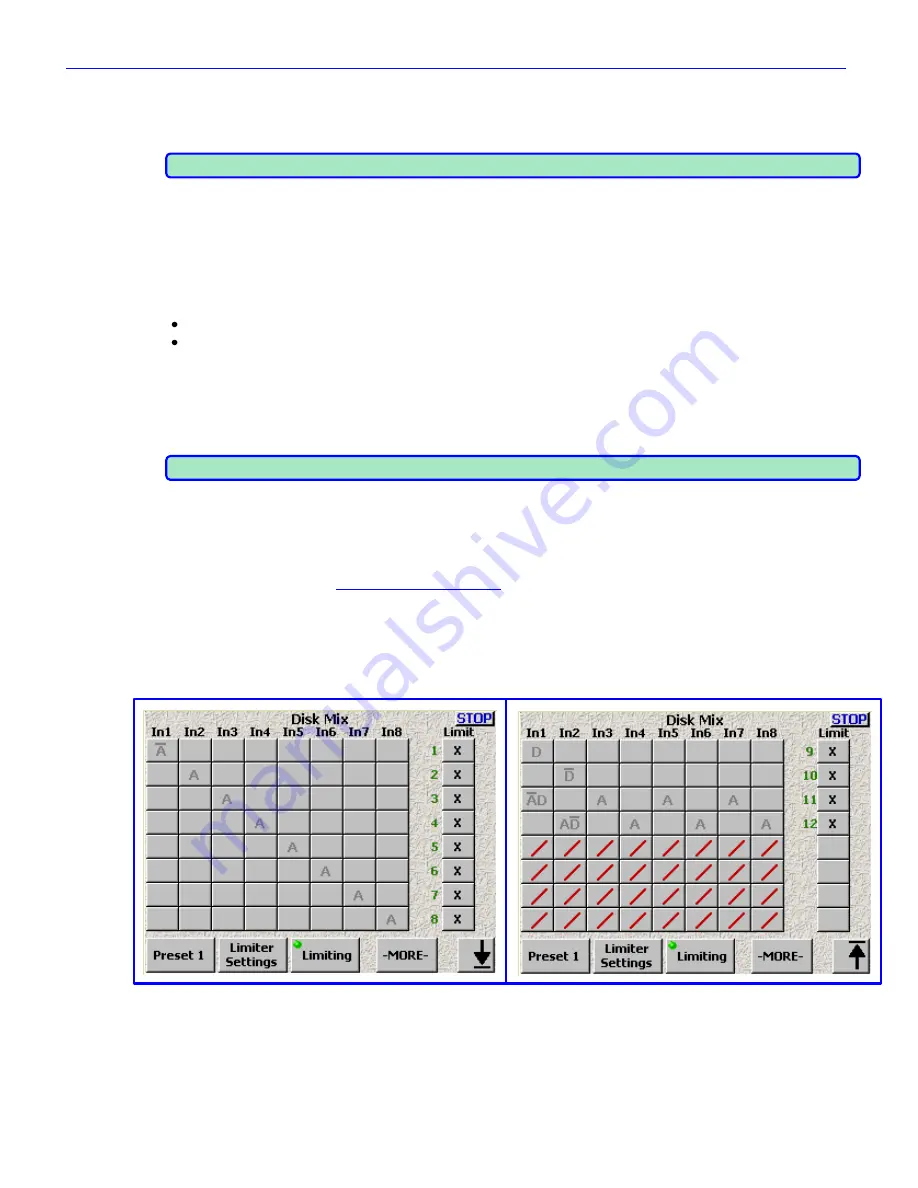
This button displays an additional column on the right used to flag which tracks have limiting enabled. With it
displayed, pressing any of the boxes will turn ON limiting for that track, indicated by an “X”. Pressing it again
turns OFF limiting for that track. The one set of parameters under the
Limiter Settings
button
is used by all of
these limiters.
Figure 2-5 Disk Mix – Limiter column page
Up/Down Arrow button
(only appears on Fusion 12)
This button toggles the display of the tracks. 1 – 8 on the first page and 9 – 12 on the last page.
Limit buttons
These buttons control which tracks will have their associated limiter enabled (indicated by an
X
).


