AS420
4x4 Dual Band 802.11ac Wave 2 Indoor Access Point
User Manual
Page 7
Ceiling Mount (Optional accessory_AS-CLM4)
3.2.
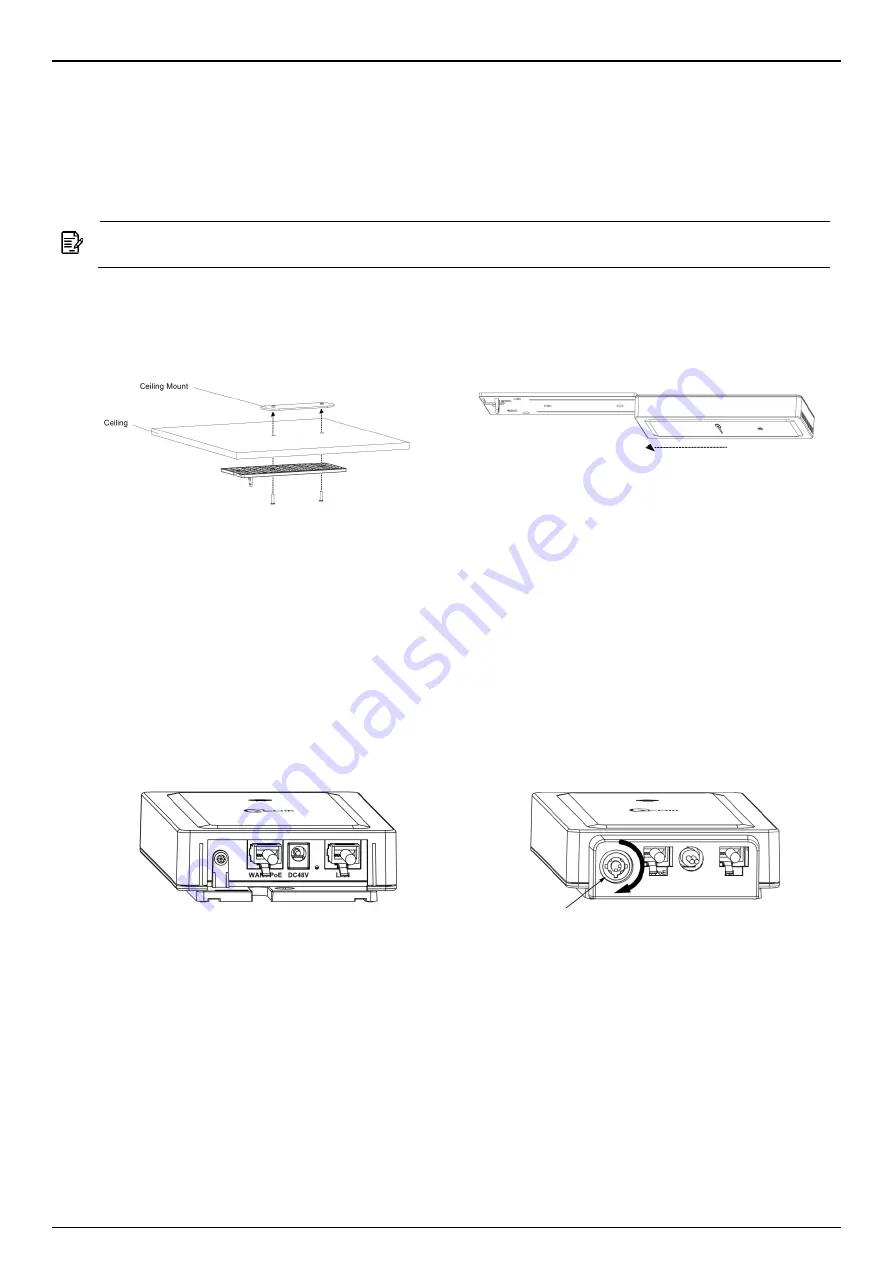
Determine where you want to mount the device, position the mounting bracket onto the ceiling,
and use a marker to mark the two screw holes on the ceiling.
Drill the two holes into the ceiling and insert the two screw anchors (included with ceiling
mount) into the holes.
Note:
The thickness of ceiling board should be less than 15mm.
Install the mounting bracket onto the ceiling
using two screws (included in the packaging)
into the screw plugs in the ceiling.
Slide the device onto the mounting bracket
to finish the installation.
Installing the Anti-tamper Lock (Optional accessory_AS-
3.3.
LK18)
Slide all the cables through their respective holes on the anti-tamper lock.
Install the mounting bracket; plug all the
cables into their respective ports on the
device before installing the anti-tamper lock.
Position the anti-tamper lock onto the
device and fasten the lock screw clock-wise
with special anti-tamper lock key.
Summary of Contents for AS420
Page 1: ......


