background image

ZPrinter

®

 450 Hardware Manual

Setup And Print The Build

www.3dpuser.com

18

All Rights Reserved

10/2/07

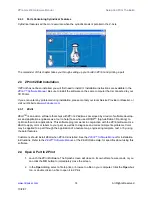
Select 

File >


3D Print Setup

 to disable the 

Bleed Compensation

, or to change the 

Layer 

Thickness

Select 

Transform

 > 

Anisotropic Scaling

 to change the values for 

Anisotropic Scaling

Select 

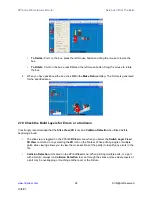
Edit > Make Fixture

 to change the 

Fixture


Clearance

 amount. This value is the small-

est amount of space between the Fixture and the part, without actually touching.

2.7.1

Create A New Powder Type

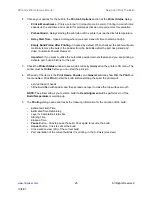
You can create a new powder type and enter new data in the fields that are activated in the 

Powder Set-

tings

 dialog. The new settings must be saved under a unique powder name and will be added to the left-

side panel after saving. See the


ZPrint™ Software Manual

 for complete instructions on how to create a 

new powder type.

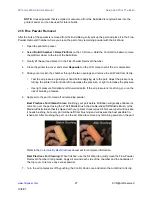
2.8 Transform The Part in ZPrint

The ZPrint 

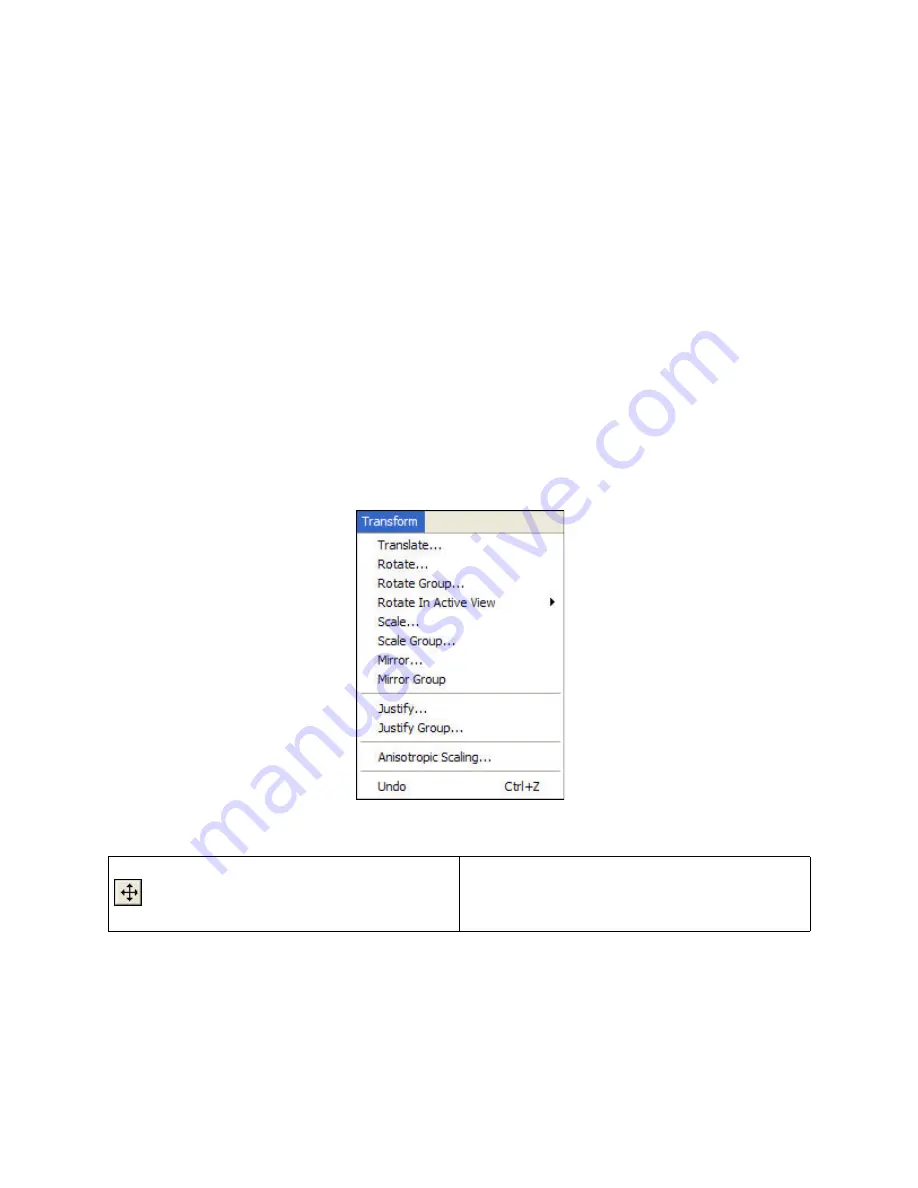
Transform

 menu has several options for transforming parts. Following is a brief overview to 

help familiarize you with some of these options. For a complete description of the 

Transform

 menu, please 

refer to the 

ZPrint™ Software Manual

.

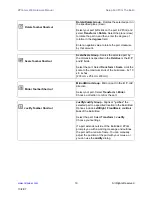
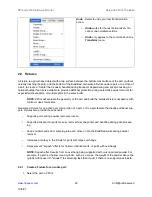
ZPrint Transform Menu

  Translate Toolbar Shortcut

Positions the selected part by the amount specified 
for the 

X

Y

, and 

Z

 coordinates. The default values of 

0,0,0, represent the lower-left corner of the Build 
Bed.

Summary of Contents for ZPrinter 450

Page 1: ...10 2 07 All Rights Reserved ZPrinter 450 Hardware Manual Part Number 09570 Version 1 1 ...

Page 2: ...ual Chapters 1 ZPrinter 450 Overview Details the ZPrinter 450 specifications and computer requirements pro vides a brief overview of the principles behind 3D printing a process diagram a list of important terms labelled diagrams of the ZPrinter 450 components and the Control Panel a description of the printer Accessories Kit and where to go for more information 2 Setup And Print The Build Describe...

Page 3: ...rview To Printing Speed Part Strength And Part Accuracy 12 2 2 Overview To Part Orientation 12 2 2 1 Parts Containing an Opening or Hollow Area 13 2 2 2 Parts Containing Overhangs 13 2 2 3 Parts Containing Cylindrical Features 14 2 3 ZPrint ZEdit Installation 14 2 3 1 ZEdit 14 2 4 Open A Part In ZPrint 14 2 5 ZPrint Main Window 15 2 6 Check Or Change The Default Printer Settings 16 2 7 Check The D...

Page 4: ...onal Operations 37 5 1 Change Print Head s 38 5 2 Add Or Change Binder 40 5 3 Add Powder To The Feeder 41 5 4 Build Piston Build Bed 41 5 5 Cover 41 6 Printer Maintenance 42 6 1 Fast Axis Bearing Lubrication 42 6 2 Slow Axis Bearing Lubrication 44 6 3 Piston Screw Lubrication 45 6 4 Change The Waste Tray 46 6 5 Check the Wash Fluid Level 47 6 6 Clean The Alignment Sensor Window 47 6 7 Clean the Fa...

Page 5: ...w 3dpuser com This Website is tailored to both beginner and advanced customers We recommend that you register immediately to receive free unlimited access to this excellent resource 1 1 New Features Automated Powder Loading Removal Recycling Quick Load Binder Cartridge New Single Print Head Color Technology Expanded On Printer Controls Automatic Powder Removal Integrated Fine Powder Removal Chambe...

Page 6: ...d capacity Build Speed 2 4 layers per minute Layer Thickness 0035 004 089 102 mm Color Shell Thickness 025 Resolution 300 x 450 dpi print resolution Noise Levels During Printing 57dB Emptying Overflow 66dB Vacuuming Cover Open 86dB Fine Powder Removal 80dB CSA CE Approval Meets CE certification standards and UL standards Power Requirements 100V 14 4 Amp 115V 14 0 Amp 230V 6 2 Amp Note Due to high ...

Page 7: ... three dimensional design file ZPrint is compatible with most 3D mod eling software files and converts it into cross sections or layers that are between 0 0035 0 004 0 089 0 102 mm thick Before printing ZPrint evaluates the part geometry and checks if there are enough materials in the printer to print the number of layers required to build the part If there are the printer then prints each layer o...

Page 8: ...Wipe powder off of the Align ment Sensor Window every time you replace a print head or whenever you remove a print head to clean the contacts Binder Solution that is dispensed through the HP11 print head and applied to the powder The binder sat uration value will vary depending on the part geometry The ZPrint software uses a default core and shell saturation value that is suitable for most part ge...

Page 9: ...ater Vent Located directly below the Debris Filter The Heater Vent supplies heat to the Build Chamber during the warm up cycle and during the drying cycle Infiltration Process of applying various post processing products resins wax epoxy etc to fully depowdered parts to give them specific properties such as strength durability and color vibrancy LCD Liquid Crystal Display Parking Caps Printer comp...

Page 10: ...build to remove residue buildup that gets left on the Ser vice Station during a build If the Service Station is not clean your print heads will not get properly cleaned and this will result in premature print head expiration Waste Tray Absorbs the binder waste and will require changing only when you are prompted to in ZPrint Located at the rear bottom of the printer You must remove the printer bac...

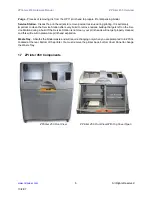
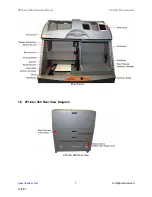
Page 11: ...ZPrinter 450 Hardware Manual ZPrinter 450 Overview www 3dpuser com 7 All Rights Reserved 10 2 07 1 8 ZPrinter 450 Rear View Diagram ZPrinter 450 Rear View ...

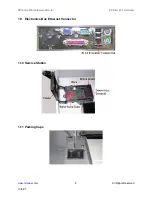
Page 12: ...ZPrinter 450 Hardware Manual ZPrinter 450 Overview www 3dpuser com 8 All Rights Reserved 10 2 07 1 9 Electronics Box Ethernet Connector 1 10 Service Station 1 11 Parking Caps ...

Page 13: ...e LCD menu Select a menu item Open a submenu Start Cancel Stop a menu function Turn the Control Knob left or right to Highlight a menu item Increase or decrease the air pressure to the Air Wand during Fine Powder Removal 1 14 LCD Menu Overview Main Menu Vacuum Depowder Prep Build Chamber Status Report Printheads Build Chamber Go Online Printheads Submenu Main Menu Change Printheads Align Printhead...

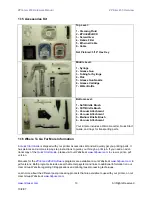
Page 14: ...s Both programs include a searchable Help system and links to additional information on our User Group Website regarding 3D applications and printing post processing techniques Learn more about the different post processing products that are available to use with your printer on our User Group Website at www 3dpuser com Top Level 1 Cleaning Fluid 2 ZPrint ZEdit CD 3 Screwdriver 4 Debris Filter 5 E...

Page 15: ... 450 Overview www 3dpuser com 11 All Rights Reserved 10 2 07 To order consumables materials visit ZShop at www 3dpuser com If you are an international customer you can order consumables directly from your local service provider or reseller ...

Page 16: ... heads direction of travel in bands across the X or the slow axis the gantry direction of travel and in laminated layers along the Z Axis Once a part is infiltrated it uniformly takes on the strength characteristics of the infiltrating product Accuracy The accuracy of your part depends on how clean the printer is your printer powder set tings and the materials you choose for post processing You ca...

Page 17: ...al Depending on how the part is imported into ZPrint you may need to use the Rotate feature to correctly orient the part Build parts that are delicate with a Fixture to give them extra support and addi tional protection during powder removal See Section 2 9 for instructions on how to create a Fixture An example of a part with hollow sides facing down 2 2 2 Parts Containing Overhangs For delicate p...

Page 18: ...developed by a team of software develop ers and application engineers as a tool to help those who use HD3DP high definition 3D printing to optimize their color applications This software program works in conjunction with the ZPrint software Use ZEdit to apply color or labels to your part as well as to diagnose and correct simple file problems Color may be applied to a part through the application ...

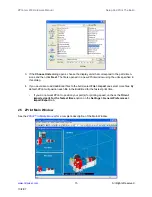
Page 19: ...ied in this dialog 4 If you would like to add additional files to the build select File Import and select more files By default ZPrint will position each file in the Build Bed for the fastest print time If you do not want ZPrint to position your part s for printing speed uncheck the Orient imported parts for the fastest times option on the Settings General Preferences Import Export tab 2 5 ZPrint ...

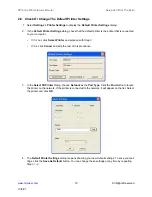
Page 20: ...mputer If it is not click Select Printer and proceed with Step 3 If it is click Cancel and skip the rest of this procedure 3 In the Select 3D Printer dialog choose Network as the Port Type Click the Find button to locate the printer on the network If the printer is connected to the network it will appear on the list Select the printer and click OK 4 The Default Printer Settings dialog reopens show...

Page 21: ...to view the settings for that combi nation ZPrint defaults to the recommended powder settings for the Layer Thickness Saturation Levels Binder Volume Ratio Bleed Compensation Anisotropic Scaling and Fixture Clearance Important Most of the powder settings cannot be changed but you can override the settings for the Layer Thickness Bleed Compensation Anisotropic Scaling and the Fixture Clearance for ...

Page 22: ...lds that are activated in the Powder Set tings dialog The new settings must be saved under a unique powder name and will be added to the left side panel after saving See the ZPrint Software Manual for complete instructions on how to create a new powder type 2 8 Transform The Part in ZPrint The ZPrint Transform menu has several options for transforming parts Following is a brief overview to help fa...

Page 23: ...s Select the part Select Transform Scale Limit the scale to the maximum limits of the build area 8 x 10 x 8 inches 203 mm x 254 mm 203mm Mirror Toolbar Shortcut Mirror Mirror Group Mirror a part in the X Y or Z direction Select your part Select Transform Mirror Choose a direction to mirror the part Justify Toolbar Shortcut Justify Justify Group Aligns or justifies the selected part to a specified ...

Page 24: ...eature that needs additional sup port Fixtures also provide these benefits Supports parts during powder removal process Supports delicate thin parts for easy removal from the printer and handling during post process ing Keeps multiple parts from bumping into each other or into the Build Bed walls during powder removal Increases accuracy in the Z Axis for parts with large overhangs Helps prevent sq...

Page 25: ...e a Fixture with holes at the grid intersections to allow powder to escape during auto matic powder removal A zero 0 in this field means no holes are generated on the Fixture The higher the percentage the larger the holes will be on the Fixture 4 Click OK The Fixture is generated 5 Select View Collision Detection to ensure the Fixture is not touching the part If the Fixture is touching the part do...

Page 26: ...n It is strongly recommended that the Slice View 2D icon and Collision Detection be utilized before beginning a build The slice view is toggled on the ZPrint 3D View menu when you select the Switch Layer View 3D View command or by selecting the 2D icon on the Toolbar When printing single or multiple parts slice viewing allows you to view the cross sections of the part s to identify any errors in t...

Page 27: ...re building a part for visualization purposes only uncheck Bleed Compensation so the part will build with slightly thicker dimensions for added strength If your part is a complex assembly containing many shells and you can see lines between the shells or if the part tends to break at the shell boundaries uncheck Bleed Compensation to weld together the places in the assembly that are slightly touch...

Page 28: ...o raise the platform to its proper position A clean properly prepared Build Bed 2 13 Print the Build 1 Select File 3D Print or click on the Toolbar to display the Printer Status dialog NOTE ZPrint checks the printer readiness and calculates the materials needed to complete the build The results are reported in the Printer Status dialog for you to check before starting the build The dialog shows OK...

Page 29: ...nting a delicate part build a Fixture for the part 3 Check the Printer Status window to see what is currently displayed on the printer LCD menu The printer must be Online before you can start the print job 4 When all of the items in the Print Heads Powder and General sections show OK the Print but ton is enabled Click Print to start the build Before starting the build the printer will service the ...

Page 30: ...rying cycle is finished Unused powder is automatically removed from the Build Bed when the Empty Build Piston After Printing option is checked in the Printer Status dialog If you unchecked the Empty Build Piston After Printing option but would still like to utilize this feature you may do so at the printer Select Build Chamber Empty Build Chamber on the LCD menu to start the Automatic Powder Remov...

Page 31: ...pressure by turning the printer Control Knob left to decrease the pressure or right to increase the pressure Use light pressure for delicate or thin walled parts If the air pressure is too strong you run the risk of breaking a feature 6 Apply air to the part to clean off all remaining powder Best Practices For Vibrant Colors Brushing your part before infiltration will greatly enhance its color Go ...

Page 32: ...e print heads and the moving parts of the printer A good time to do these few simple tasks is after the fine powder removal session while the part continues to dry and before post processing Cleaning and preparing the printer for the next build takes only a couple of minutes and will greatly reduce the chance of hardware errors and printer down time A clean printer also means your print heads will...

Page 33: ... Build Chamber including the Build Bed Deck and Gantry To vacuum 1 Select Vacuum on the LCD panel 2 Open the printer top cover and remove the vacuum hose from its stand 3 Vacuum any excess powder in the Build Bed around the Deck and on top of the Gantry Pull the Gantry forward and check for powder towards the back of the Build Chamber as well You can leave powder in the Feeder the area behind the ...

Page 34: ...er Be sure to push the filter flush against the holder for a secure fit 3 3 Clean The Parking Caps The Parking Caps provide a clean surface for seating the print heads between builds Before you begin Get several dry paper towels Get the squirt bottle included in your Accessories Kit Fill the squirt bottle with distilled water 1 Lift the Parking Cap cover to a horizontal position and place a dry pa...

Page 35: ...Get the Pick from the Accessories Kit 1 Open the printer top cover and then open the Service Station cover 2 Pull down on the Service Station wiper lever and hold it down to properly position the squeegees for cleaning 3 Position the squirt bottle close to the unit and squirt water on and around the squeegees and down into the Service Station 4 Take the cotton swab and wipe the front and back of t...

Page 36: ...hts Reserved 10 2 07 6 Wipe up any excess water and thoroughly wipe the Service Station clean 7 Push the wiper lever back to its original position 8 Wipe up any water that may have spilled onto the Deck 9 Close the Service Station cover and then close the printer top cover ...

Page 37: ...Bond enhances the vibrancy of models printed with color For additional information please see the Z Bond User Guide at www 3dpuser com Safety Precautions Do not use or handle this product until the Material Safety Data Sheet has been read and under stood Wear a lab coat or smock gloves face shield or goggles A face shield is required if you are spraying this product Apply in a well ventilated area...

Page 38: ... for 10 seconds If you see air bubbles wait until the bubbles stop before removing the part When dipping or drizzling Z Bond onto a part be sure to constantly move the part in your hands to keep it from sticking to your gloves The best combination for protecting your hands and avoiding getting your fingers stuck to the part is to wear a vinyl or nitrile glove as a first layer and a PE food service...

Page 39: ...between 15 20 psi pounds per square inch When finished remove the disposable liner and clean sprayer with ethyl alcohol or acetone Remove the sprayer tip and thoroughly clean by hand to avoid residue build up Curing Information Allow the part to cure for 1 hour at ambient temperature to avoid discoloration prior to placing in an oven for accelerated curing Z Max will cure at an accelerated rate in...

Page 40: ...to melt at very low tem peratures 122 F or 50 C and strengthen parts This product cures rapidly and enhances the vibrancy of color parts It is economical easy to handle and simple to store Please see the Paraplast X TRA Wax User Guide at www 3dpuser com for additional information Safety Precautions Liquid wax is hot and will cause burns if spilled onto skin Follow all manufacturer recommended safe...

Page 41: ...item shows OK except for the Build Temperature and the Print button is enabled From here you would choose your printing options and click Print to start the job Before the printer starts printing your file it will first fill the Build Bed with powder spread a layer to ensure the Build Bed surface is smooth service the print heads run an auto alignment if a print head was replaced or removed for cl...

Page 42: ...prepare it for binder When either print head is replaced or removed from its slot for cleaning the printer will run the Auto Alignment pattern to properly align the print heads before the next build is started 1 Select Print Head Change Print Head on the printer LCD menu The gantry moves to the ser vice position 2 Open the printer top cover and then open the carriage cover 3 Lift both print head o...

Page 43: ...e of the carriage could result in printhead errors such as 40006 or 2303 1 Refer to the Troubleshooting Guide chapter for information on how to access the ZPrinter 450 Troubleshooting Guide 7 Remove all new cartridge packaging Be sure to pull the tape tab off of the new cartridge 8 Re insert each cartridge Press down firmly on the side of the pogo pins to securely fit a cartridge into its slot 9 C...

Page 44: ...tridges to fill the reservoir If you need to change the binder you can by simply inserting a new Binder Cartridge There is no need to run out the current binder and the reservoir does not need to be empty before adding a different binder For example to change from zb59 to zb60 insert the zb60 cartridge in place of the zb59 cartridge and con tinue printing as usual To add or change Binder 1 Pull th...

Page 45: ...ng on top of the bucket 3 Select Vacuum on the LCD menu The vacuum will automatically shut off when the Feeder is full or the bucket is empty The LCD displays Feeder Full when the Feeder is filled to capacity 4 Return the vacuum hose to its stand replace the round cap if there is powder left in the bucket and remove the bucket 5 4 Build Piston Build Bed The Build Bed platform must be in its proper...

Page 46: ...Fast Axis Bumpers Bleed Air Printer Storage Preparation The Maintenance dialog found on the ZPrint Service menu keeps a record of when the Fast Axis bear ing the Slow Axis bearing and the Piston Screw require lubrication ZPrint will prompt you when lubrica tion of any of these components is required Only lubricate these components when you are prompted to in ZPrint While lubrication of these items...

Page 47: ...ze the trigger until you see grease begin to come out of the relief hole located just to the front of the pulley belt and STOP Do not over grease 6 Manually move the carriage back and forth several times across the rails to evenly distribute the grease Wipe away any excess grease you see coming out of the relief hole on the bumpers and on the rails with a paper towel Best Practices Take a cotton s...

Page 48: ...a flat head screwdriver or a Pick Tool and pop the cover off to expose the bearing through the opening Be careful not to scratch the deck surface An alternative method is to reach your fingers under the left side of the deck and pop the cover off 3 Pull the Gantry forward until you see the Slow Axis bearing in the center of the opening 4 Assemble the grease gun that is part of your Accessories Kit...

Page 49: ...r panel of the printer 2 Lower the Build Bed platform as far as you can Build Chamber Lower Platform to expose the entire length of the piston screw Remember to hold the Control Knob down to lower the platform 3 Assemble the grease gun that is part of your Accessories Kit 4 From behind the printer squeeze the trigger twice at the top of the Piston Screw under the Build Bed and then squeeze the tri...

Page 50: ...ance Counter in ZPrint 6 4 Change The Waste Tray Frequency When prompted to in ZPrint Your Dealer or Service Provider will change the Waste Tray as part of your annual maintenance contract If you do not have a Service Contract or you are prompted before the annual maintenance follow these instructions 1 Remove the back bottom cover panel of the printer 2 Pull the Waste Tray out of its holder 3 Rem...

Page 51: ...t fill to the top You need to leave room to reinsert the red cap 3 Reinsert the red cap and close the Service Station cover 4 Reset the Maintenance Counter in ZPrint 6 6 Clean The Alignment Sensor Window Frequency Clean the Alignment Sensor Window every time you change a print head or remove a print head to clean the contacts and pogo pins 1 Take a paper towel and squirt a little distilled water o...

Page 52: ...s bumper is above the top rail as in the picture on the right below The right hand Fast Axis bumper is below the top rail as in the picture on the left below This is the right side bumper This is the left side bumper If you get a 2400 1 error visually check the bumpers for residue buildup Take a paper towel and thor oughly clean off any residue on both bumpers 6 8 Bleed Air IMPORTANT NOTE The only...

Page 53: ...ound device with a white rubber seal 3 Find the syringe and piece of tubing that is part of the Accessories Kit One end of the tubing screws in to the tip of the syringe and the other has a fitting that is designed to push into the septum 4 Insert the black fitting over the septum and push down so that the needle in the fitting penetrates the rubber membrane of the septum ...

Page 54: ...he pogo pins and Printhead contacts with an alcohol swab and reinsert the Printhead 8 Close the carriage cover The Auto Alignment will run before your next print job to realign the Print heads 6 9 Printer Storage Preparation It is recommended that you leave your ZPrinter 450 turned on during idle times so it can routinely service the print heads and exercise the moving components However if you ch...

Page 55: ...y following the instructions for routinely cleaning your printer most customers will never need to trouble shoot their printer Most errors can be avoided by practicing diligent routine cleaning on your printer Keep ing your printer clean will maximize the life of the print heads and will ensure that you are able to build the most accurate and strongest parts possible To access the ZPrinter 450 Tro...

Page 56: ...rinter 450 Hardware Manual Troubleshooting www 3dpuser com 52 All Rights Reserved 10 2 07 You can also use the Help Search tab to search on a specific error 7 1 Service Contact Service Online Information ...

Page 57: ...nob Operations 9 Cover Close 41 CSA CE Approval 2 Cylindrical Features Parts With 14 D Debris Filter Definition 4 Debris Filter Empty 30 Deck Definition 5 Default Powder Settings 17 Default Printer Settings 16 Default Settings Check or Change 16 Delay Start Time 25 Depowder Definition 5 Diagram of Interior And Exterior Saturation 3 Diagram 3D Printing 4 Diagram Accessories Kit 10 Diagram Carriage ...

Page 58: ...on 45 Platform Definition 5 Pogo Pins Definition 5 Post Processing 33 Powder Removal Automatic 26 Powder Removal Fine 27 Powder Screen Definition 5 Powder Settings Defaults 17 Powder Type Create New 18 Powder Add To Feeder 41 Powder Definition 5 Power Requirements 2 Preheat Build 25 Prep Build Chamber 41 Prepare Build Area 23 Print Head Contacts Definition 5 Print Head s Change 38 Print Head Defin...

Page 59: ...ransform Part 18 Translate Toolbar Shortcut 18 Troubleshooting 51 U Undo Description 20 Using Z Bond Cyanoacrylate 33 V Vacuum Powder 29 Volume Build 2 W Wash Fluid Level Check 47 Waste System 2 Waste Tray Changing 46 Waste Tray Definition 4 Weight Printer 1 Workstation Compatibility 1 Z Z450 Front View 6 Z Bond Safety and Application 33 Z Max Safety and Application 34 ZPrint Main Window 15 ZPrint...

Reviews: