9
5.0.16 Note:
If the Octo-Z did not exhibit any problems during the visual inspection, then the pro-
cedure is finished and the Octo-Z cab be returned to the customer. If minor problems are found,
they can be corrected during this inspection. If major problems are found, then the technician
should revert to the full overhaul procedure section of this manual. Be sure to instruct the cus-
tomer that this has been a visual inspection and that at the next annual period, the full tear-down,
inspection and overhaul will take place. At
that
time (during the bi-annual full service interval),
parts in the 345-7000 Service Kit will replaced no matter their condition at no cost to the owner
IF
they are the original owner, bought it at an authorized Zeagle Dealer and have it serviced/
inspected annually. The 345-7000 Kit is not provided for the bi-annual Visual Inspections. If the
procedure has to revert to a tear-down session during the Visual Inspection, ONLY parts that have
FAILED due to faulty workmanship or materials will be replaced at no cost through the provisions
of the limited Lifetime Warranty.
6.0 Octo-Z FULL SERVICE PROCEDURES
Note:
Unless the Octo-Z has failed, or problems were discovered during the bi-annual Visual
Inspection, the following Full Service Procedure is to be conducted only on the 2nd year and then
every other year after that.
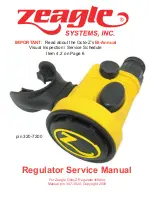
The procedures covered in this manual section apply to the Octo-Z regulator/inflator. See the picture
on the front page of this manual to identify this model type. The serial number for this model always
starts with “Z”. The number can be seen on the front curved section of the body, below the oval
Deflate Button. It starts with the letter “Z” and is followed by a six digit number.
6.1 DISASSEMBLY OF THE Octo-Z
To view the complete parts list of the Octo-Z, at the inside front cover of this manual if it is printed,
or the third page if you are viewing this as a PDF.
6.1.1 Disconnect the Octo-Z body assembly from the Corrugated Hose Coupling Assemble (9) and
the Fill Hose (1) and QD Fitting (2)
6.1.2 Remove the O-ring (31) from the corrugated Hose coupling (9) and replace it with one from
the Service Kit.
6.1.3 Remove the mouthpiece (11) by cutting the two mouthpiece ties (24) with side cutting pliers.
Discard the old mouthpiece ties. Examine the condition of the mouthpiece. Pay particular attention
to the area on top just behind where the old ties tightened. This is a prime area for small holes to
develop. If the mouthpiece is in good condition, it can be reused.

