Omnidirectional In-Counter Scanner
25
U
SER
’
S
M
ANUAL
Set Up
Configuring the Scanner
The scanner is either pre-programmed to suit the situation, or it automatically detects
and is ready to go. In certain cases no setup is required. In other cases the scanner must
be informed about what kind of system it is connected to. This can be done in a few
moments using the programming barcodes in the separate Programming Guide.
The programming section may be used to set a number of parameters on the scanner:
communication interface type, sleep mode timing, same-code delay time, barcode
symbologies, and more advanced settings like setting headers and trailers.
The settings are to be stored in non-volatile memory and are preserved even when the
scanner is powered down. Individual parameters may be set at any time without affecting
the other parameters.
Power-Up Self-Test
The scanner would automatically run the self-test when the power is supplied. It is to
verify that the scanner and interface are functioning properly and takes only seconds.
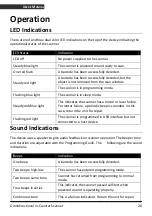
The unit would give four beeps in series to indicate that the scanner passed self-test; blue
LED would light on afterwards. It the scanner fails the self-test, both the blue and red LED
would light on (appearing the color purple); a continuous beeping may also be heard.
Scan Test
After the scanner passes the power-up self-test, it is ready to scan. Follow the steps
below to ensure that your scanner can work well with your host system.
With the scanner running (blue LED lights up) and the host system on, try to scan several
known-good barcodes.
Check the results on the POS screen. If the scanner is reading okay, it is likely that no
further setup is necessary.
If the POS screen does not show the expected scans, go to the Parameter Setting section
below.

