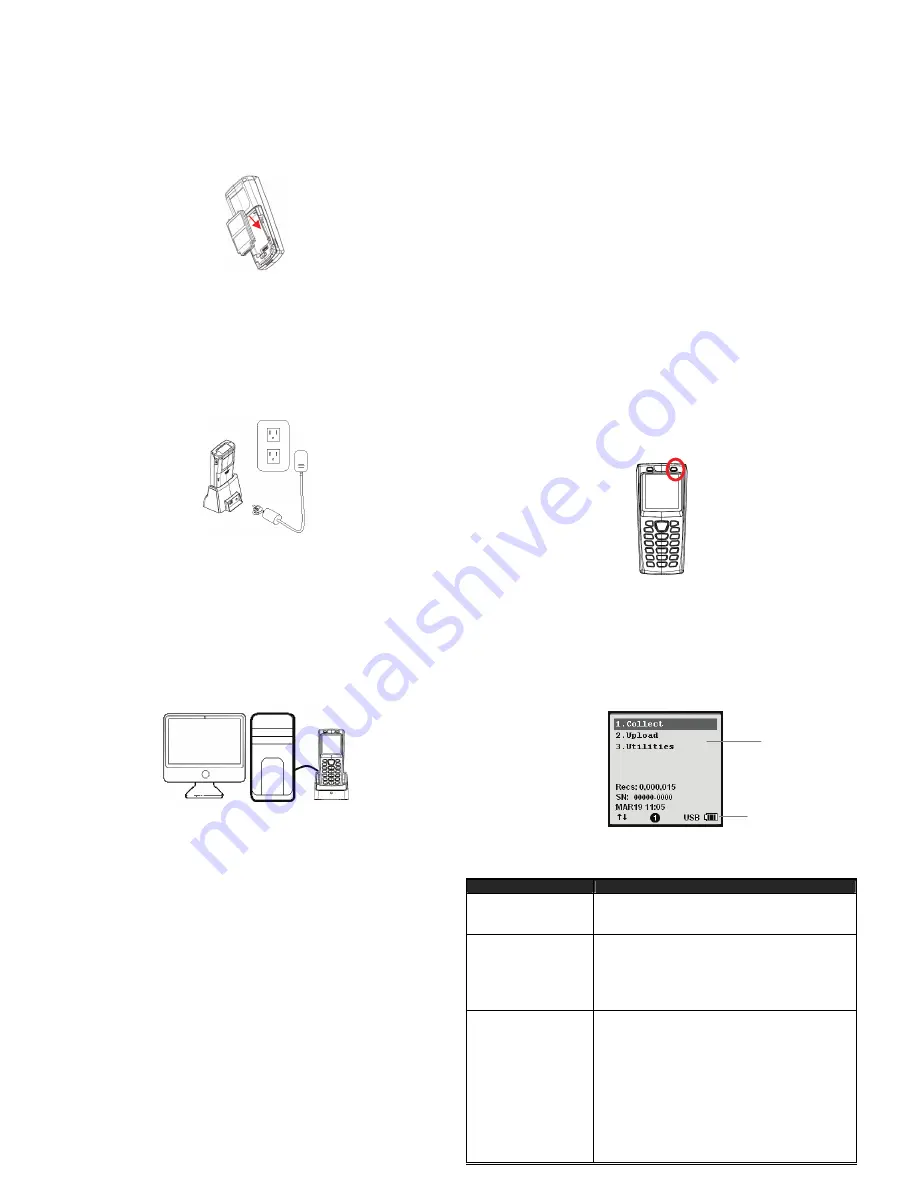
Inserting Battery
1.
Push the lock lever to unlock the battery lock.
2.
Remove the battery cover from the data collector.
3.
Insert the battery with the top side in first then the side with battery
contact. The battery is held in place by a small lock on the bottom of the
compartment. Push the battery in until it clicks into place.
4.
Slide the battery cover back on to secure the battery.
Charging Battery
1.
Connect the power adapter to the cradle and to a wall outlet.
2.
Place Z-9000 on the cradle. The screen indicates the status of battery
charge.
3.
Charge the batteries until the battery indicator turns full.
To extend the life of the battery to its maximum, please allow the initial
charge to be at least 12 hours.
Please do not completely discharge battery as lost of data may occur.
Wireless Connection
1.
To set the device to RF mode, select “3.Utilities”, “1.Settings”, “2.Dow
Port” (or “1.Upload Port”) from the device menu and select SPP Master or SPP
Slave modes.
nload
y.
For RF SPP Master mode, please select “3.Utilities”, “1.Settings”, next
page, “4.Wireless Menu”, ” 6.Master Connect” and enter the host
MAC address.
For RF SPP Slave mode, no additional action is necessar
2.
Select “3.Utilities”, “6.Load Application” (or “8.Load Lookup”; upload lookup
files please select “2. Upload”) and wait for the device to connect. An error
message may appear if you fail to enter the correct MAC address in SPP Master
Mode.
3.
Start using ZAC for your applications. For more details please see the ZAC User's
Manual.
Using the Device with PC
1.
Install and run ZAC on
your PC. Please download the latest version from
our website and refer to ZAC User’s Manual for instructions.
2.
Make sure the virtual COM port driver is installed.
3.
Start using ZAC for your applications. For more details please see the ZAC
User’s Manual.
Power On the Device
Press and hold the power button to turn the power on or off.
Connection to Host
To connect the data collector to a PC via cradle:
1.
Place the data collector on the cradle and connect the cradle to PC by
using
the USB cable.
2.
The PC should auto-detect the device as a COM device and ask for the driver
when connecting the first time.
3.
Please download and install the driver from ZEBEX website. The system
should assign a COM port to the device after the driver installation.
To install USB driver:
1.
Connect the device to your computer via USB cradle.
2.
A window appears in the bottom right-hand corner of Windows that says
“Found new hardware”. In a few seconds a "Found New Hardware Wizard"
window opens up. Double click the found new hardware icon to pull up
the window if it does not appear automatically. Select "No, not this time"
to continue.
3.
Click "Next" to continue installation.
4.
Click “Install from a list or specific location (Advanced)” and click “Next”.
5.
Check the “Include this location” option and use “Browse” to locate the
driver in your computer. Click “Next” to go to the next step.
6.
Click “Next” and “Finish” when the installation is done.
Check the COM and LPT section in the device manager for the assigned
COM port. The data collector should appear as a virtual com device.
Working with Menus
•
Press the
or
buttons or the number keys to move the cursor
to the desired option.
•
Press the Enter key to enter the menu option.
•
Press ESC to go to the previous screen.
Menu Description
Menu
Description
Collect
Select this option to start recording data. You can scan
barcodes or enter the data manually.
Upload
Select this option to:
Upload Data file
Upload lookup file
Upload all files 1 by 1
Upload all files as append
Utilities
Select this option for:
1. Settings
2. Browse Data
3. Delete Data
4. Reader Test
5. Set Date/Time
6. Load Application
7. Memory & Power
8. Calculator
9. Load Lookup (when lookup is available this option
becomes option 8 and calculator becomes option 9)
Menu selection
Keypad/USB/Battery
status


