10 - EN
EN - 11
3 Operation
Read the manual of the connected operating devices
to see how to use them.
Read this document to see how to use the display on
the unit
3.1 How to use the display on the unit
The main screen will start automatically when
you open the visor. In case of an error or warning
messages the display will also start when the visor
is closed. The display will always stop automatically
after 15 minutes of no activity. Press any key to
restart the display.
3.1.1 Start/stop child lock
Select and hold MENU in the main screen for 4
seconds.
3.1.2 Switch between user modes
When in basic mode:
1. Select SHIFT in the main screen.
2. Select ADVANCED.
When in advanced mode:
1. Select SHIFT in the main screen.
2. Select BASIC.
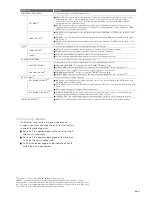
3.1.3 How to navigate through the menu
1. Select MENU to get access to the menus.
2. Use the up and down button to navigate forward
and back through the menus.
3. When the selection arrow is in front of the desired
option select CONFIRM.
When you are done with all your operating options:
1. Select BACK until you reach the main screen.
2. Close the visor.
3.1.4 Manually set the airflow
To set a temporary airflow press the up or down
button to select the desired temporary airflow.
When the next step of the SCHEDULER
VENTILATION starts or after a maximum of two
hours the unit will automatically switch back to AUTO
mode.
To set a permanent airflow:
1. Navigate to TASK MENU.
2. Navigate to AUTO/MANUAL.
3. Navigate to MANUAL.
4. Select the desired airflow with the up and down
button.
5. Select CONFIRM.
6. Select CONFIRM.
Stop the MANUAL mode:
1. Repeat step 1 and 2.
2. Navigate to AUTO.
3.1.5 Set the airflow to a maximum (BOOST) for a
specific duration
1. Navigate to TASK MENU.
2. Navigate to BOOST.
3. Navigate to TIMER.
4. Select the desired duration with the up and down
button.
5. Select CONFIRM.
Stop the boost before the end of the duration:
1. Repeat step 1 and 2.
2. Navigate to OFF.
3.1.6 Stop the airflow for a specific duration
1. Navigate to TASK MENU.
2. Navigate to VENTILATION.
3. Navigate to
- SUPPLY ONLY if you would like to stop
extracting air;
- EXTRACT ONLY if you would like to stop
supplying air (if available);
4. Select the desired duration with the up and down
button.
5. Select CONFIRM.
6. Select CONFIRM.
Start the airflow before the end of the duration:
1. Repeat step 1 and 2.
2. Navigate to BALANCE.
3.1.7 Set the airflow to a minimum for the period of
your absence (PRESET A)
1. Navigate to TASK MENU.
2. Navigate to AWAY.
3. Navigate to UNTIL.
4. Set your expected return time with the up and
down button.
5. Select CONFIRM after each set number.
Stop the away mode before the end of the time:
1. Repeat step 1 and 2.
2. Navigate to OFF.
3.1.8 Set the temperature profile
1. Navigate to TASK MENU.
2. Navigate to TEMPERATURE PROFILE.
3. Navigate to the desired temperature profile.
Summary of Contents for ComfoAir Q 350 ST
Page 1: ...Cooling Fresh Air Clean Air Heating Ventilation system Zehnder ComfoAir Q User manual ...
Page 4: ...4 EN ...
Page 33: ...EN 33 Data Activity Initials ...
Page 34: ......
Page 35: ......


