22 - EN
EN - 23
5 Installation
5.1 Hoisting instructions
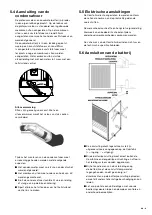
■
Hoisting the ComfoAir may only be carried out by
persons authorized to do so;
■
Check the dimension sketch and the weight given
on the ComfoAir;
■
Hoist the appliance by means of the hoisting lugs
on the base frame;
■
When hoisting, protect the housing from denting
by the hoisting strap. A suitable load spreader can
be used for this purpose;
MAX.60°
■
Remove the hoisting lugs after placing the unit.
5.2 Installation and fitting
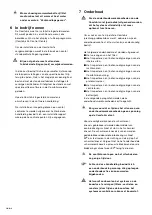
1. Set the height of the ComfoAir and ensure it
stands level.
Make sure the ComfoAir is evenly supported. For
units with legs, all legs must be fully supported.
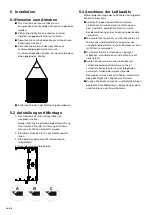
2. Remove the socket screws (A) from the operating
door.
3. Insert the seal plugs (B) (supplied).
4. Fit the seal cap (C) (supplied).
5. Lock the hinges/clamps.
5.3 Connecting the air ducts
Take account of the following factors when mounting
air ducting:
■
Insulate the outside air supply duct between the
roof/wall passage to render the ComfoAir damp
proof. This prevents the formation of condensation
on the outside of the ducts;
■
To prevent unnecessary temperature loss in either
the summer or the winter, we recommend fitting
thermal and damp-proof insulation to the supply
ducts from the ComfoAir up to the supply valves;
■
Install the air ducts with as little air resistance as
possible and free from air leakage;
■
Ensure that there are no obstacles of any sort on
the inside of the air ducts. Air ducts must not have
any sharp bends, dents or long screws on the
inside. Obstacles will reduce the effectiveness of
the system;
■
Fit an adequate silencer directly to the supply and
exhaust connectors. For relevant advice, please
contact Zehnder.
Summary of Contents for ComfoAir XL Series
Page 17: ...NL 17 Datum Activiteit Paraaf...
Page 32: ...32 EN Date Activity Initials...
Page 48: ...48 DE Datum Aktivit t Unterschrift...
Page 64: ...64 FR Date Activit Paraphe...
Page 80: ...80 IT Data Attivita Sigla...
Page 96: ...96 PL Data Czynno Podpis...
Page 97: ......
Page 98: ......
Page 99: ......

