background image


- 9 - 

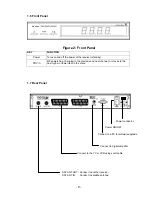
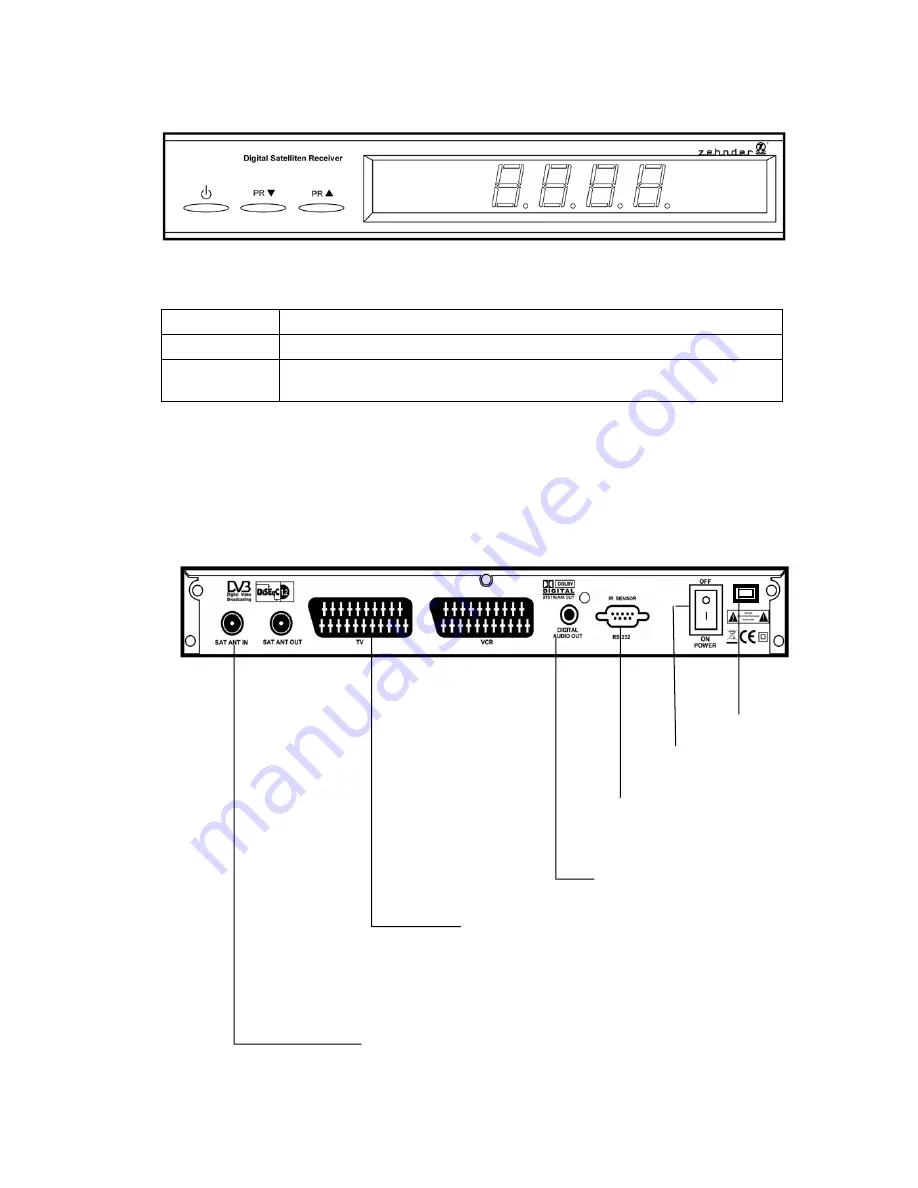
1.6 Front Panel 


Figure 2: Front Panel  

KEY FUNCTION 

Power 

Turns on and off the power of the receiver (standby). 

PR V/

Λ


When watching, changing to the previous and next channel, or moves to the 
next higher or lower item in the menu 


1.7 Rear Panel 


Power ON/OFF

Connect to a PC for software upgrade

Connect to the TV or VCR using scart cable

SAT ANT OUT:  Connect to another receiver 
SAT ANT IN:      Connect to satellite antenna 

Connect to digital amplifier

Power connector

DX 2202 

Summary of Contents for DX 2202

Page 1: ...User s Manual Digital Satellite Receiver DX 2202 English ...

Page 2: ... 2 ...

Page 3: ...TV VCR using SCART Support 10 2 3 Connecting to Digital Amplifier 11 3 Menu Information 12 4 User Installation 13 4 1 Antenna Settings 13 4 2 Automatic Search 14 4 2 1 Edit Name 14 4 3 Manual Search Edit Transponder 14 4 3 1 Add Transponder 15 4 3 2 Delete Transponder 15 4 3 3 Set PID 15 4 4 Motor Setting 15 4 5 Factory Default 16 5 Preferences 16 5 1 System Options 17 5 2 AV Setting 17 5 3 Video ...

Page 4: ...oom details of picture 22 6 11 Multipicture 22 6 12 Position 23 6 13 Sat 23 7 Channel Manager 24 7 1 Channel Manager 24 7 2 Move Channel 24 7 3 Lock Channel 24 7 5 Delete Channel 25 7 6 Sort Channel 25 7 7 Favorite Channel 26 8 EPG Electronic Program Guide 27 9 Timer 28 Time Adjust 28 Time Reservation 28 10 Front Panel Display 29 11 Software Update via RS 232 30 12 Easy plug and play data transfer...

Page 5: ...various satellite transponder information Automatic search for newly added transponder Network Auto Search Stores up to 4000 channels Easy and fast software upgrade through RS 232 port Plug and play data transfer system DSR to DSR Timer function 10 events automatically turns On Off by setting function daily weekly monthly one time programmable through EPG Automatic reserved channel moving system E...

Page 6: ...he electrical safety of the unit can be affected by improper tampering with it The manufacturer s liability excludes accidents occurring to the user when the unit is opened Important notes for sitting and installation Place of installation Every electronic device generates some heat The rise in temperature however lies within safe limits Nevertheless this does not rule out the possibility of sligh...

Page 7: ...sure that all of the following items are included in the packaging 1 x Remote Control Unit RCU 1 x User s Guide 2 x AAA batteries 1 x DX 2202 1 4 General Operation of the DX 2202 Throughout this manual you will notice that the everyday operation of your DX 2202 is based on a series of user friendly on screen display and menus These menus will help you get the most from your DX 2202 guiding you thr...

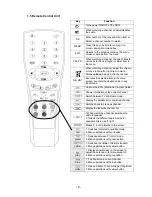
Page 8: ...ctronic Program Guide Shows information of the current channel Switch between TV and Radio mode Display the satellite list or searched channel Switches back to previous channel Display the favourite channel list 1 When watching a channel switches the audio languages 2 Selects the different audio modes for speakers Stereo Left right Makes 4 6 or 9 pictures to the screen red 1 Switches to teletext o...

Page 9: ...anging to the previous and next channel or moves to the next higher or lower item in the menu 1 7 Rear Panel Power ON OFF Connect to a PC for software upgrade Connect to the TV or VCR using scart cable SAT ANT OUT Connect to another receiver SAT ANT IN Connect to satellite antenna Connect to digital amplifier Power connector DX 2202 ...

Page 10: ...ment such as the dish antenna When adding new equipment be sure to refer to the related parts of the manual for the installation and be sure you have correctly adjusted the antenna to a satellite 2 1 Connecting to Antenna and TV 2 2 Connecting to TV VCR using SCART Support Cable or OFF Air antenna VCR TV Satellite antenna antenna cable Scart cable Satellite Receiver ...

Page 11: ... 11 2 3 Connecting to Digital Amplifier Dolby Digital Amplifier Satellite Receiver ...

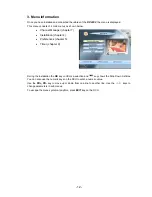
Page 12: ...ation chapter 4 Preferences chapter 5 Timer chapter 9 During the installation the OK key confirms a selection and key shows the Drop Down List Box You can also use the numeric keys on the RCU to enter a numeric value Use the PR PR key to move up or down from one line to another line Use the keys to change parameters in sub menus To escape the menu system at anytime press EXIT key on the RCU ...

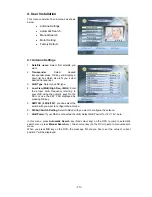
Page 13: ...y referring to your LNB using the numeric keys On the RCU or use the KEY PAD displayed by pressing OK key 5 SWITCH 22K 0 12V you can select the switch with you want to configure the antenna 6 DiSEqC Switch Setting Select DiSEqC with you want to configure the antenna 7 LNB Power If your DSR is connected the LNB Select LNB Powr off or 14V 18V Auto In this menu press Automatic Search key Red colour k...

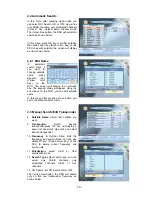
Page 14: ...ear Using the arrow keys on the RCU you can edit satellite name In this menu after pressing green button you get to the Manual Search menu 4 3 Manual Search Edit Transponder 8 Satellite Name Select first satellite you want 9 Transponder Select desired transponder press OK key will display a down list box which also let s you select desired transponder 10 Frequency Symbol Rate Edit the frequency an...

Page 15: ...irm by YES to delete 4 3 3 Set PID If you want to search only one specific channel from which you have all details set PID Packet Identifier manually Press Set PID key Yellow color key on the RCU the screen will display a sub menu enter the current value and select OK 4 4 Motor Setting Select Motor setting than press OK key the screen will shown as below 1 Satellite Name Select first satellite whi...

Page 16: ...utton on the screen and press OK key on the RCU to confirm the East limit To set West limit follow the same steps as East limit Reset Limit Place the cursor on Reset Limit button and then press OK key on the RCU The message Would you like to reset limit for DiSEqC positioner will be displayed for your confirmation Select OK button by pressing OK key on the RCU 4 5 Factory Default If you want to br...

Page 17: ...nding on your TV screen 2 Black Freeze Select black freeze Yes or No 3 Monitor Type You can adjust the TV system type of your TV set Auto PAL NTSC SECAM 4 Video Output If your SCART supports RGB control Select RGB Otherwise select CVBS 5 3 Video Adjust Set OSD brightness contrast saturation and hue to adjust video picture in steps of 1 20 5 4 Time Settings Usually you get the information real time...

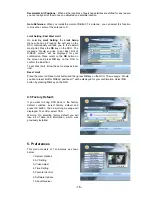
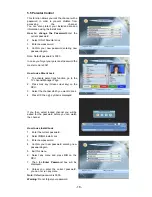
Page 18: ...Lock 1 To activate parent lock function go to the TV channel Manager Page 2 Press Lock key Green colour key on the RCU 3 Select the channel which you want to Lock 4 Press OK then symbol is displayed If you then select locked channel you will be asked for the password before you can watch the channel How to use Install Lock 1 Enter the current password 2 Select ON of Install Lock 3 Enter new passwo...

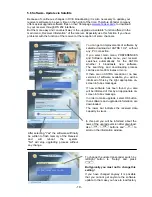
Page 19: ...searching and downloading process can take some 30 minutes or more If there are no ASTRA reception or no new versions of software available you will be informed of this by the right appropriate on screen info box messages If new software has been found you also will be informed of this by an appropriate on screen info box message In order to make upgrade select OK button then software and upgraded...

Page 20: ... press RED button you get into some Channel Sort window where you can search for special channel names 6 2 Previous Channel Recall Press key on the RCU to move to the previous channel you watched 6 3 TV Radio Mode While viewing a TV channel press the TV RADIO key on the RCU to toggle between TV and Radio modes 6 4 TV VCR Mode The key on the RCU lets you change the mode from satellite to TV or VCR ...

Page 21: ...io settings Left Right and Stereo The current audio setting will be displayed in the channel information 4 Language Selection Press the key on the RCU and repeatedly to select audio language This is dependent on the transmission of audio signal e g AC3 Audio 6 8 Teletext Subtitle If a channel is broadcasting either subtitle or teletext information you can see the symbol in the channel information ...

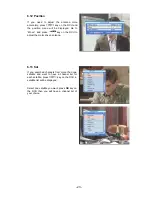
Page 22: ...atly extends the size of the mark picture part 2 Move the marks to the correct part of the picture by using the arrow buttons 3 At least press OK to zoom the picture Also in zoom mode you can move the zoomed part by arrow keys on the screen 4 Press OK again Exit or ZOOM button to get back the full picture 6 11 Multipicture Using the MULTIPICTURE button you can divide the TV screen in showing 4 6 o...

Page 23: ...Move and press key on the RCU to adjust the motor driven antenna 6 13 Sat If you searched channels from more than one satellite and want to have a channel list for each satellite press key on the RCU a satellite list will be displayed Select one satellite you want press OK key on the RCU then you will have a channel list of your choice ...

Page 24: ... accordingly You can use those color keys on the RCU as below 1 Delete mode Red key 2 Lock mode Green key 3 Move mode Yellow key 4 Sort mode Blue key 5 Rename mode White key 7 2 Move Channel In the TV channel manager page press Move key Yellow color key on the RCU Select a channel by pressing OK key You can mark more than one channel by the same procedure Then press again Yellow color Key to start...

Page 25: ...to delete If you press Delete SAT Red color key again all channels of the whole satellite will be marked to be deleted If you press Delete TP Yellow color key again all channels of selected transponder frequency will be marked to be deleted If you press Delete ALL White color key again all channels of the whole channel list will be marked to be deleted Warning The deleted channel cannot be recover...

Page 26: ...name from the favorite channel list press OK key once again then the mark will disappear After the selection of favorite channels press EXIT key twice to save data How to make a favorite group 1 When you enter channel manager the default favorite group will be shown once on the screen as Favorite 2 If you press favorite key on the RCU a next favorite group can be created as Favorite 2 e g News Spo...

Page 27: ...time of Program name which detail information you want to know If there is detail information of the channel press Detail Info Blue color key key on the RCU for the detail information box to be displayed If you want to check the previous or next information of the channel please press 6 00 key Green color key or 6 00 key Red color key on the RCU Note A No data available message will be shown if th...

Page 28: ...ation Either you can program a timer event through the EPG data see EPG or directly in the Timer Event Table of this menu Timer can be activated by Once Daily or Weekly option in right column 9 different events can be programmed at maximum number Each line is one event showing the channel start and stop time 1 First mark one Timer event line and step by step move right with arrow buttons on RCU 2 ...

Page 29: ... 29 10 Front Panel Display UP LOAD PROCEDURE DOWN LOAD PROCEDURE ERROR IN DATA TRANSMITTING SYSTEM WAITING FLASH ROM ERROR SYSTEM BOOTING TV MODE VCR MODE ...

Page 30: ...Download Software Update Then select respective receiver type With this software you also can prepare your personal channel list at the PC by sorting moving deleting changing adding channels in a very easy way 1 Connect receiver to your PC using RS232 cable 2 Turn on the receiver and check the Front Display shows channel number 3 Run CREdit software in your PC then the editor main window will be d...

Page 31: ...upgraded 7 During the download your PC and Front panel of the receiver will display the procedure situation 8 After completed Download the receiver automatically writes downloaded data in its Flash Rom Please wait until it displays good message on the Front Panel Display Receiver has to be re booted by power off on if the procedure is completed ...

Page 32: ...aster receiver to stand by mode 4 Turn on the slave receiver by Power ON OFF and check the front display is d 000 From now on the slave receiver will be upgraded 5 During the download the receiver front display will show the progress of the procedure e g d 062 means 62 data transfer finished 6 After completed download the receiver automatically writes downloaded data in its Flash Rom Please wait u...

Page 33: ... front panel does not light up Main cable is not connected Check that the main cable is plugged into the power socket Signal is too strong Satellite dish too small LNB noise factor too high The satellite dish is not pointing at the satellite The LNB is faulty Check the cable connection Lnb and connected between the LNB and the receiver and or adjust the dish Press the standby button Change to a la...

Page 34: ...leads Change the batteries Aim the RCU at SRS 5518 GB or check that nothing block the front panel Problem Possible Causes What To Do The systen is connected using RF leads and the output channel of the SRs 5518 GB interferes with an existing terrestrial channel or Video siganl Note If you have tried all of the actions suggested above and couldn t solve the problem please contact your dealer or ser...

Page 35: ...n Aspect Ratio 4 3 16 9 Output System PAL NTSC SECAM AUTO Audio Decoding MPEG layer I and II Musicam Audio Mode Stereo Channel Dual Mono Joint Stereo Channel Mono Sampling Rate 32 44 1 and 48KHz Digital Audio SPDIF with AC 3 loop through AC3 optional license based A V Data In Out VIDEO Output CVBS RGB TV SCART AUDIO Output VIDEO Output CVBS VCR SCART VIDEO Input CVBS RGB SPDIF Digital Audio Output...

Page 36: ...HEINRICH ZEHNDER GMBH Tel 07729 881 0 SATELLITEN EMPFANGSTECHNIK Fax 07729 881 72 Weierhalden 37 1 http www Zehnder SAT de D 78144 Tennenbronn Germany e mail Info Zehnder SAT de 03 06 Änderungen vorbehalten ...

Reviews: