02/2010
5
Introduction to ZEN – Efficient Navigation
The
ZEN 2010
interface is clearly structured and follows the typical workflow of the experiments
performed with confocal microscopy systems:
On the
Left Tool Area
(Fig. 4/
D
) the user finds the tools for sample observation, image acquisition,
image processing and system maintenance, easily accessible via four
Main Tabs
(Fig. 5/
1
). All functions
needed to control the microscope can be found on the
Ocular Tab
, to acquire images use the
Acquisition Tools
(Fig. 5/
3
and
4
). Arranged from top to bottom they follow the logic of the
experimental workflow. The area for viewing and interacting with images is centered in the middle of the
Main Application Window
: the
Center Screen Area
. Each displayed image can be displayed and/or
analyzed with many view options available through view tabs which can be found on the left side of the
image. According to the chosen view tab, the required view controls appear in View Control Tabs below
each image. File management and data handling tools are found in the
Right Tool Area
(see Fig. 4 and
Fig. 5).
Color and brightness of the interface have been carefully adjusted to the typical light conditions of the
imaging laboratory, guaranteeing optimal display contrast and minimal stray light for high-sensitivity
detection experiments. The
ZEN
software is optimized for a 30" TFT monitor but can also be used with
dual-20" TFT setups.
A focus in the development of
ZEN 2010
was to fulfill the needs of both basic users and microscopy
specialists. Both types of users will appreciate the set of intuitive tools designed to make the use of a
confocal microscope from Carl Zeiss easy and fast:
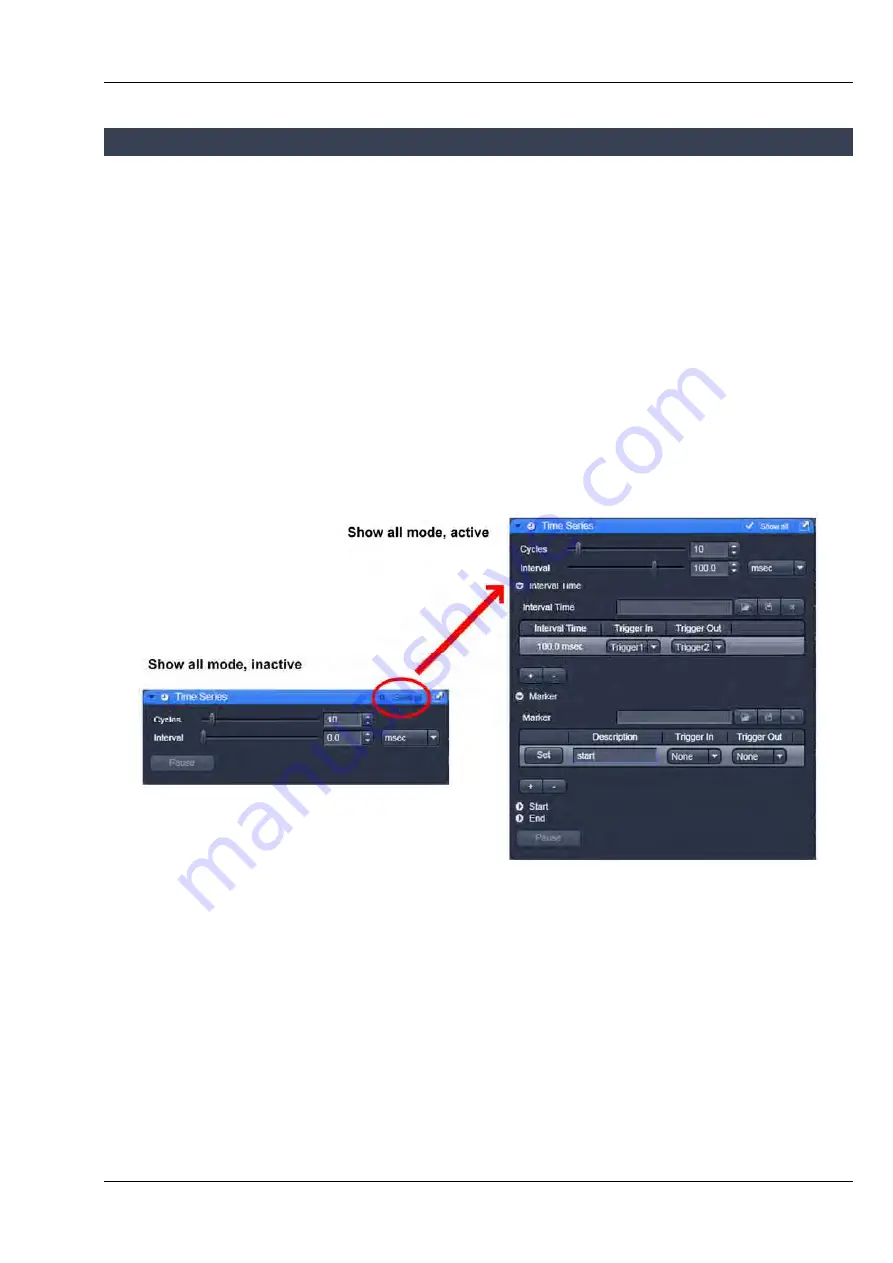
The
Show all
concept ensures that tool panels are never more complex than needed. With
Show all
de-
activated, the most commonly used tools are displayed. For each tool, the user can activate
Show all
mode
to display and use additional functionality (Fig. 6).
Fig. 6
Show all mode


