Step 3 - PLACE BASE DRIP MAT
1. Unfold and spread out the Base Drip Mat (#2) over the Foam Tiles
(#5) and the Heating Pads (#4a & #4b)
a. Locate the oral air inflation tube on the Drip Mat (#2)
b. Untighten the end cap on the oral air inflation tube
c. Blow into the end cap on the oral air inflation tube until the
surrounding berm of the Drip Mat is fully inflated
d. Retighten the end cap on the oral air inflation tube
2. Position the Base Drip Mat (#2) over the Foam Tiles (#5) and the
Heating Pads (#4a & #4b)
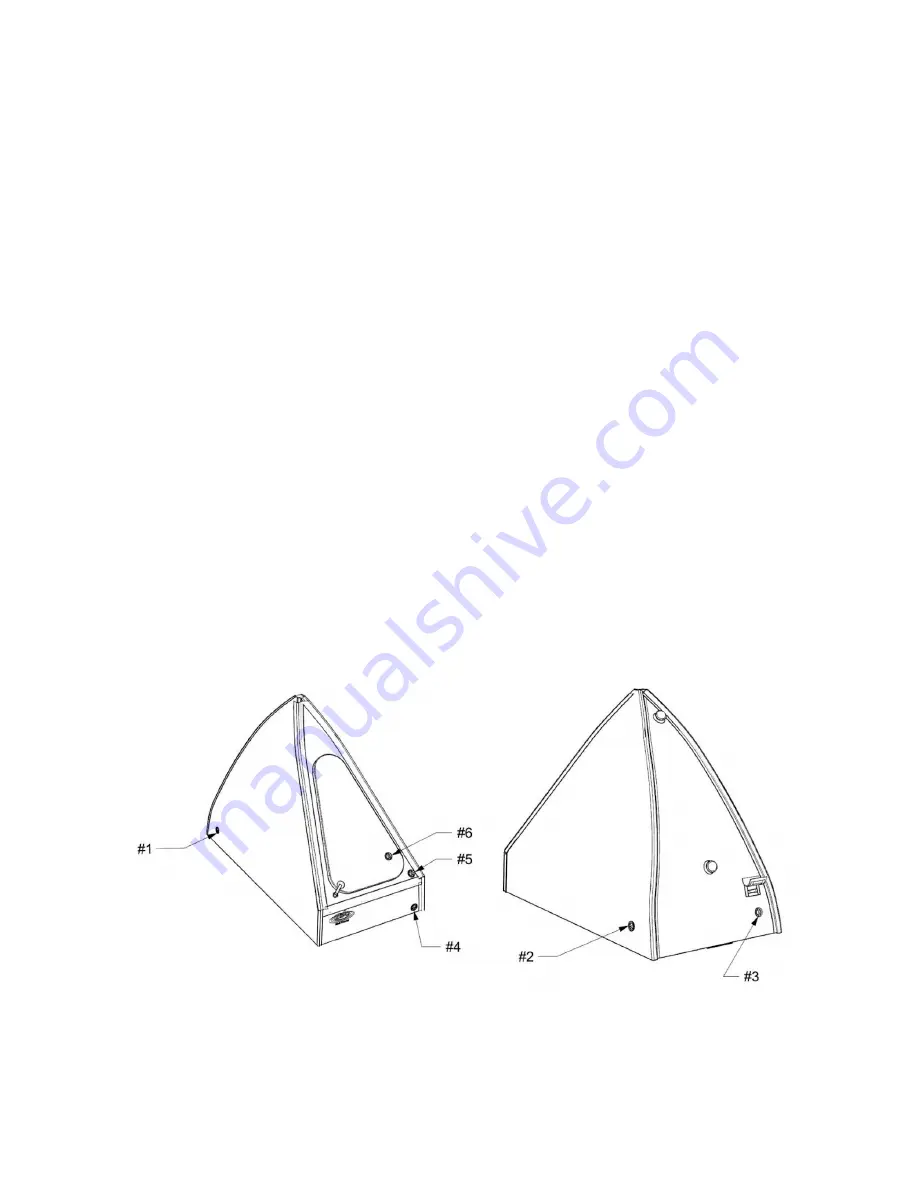
Step 4 - INFLATE & PLACE TANK BODY
There are seven different air valves on the Float Tank Body you will need
to inflate to complete the process:
● Left wall valve #1
● Right wall valve #2
● Rear wall valve #3
● Lower front wall valve #4
● Door frame valve #5
● Door valve #6
● Door Inside Valve #7
1. Attach supplied Air Inflation Pump hose to the Air Inflation Pump on
the inflation side marked “INF” (“DEF” will create a vacuum that
removes air from the panels)
12


