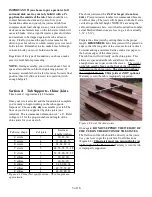
Figure 6.1.1 Mirror allows you to see the bottom of the
staves. USE IT!
After each set of about five staves is added, go back and
ensure the previous staves aren’t bulging outward and still
appear properly gapped. If they have moved, use the
mallet to tap them back into place. Remember to use the
scribed pencil line near the edge of the floor to keep track
of how things are aligned. Also remember a small gap
(1/32”) every second or third stave is ideal. Use the mirror
to continually check for consistent stave seam gapping.
Until the staves are driven on tight, the circle which the
staves collectively form, is bigger than it will be at the
end, hence the gaps. Small and equally distributed gaps
around the perimeter of the tub will close tight as the
staves are later driven on. During that later process the
circle will shrink. If you put them all tight together now,
when you get to the last one you’ll have a “big gap”. “Big
gaps” (more than 1/16”) will not close as they should.
Instead the staves will bind as they are driven (wedged)
onto the floor tightly. Staves do not “scoot” sideways as
they’ve driven on.
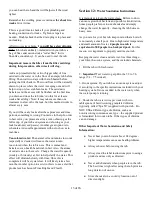
Figure 6.2 Adjusting staves
Remember, a spot that needs special attention is the
opposite end(s) of the floor seam(s). You must avoid
having the floor seam line up directly with a seam
between staves. If you followed our numbering, we have
accounted for this already. If not, sort through the staves
and find a couple of narrower or wider staves to switch in
to solve the problem. If necessary, start over and shift the
first stave over to correct the problem. Arrange so the
floor seam and stave seam are a minimum of 3/4 inch
apart. This is very important! See Figure 6.3.
Keep an eye on the floor seam in the process of installing
staves. It should stay closed. If it spreads a bit - rap the
opposing sides of the floor with your mallet. Make sure
that the temporary plywood braces are in place and doing
their job.
Take your time and work your way around the tub adding
staves until you get back near the starting point. Stop
periodically to tap inward any staves that have loosened in
the process of adding others. Check the pencil reference
line to judge that you are putting the staves on the correct
amount. Again, continually use the mirror to check for
consistent gapping,
ensuring no gaps are any larger
than 1/16”
. The set of staves were custom cut to fit your
particular tub, so the last stave will fit right in if you have
been careful to place the staves in this way. Small tubs
need more gaps, large tubs need fewer. The total
cumulative gap with all staves at the 9/16” pencil line is
about ⅝”. So your goal is to distribute this amongst the
staves you have; insert however many 1/32” (ideal) to
1/16” (absolute maximum) gaps are required, spread out
equally around the tub. Place the remaining staves tight
together.
If the last stave seems a loose fit
(more than 1/16” gap),
you will need to distribute that excess space (gap) around
the tub by adjusting the position of the staves. Use the
mirror and mallet to work the staves sideways so that the
excess is distributed among several small gaps of 1/32” to
1/16” or less. In other words, we want several tiny gaps
instead of one or two large ones. You may have to
backtrack, taking several staves off and starting again.
Remember, if the gaps are correct they will disappear
when the staves are driven inward and the tub is
tightened. If you have to go back and redistribute, you
may need to remove 4 or 5 staves at a time and then place
them back on, while adding more frequent gaps than
before.
7 of 16


