background image

 
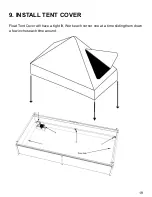
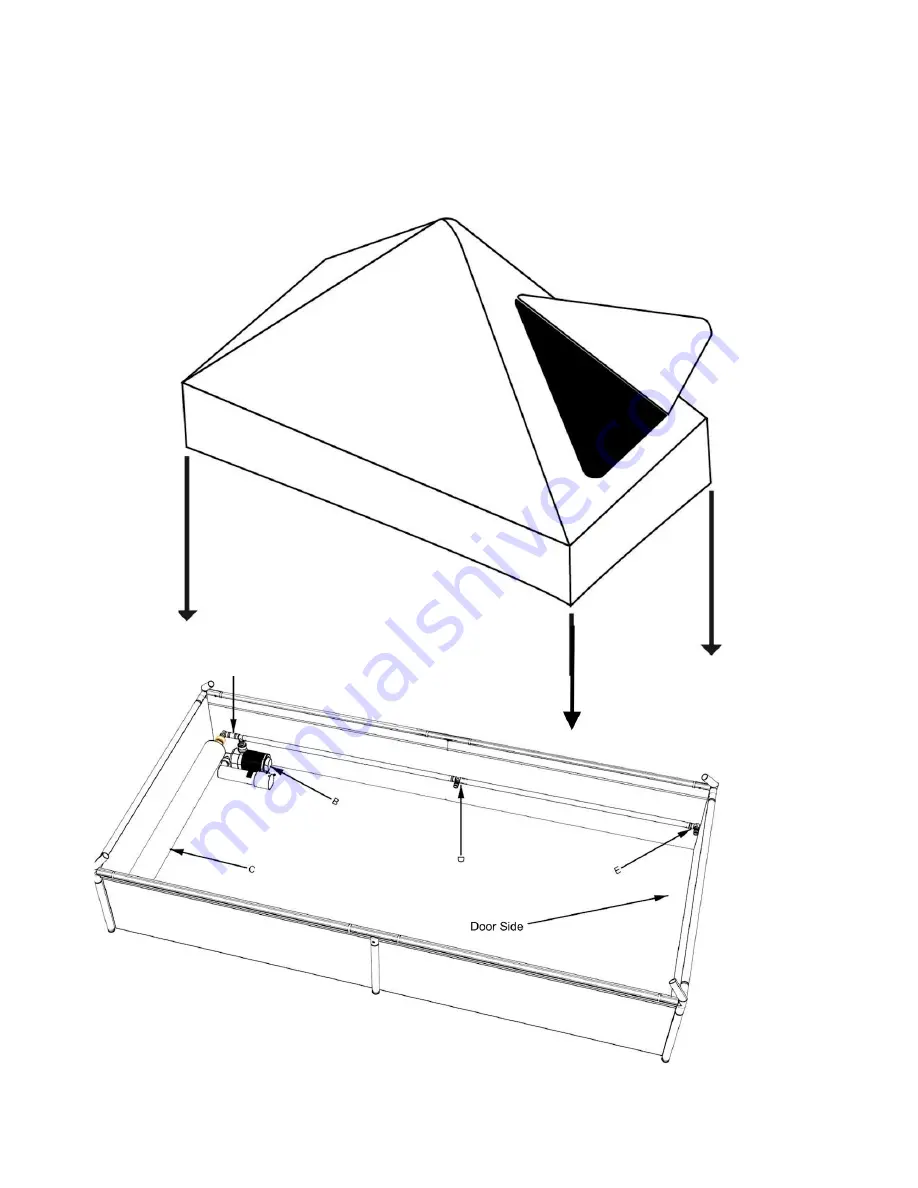
9. INSTALL TENT COVER 

 
Float Tent Cover will have a tight fit. Work each corner one at a time sliding them down 
a few inches each time around. 


19 

Summary of Contents for FLOAT TENT

Page 1: ...FLOAT TENT TM ASSEMBLY INSTRUCTIONS VIDEO INSTRUCTIONS zenfloatco com setup Version 2 3 updated 09 31 2020 For help with watercare maintenance go to Zenfloatco com water care 1...

Page 2: ...RM THAT FLOOR LOAD BEARING CAPACITIES ARE ABLE TO SUPPORT THE FLOAT TANK WEIGHT WHEN FILLED AND OCCUPIED CALCULATE AT APPROXIMATELY 75 LBS 34 KG PER SQUARE FOOT WHICH IS BASED ON A HUMAN FLOATING IN T...

Page 3: ...ING AND FALLING TO AVOID FALLING OR OTHER INJURY USE CAUTION WHEN ENTERING OR EXITING THE FLOAT TENT CHILDREN THE FLOAT TENT SHOULD NOT BE USED BY CHILDREN UNDER THE AGE OF 12 CLOSELY WATCH ALL CHILDR...

Page 4: ...ING ALWAYS DETACH THE TENT FROM THE TUB BEFORE DISASSEMBLING THE TENT NEVER PULL ON THE TENT TO REMOVE POLES SUITABLE INSURANCE IMPROPER USE OF THIS PRODUCT MAY CREATE CERTAIN RISKS OF DAMAGE TO PERSO...

Page 5: ...IED AND CORRECTED D IF THE UNIT WAS NOT PROVIDED WITH A GFCI IT MUST BE WIRED BY A CERTIFIED ELECTRICIAN FAILURE TO DO SO COULD RESULT IN SERIOUS BODILY INJURY OR DEATH AND WILL VOID ALL WARRANTY COVE...

Page 6: ...PACKAGE CONTENTS 6 x SHORT POLES 14 8 x MEDIUM POLES 34 6 x LONG POLES 42 2 x T CONNECTOR 3 x METAL DOOR POLES 5 x PLASTIC DOOR POLES 6...

Page 7: ...ECTOR Pre assembled w Top Connector Nut Bolt 2 x RIGHT CORNER 2 x LEFT CONNECTOR 1 x VINYL TENT COVER 1 x VINYL TUB 1 x DRIP MAT 2 x HEATING PADS 4 x VENT CAPS 1 x TEMP CONTROLLER Pre plugged w Ground...

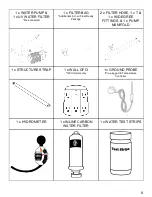
Page 8: ...nals incl w Float Ready Package 2 x FILTER HOSE 1 x T 1 x 90 DEGREE FITTINGS 1 x PUMP MANIFOLD 1 x STRUCTURE STRAP 1 x WALL GFCI 120V models only 1 x GROUND PROBE Pre plugged to Temperature Controller...

Page 9: ...nheit 21 to 32 Celsius Allow at least 1 ft 30 cm of space between the Float Tent and the room s walls to allow for maintenance and cleaning TIP If your tent is located in a room with a tile or concret...

Page 10: ...rea and fill up to ten inches If you have any leaks contact us immediately NOTE Poles are threaded through sleeves on the water tub NOTE Make sure the open end of corner pieces point toward the center...

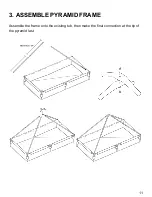
Page 11: ...3 ASSEMBLE PYRAMID FRAME Assemble the frame onto the existing tub then make the final connection at the tip of the pyramid last 11...

Page 12: ...y to verify they weren t damaged in transit The pads will heat almost too hot to touch BURNS USE HEATING PADS ONLY AS DIRECTED CONFIRM THAT THE HEATING ELEMENT IN THE HEATING PAD IS FACING UPWARD WHIL...

Page 13: ...aterproof liner and place the tub directly over pads The liner should stick out evenly on three sides but there should be excess on the side where the tent door will face With the liner in place the t...

Page 14: ...and UV Water Filter B are in the right position screw the Pump Manifold A on top of it This would be the time to make sure it aligns well with your filter bag C in place Adjustment may be necessary 3...

Page 15: ...3 inches 5 to 7 5 cm of water start smoothing out creases on the tub floor Once smooth continue to fill the tank with 5 inches 13cm of water Add 100 lbs 45 kg of salt at a time mixing in fully as you...

Page 16: ...4 Once 800 lbs 363 Kg of salt is added fill until the water level reaches 10 inches 25 5 cm 16...

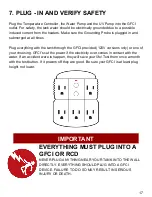
Page 17: ...the GFCI provided 120V versions only or one of your choosing GFCI s cut the power if the electricity ever comes in contact with the water If an accident were to happen they will save your life Test t...

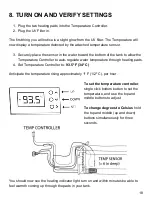
Page 18: ...erature Controller to auto regulate water temperature through heating pads 4 Set Temperature Controller to 93 5 F 34 C Anticipate the temperature rising approximately 1 F 1 2 C per hour To set the tem...

Page 19: ...9 INSTALL TENT COVER Float Tent Cover will have a tight fit Work each corner one at a time sliding them down a few inches each time around 19...

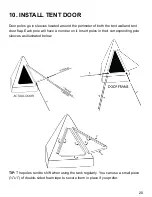
Page 20: ...tent wall and tent door flap Each pole will have a number on it Insert poles in their corresponding pole sleeves as illustrated below TIP The poles tend to shift when using the tank regularly You can...

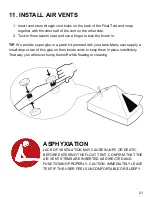
Page 21: ...a patch kit provided with your tank Many users apply a small drop or two of this glue on their inside vents to keep them in place indefinitely That way you will never bump them off while floating or c...

Page 22: ...R From the inside of the Float Tent free the condensation liner out from the cover and tank walls Allow the liner to hang free so any condensation dripping down the tent walls will drip down the liner...

Page 23: ...SAVE THESE INSTRUCTIONS Zen Float Co 5947 South 350 West Murray UT 84107 USA Tel 801 871 5140 Email info ZenFloatCo com 23...

Reviews: