background image

ZENA mobile welding system  --  Operators Manual -- Series 150 & 200 Welders

19

19

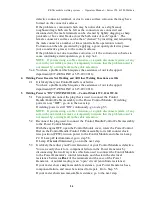
Handle.  Lamp #2 (

and

 Lamp #3 for a “RO” type Module) should light and

remain lit for as long as the Power Button is held down.  You should also hear a
very faint “clicking” sound coming from the Control Module.  If Lamp #2 (and
Lamp #3) is working properly, and if you 

are

 hearing the faint clicking sound,

go on to the next step.

If Lamp #2 

is


not

 working properly, AND if you 

are

 hearing the faint clicking

sound, the Control Module is malfunctioning.  Go to step  2.9.
If you have a type “RO” Module, and if Lamp #2 

is


not

 working properly BUT

Lamp #3 

is

 working properly, AND if you 

are

 hearing the faint clicking sound

you have a “blown” 10A fuse -- and/or a defective Control Module.  Go to Step
2.10.

If Lamp #2 

is


not

 working properly, AND if you 

are


not

 hearing the clicking

sound, go to step 2.10.

If you have a type “RO” Module, and if Lamp #2 

is


not

 working properly BUT

Lamp #3 

is

 working properly, AND if you 

are not

 hearing the faint clicking

sound, go to Step 2.11.

2.7

Check to insure that the Gray wires which connect the Power Control Module to
the Welding Power Generator are properly connected to the Power Generator,
that the connectors at the ends of the Gray wires are secure, and that the gray
wires have not been damaged. Also insure that the Yellow wire (not used in
most basic welder installations) is not short circuiting to chassis ground or to any
other component.  Also check and insure that the Yellow wire is not connected
to anything other than to another Yellow wire from either a ZENA WC.12S
Slave Control Module or a ZENA WC.VR Universal Voltage/Current
Regulator.  If any wires were not properly connected, correct the problem and
go to step 2.8.  If the wires were properly connected, it is likely that you have a
problem within your Power Generator, go to step 2.12.

2.8

Congratulations, it is likely that you have successfully corrected your problem.
Fully re-test your welding system to make sure.

2.9

You have a problem which requires the assistance of our tech support
department (877-ZENA INC or 615-897-2011).

2.10 It is possible that an internal fuse has been “blown”.

The Control Module’s internal solder-in fuses are covered with a silicone
adhesive/sealant.  Carefully remove the silicone to expose the fuse leads.
Using a test lamp or a volt meter with a sharp test probe, check for the presence
of power (12 volts or 24 volts) at the end of the 10 amp. fuse which is 

farthest

from the point where wires enter/exit the Control Module.  The 10 amp. fuse
(one of two internal fuses in the Control Module) is the “bottom” or lower fuse
when viewing the Control Module from above, with the wires from the Control
Module on the viewer’s left.  (SEE CONTROL MODULE DIAGRAM ON
PREVIOUS PAGE)  If you do not have a test lamp or meter, go to step 2.9.
If power 

is

 present at the end of the fuse, it is likely that the Power Control

Module is defective.  Go to step 2.9.
If power 

is


not

 present at the end of the 10 amp. fuse, you have a “blown” fuse.

A 10A fuse failure may indicate a possible failure in the Control Module itself,
but more likely it is pointing to a component failure in the Power Generator, OR

Summary of Contents for 150 series

Page 1: ...1 Fax 615 897 2023 www zena net Operator s Manual for all ZENA Backpak welders Equipped with WC 12 Welding Control Module SC101 Active Speed Control Module Series WSC Welding Cables System Controls or...

Page 2: ......

Page 3: ...t prior notice Copyright 2004 2005 by ZENA Incorporated All rights reserved No part of this publication may be reproduced in any form or by any means without the prior written permission of the publis...

Page 4: ...VI Using your ZENA mobile welding system 10 A Cabling Attachment 10 B System Operation All Models 10 VII Care Maintenance 12 A Lubrication 12 B Wet Conditions 12 C Cleaning 12 D DO NOT 13 VIII Troubl...

Page 5: ......

Page 6: ......

Page 7: ...and to properly use your new welder The ZENA system produces a high frequency pulsating DC current for welding which provides a number of benefits over conventional DC welders For example Improved we...

Page 8: ...ghly sophisticated electronics speed controls system which has been designed to insure optimum engine efficiency from the welder s powerful 2 cycle engine when welding and when idling at rest Addition...

Page 9: ...ttempted by individuals who use pace makers and or other life sustaining electronic medical implants and or devices B Danger of Electrical Shock When properly installed the ZENA system converts your v...

Page 10: ...I Z49 1 Safety in Welding and Cutting ANSI Z87 1 Practice for Occupational and Educational Eye and Face Protection ANSI Z88 2 Standard Practice for Respiratory Protection American Welding Society 550...

Page 11: ...ng cables system controls and any small accessories which you may have ordered and an inner carton that contains the power generating unit and its electronic control module2 Except as otherwise noted...

Page 12: ...ZENA mobile welding system Operators Manual Series 150 200 Welders 6 6 This page intentionally left blank...

Page 13: ...r second Min Power Generator Shaft Speed for Maximum Output Power approximately 6 500 RPM Higher shaft speeds up to 15 000 rpm have no detrimental effect on welding performance but welding at these sp...

Page 14: ...be adjusted at any time even while welding Turning the control fully counter clock wise yields minimum power and turning it fully CW sets the unit to produce maximum welding power This control can ass...

Page 15: ...attachment of the welding cables using the supplied wing nuts to the terminals at the rear of the Power Generator Unit Red cable lug to Red terminal Black cable lug to Black terminal reverse positive...

Page 16: ...mating Gray Plastic connector located at the rear bottom of your backpack frame b Attach the black control cable connector to the black mating connector attached to the short gray cable coming out of...

Page 17: ...Power Button strike an arc and begin welding Remember if you are having trouble striking an arc for any reason you can simultaneously depress the Power Button and the Boost Button to produce an extra...

Page 18: ...nents may be exposed to corrosive chemicals solvents degreasers antifreeze and or liquids with a high mineral content it should be rinsed off with fresh water as soon as possible after exposure Remove...

Page 19: ...t is as dust and or contaminant free as possible or allow antifreeze compounds to contact system components without cleaning the affected component with fresh water or allow accumulations of grease an...

Page 20: ...gnostic indicators used with each module 1 Welding Power Control Models Model WC 12B Location of Internal Indicators and Fuses By removing 4 screws the cover of the Welding Power Control Module can be...

Page 21: ...odule in place With the screws removed the cover should come free If the cover is tight or if you have difficulty getting hold of the cover a small straight slot instrument screwdriver or the edge of...

Page 22: ...ted properly or the module may be defective Stop and restart the engine Recheck the lamps If they are all still off goto Step If Lamp 5 yellow is flashing rapidly Lamp 1 green and Lamp 6 red are off b...

Page 23: ...s increased and stabilized attempt to strike an arc and begin welding while your assistant observes the tachometer lamps If engine speed drops dramatically at this point possibly to a degree which pre...

Page 24: ...nt of connection between the red wire extending from the Control Module and the red wire which is connected to the vehicle s electrical system Check wiring If the wiring is OK the internal wiring of t...

Page 25: ...connected to anything other than to another Yellow wire from either a ZENA WC 12S Slave Control Module or a ZENA WC VR Universal Voltage Current Regulator If any wires were not properly connected cor...

Page 26: ...nite resistance If your meter shows any measurable resistance your Power Generator has a component failure and must be returned for repair Go to Step 2 9 If all resistance readings at the control term...

Page 27: ...60VDC or above 80VDC it is likely that you have a component failure in the high current section of the welding power generator and it should be returned for repair NOTE If for some reason this is not...

Page 28: ...r the Control Module or the Control Cable connection between the two assemblies is malfunctioning NOTE If you are using a cable extension or a quick disconnect system of any sort with your welder remo...

Page 29: ...has caused fouling coating of the brushes and or internal slip rings Cleaning can be accomplished in the field if necessary but is best done under factory conditions Such cleaning will be performed f...

Page 30: ...7 ZENA INC or 615 897 2011 5 Welding Power is ON CONTINUOUSLY Control Models WC 12 WC 24 5 1 Temporarily disconnect the plug that is used to connect the Control Handle Control Cable Assembly to the Po...

Page 31: ...nctioning To troubleshoot further go on to step 3 1 5a Welding Power is on CONTINUOUSLY Control Models WC 12RO WC 24RO 5a 1 Temporarily disconnect the plug that is used to connect the Control Handle C...

Page 32: ...Control Cable Assembly is malfunctioning To troubleshoot further go on to step 3a 1 6 Automatic Speed Control Stays at High Idle Constantly When Welder Power is ON Welder Operates Normally Control Mo...

Page 33: ...finite vacuum should be noted If vacuum is not found correct the problem and retest If vacuum is present reconnect the vacuum line and go on to the next step 7 3 Temporarily disconnect the vacuum line...

Page 34: ...e Module PCIM C Mechanical Problems Symptom Likely Problem V belt squealing Belt loose OR worn out V belt and or pulley attached to the Welding Power Generator gets very hot Belt mis aligned OR too ti...

Page 35: ...ZENA mobile welding system Operators Manual Series 150 200 Welders 29 29 This page intentionally left blank...

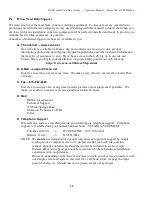
Page 36: ...mail at any time We make every effort to answer all e mail within 24 hours C Fax 615 897 2023 Feel free to send us a fax at any time include pictures and or diagrams if possible We make every effort...

Page 37: ...ZENA mobile welding system Operators Manual Series 150 200 Welders 31 31 This page intentionally left blank...

Page 38: ...t appear clearly on the outside of the package If the product is damaged during shipment or received in inadequate packaging this warranty may not apply EXCLUSIONS FROM WARRANTY This warranty is conti...

Reviews: