ZENIT-122 User manual, 1992 year
– 5 –
6. Shutter Speed Setting
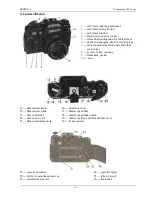
Turn the shutter speed dial 17 to bring a selected shutter speed opposite to the index mark 18 on the
camera top plate. In so doing the dial is click-stopped. Figures on the shutter speed dial show shutter
speeds in corresponding fractions of a second and “B” indicates a hand-controlled shutter speed.
Shutter speeds can be set with the shutter both cocked and released. When taking pictures at “B” the
shutter remains open for as long as the release button 5 is pressed down. To obtain a long exposure
turn the depressed release button counter-clockwise as far as it will go (“T” position). The exposure
over, return the release button 5 to its normal (middle) position and release it. This will result in
closing the shutter.
To take a picture at “B” or long exposures one is recommended to use a cable release which can be
screwed into the release button thread. In so doing the camera should be mounted on a tripod.
7. Stop Setting
Set a selected aperture against the index mark by turning the aperture setting ring 32.
When taking pictures with a self-timer, the procedure of stop setting is somewhat different as
described in the section “Operating the Self-Timer“.
8. Focusing
The camera viewfinder is provided with a composite focusing device consisting of microprism collar
and ground glass collar or focusing wedges, microprism collar and ground glass collar. Before
shooting remove the lens cap. Looking through the viewfinder turn the lens focusing ring to obtain
sharp image of the object within the ground glass and microprism collars and for cameras with
focusing wedges to match the upper and lower parts of the split image. The best sharpness is obtained
when focusing is done at full aperture.
It should be noted that the focusing wedges and microprism collar, ensuring the best possible
focusing, are of no use when low speed interchangeable lenses are used and focusing is done at
apertures more than 4. In these cases as well as in photomicrography and macrophotography focusing
should be done on the ground glass collar.
Focusing can be done as well without looking in the viewfinder. To do this turn the focusing ring
and, making use of distance scale 27, set the distance from the film plane marked O on the camera top
plate to the subject being shot against the larger index mark.
The smaller index mark with letter “R” is used for shooting on infra-red films. In such a case focus
the image and introduce a correction by bringing the distance figure you have obtained opposite to the
index mark “R”.
Focusing over, you can determine distances from the film plane to the near and far limits of the
depth of field making use of scales 27 and 28. On scale 27 against two identical figures of scale 28
corresponding to the aperture with which you are going to take pictures there will be set two figures,
indicating the distance range within which all the subjects will be sharp on film. For example, the lens
is focused for 3 m and the aperture to be used is that of 8. In such a case on scale 27 against two
figures 8 of scale 28 you can read that the image will be sharp within the distance range from 2,3 to
4,5 m.
Approximate depth-of-field limits can be determined visually as well by pressing the release button
till a definite stop is felt with the aperture value set beforehand. On the ground glass collar of the
viewfinder you will see what subjects will be sharp on film.


