background image

ZENIT-122                                                                                                                                             User manual, 1992 year 


– 6 – 

9. Exposube Setting with the Help of Exposure Meter 

The camera semi-automatic exposure meter measures the light passing through the lens (TTL system). 
As a result, making use of various combinations of aperture and shutter speed values, you can set the 
exposure  depending  upon  the  brightness  of  can  object  and  the  speed  of  film  being  used  with  a  high 
degree  of  accuracy.  It  remains  true  as  well  when  interchangeable  lenses,  light  filters,  supplementary 
lenses and extension tubes are used. For more accurate exposure determination in conditions of poor 
brightness  of  the  subject  to  be  photographed  the  lens  cap  should  be  removed  a  bit  earlier,  before 
shooting. 

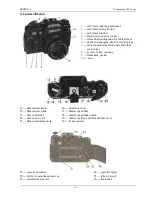
Looking  through  the  viewfinder  eyepiece  in  such  a  way  that  the  whole  its  frame  could  be  clearly 

seen, press the  release button 4 till a definite stop is felt but not till the shutter “firing”, should it be 
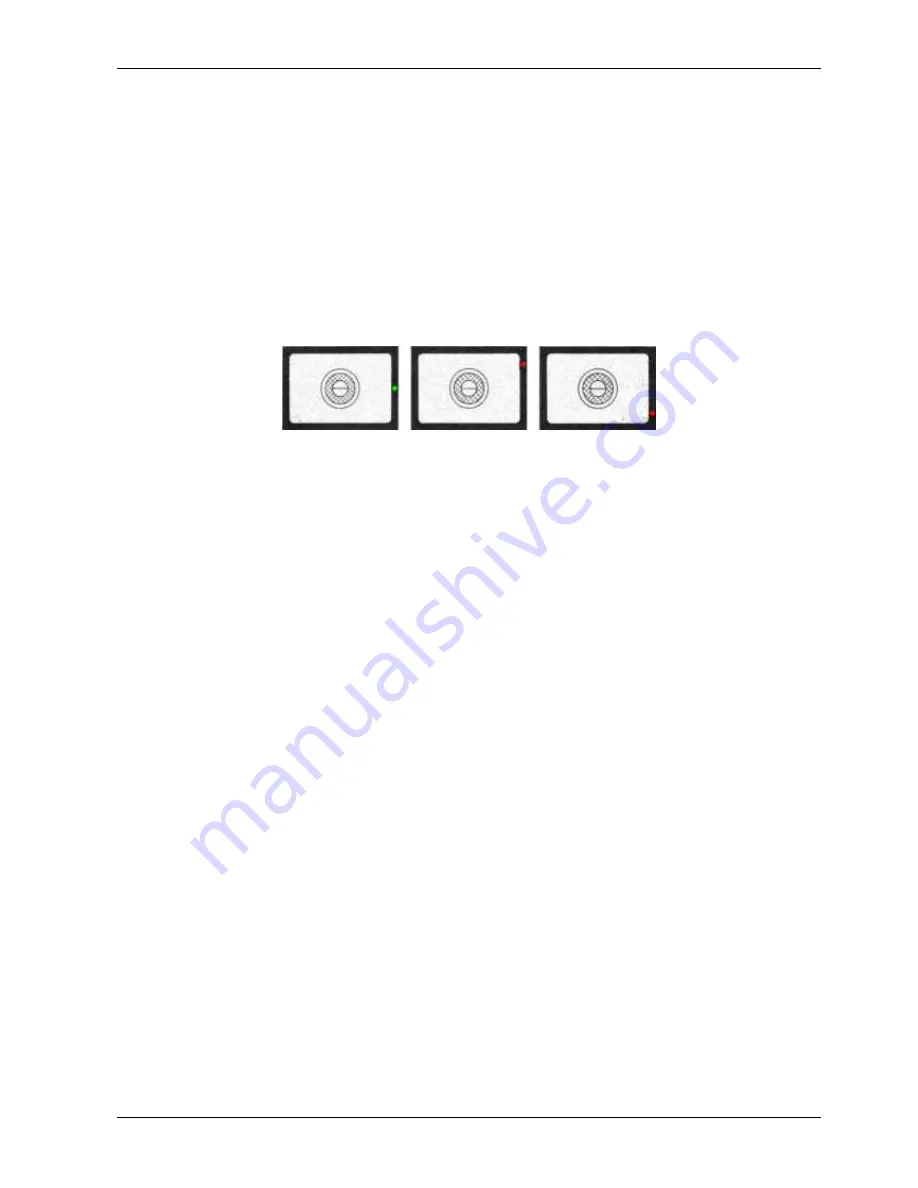
cocked,  and  hold  the  button  in  this  position.  On  the  right-hand  side  of  the  viewfinder  light-emitting 
diodes can be seen. 

There  are  two  modifications  of  cameras:  one  with  two  red  and  the  other  one  green  and  two  red 

diodes. 


9.1. Exposure setting in cameras with two-diode indication 

Lighting  of  the  upper  diode  indicates  overexposure  and  of  the  lower  one  —  underexposure.  Turn 

the aperture setting ring 32 and the shutter speed dial 17 till the moment when both of the diodes are 
lighting.  It  indicates  the  best  possible  combination  of  the  shutter  speed  and  aperture  providing  for 
correct  exposure.  However,  if  you  fail  to  obtain  simultaneous  blinking  of  both  of  the  diodes,  and 
changing  the  shutter  speed  and  aperture  values  over  between  the  two  neighbouring  ones  results  in 
switching the lighting from one diode to the other, you may select one of these values. In such a case 
the exposure will be still acceptably correct. 


9.2. Exposure setting in cameras with three-diode indication 

Lighting  of  the  upper  (red)  diode  indicates  over-exposure  and  of  the  lower  (red)  one  —  under-

exposure. Turn the aperture setting ring 32 and shutter speed dial 17 till the moment when the middle 
(green) diode is lighting continuously.  It indicates the best possible combination of the shutter speed 
and aperture providing for correct exposure. However, if you fail to obtain continuous blinking of the 
middle  (green)  diode,  and  changing  the  shutter  speed  and  aperture  values  over  between  the  two 
neighbouring ones results in switching the lighting from one red diode to the other red one, you may 
select one of these values. In such a case the exposure will be still acceptably correct. 


10. Picture Taking 

Having  prepared  the  camera  for  picture  taking,  cock  the  shutter,  make  sure  of  correct  focusing, 
framing and exposure setting and smoothly press the release button to take a picture. 

BEAR IN MIND that sharp pressure on the release button results in camera shaking at the moment 

of exposure and thus in blurring of the picture. 

When  taking  pictures  see  to  it  that  index  marks  on  the  release  button  and  the  camera  top  plate 

(between “T” and “V”) should be lined up. 

To take a picture with long exposure mount the camera on a tripod, set the shutter speed dial 17 at 

“B”, slightly press release button 5 (the shutter should be set beforehand in the “ready to fire” position) 
and turn it counter-clockwise as far as it will go (“T” position). 

The exposure over, return the button to its normal (middle) position and release it. As a result the 

shutter will close. 


11. Camera Unloading 

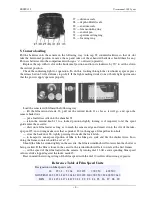
When the exposure counter shows figure 36, rewind the film into the cassette. To do this: 

— release the shutter, pressing release button 5; 
— press bush 6 downwards as far as it will go; 

Summary of Contents for Zenit 122

Page 1: ...ter operation fully open diaphragm ensures maximum brightness of the image in the view finder which is very important for viewing and focusing composite focusing device provides excellent image sharpness in various conditions of shooting speedy exposure setting simplified film loading procedure and frame counter automatically re setting to 0 upon pressing the film rewind button reduce the time req...

Page 2: ... it is likely to impair the shutter operation Do not try to rotate the shutter speed dial with the index moving along its short section from 500 to B Do not rotate shutter speed dial when self timer is running and when setting the release button in T position When taking pictures in frosty weather keep the camera under your street clothes but not in the open air and take it out only for the moment...

Page 3: ...or mounting flash units and other accessories 8 eyelet of strap securing 9 film check pocket 10 lens 11 film rewind knob 12 film rewind crank 13 film speed dial 14 film speed scale 15 film speed index mark 16 protective strip 17 shutter speed dial 18 shutter speed index mark 19 shutter cocking and film advance lever 20 frame counter 21 cassette chamber 22 battery compartment end cap 23 viewfinder ...

Page 4: ... the chamber 21 return the rewind knob 11 to a locked position slightly turning it if required to let the spool guide enter the cassette draw out a film leader as long as to reach the camera edge and insert it into the slot of the take up spool 25 in so doing make sure that a sprocket 24 tooth engage a film perforation hole close the back door 26 tightly pressing it to make the lock latch to trans...

Page 5: ...ng wedges to match the upper and lower parts of the split image The best sharpness is obtained when focusing is done at full aperture It should be noted that the focusing wedges and microprism collar ensuring the best possible focusing are of no use when low speed interchangeable lenses are used and focusing is done at apertures more than 4 In these cases as well as in photomicrography and macroph...

Page 6: ...de to the other you may select one of these values In such a case the exposure will be still acceptably correct 9 2 Exposure setting in cameras with three diode indication Lighting of the upper red diode indicates over exposure and of the lower red one under exposure Turn the aperture setting ring 32 and shutter speed dial 17 till the moment when the middle green diode is lighting continuously It ...

Page 7: ...chanism is not cocked green light indicates that it is cocked press the self timer release button 2 and take your place in front of the lens The shutter will operate no sooner than in 7 seconds after pressing the button self timer operation over return button 5 to its home position 13 Taking flash pictures The camera shutter is synchronized for use with electronic flashes To connect a flash unit w...

Page 8: ...bes without control pins should be used with the lenses in which the aperture is set manually the diaphragm mode selector switch should be set to M 15 Interchangeable Lenses Lens name focal length in mm relative aperture angle of field of view minimum focusing distance in m Mir 20M MC Mir 20M 20 f 3 5 96 0 18 Mir 10A 28 f 3 75 0 20 MC Mir 24M 35 f 2 66 0 30 MC Industar 61 50 f 2 8 45 0 30 Helios 4...

Reviews: