5-32
Upgrades and Options
9.
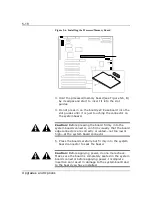
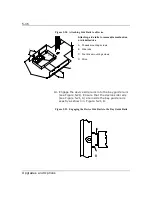
Align the rounded notch in the retaining bracket
with the threaded hole in the expansion slot frame.
The retaining bracket fits into the space that was
occupied by the expansion slot cover.
10.
Reinstall the screw in the threaded hole. Be sure to
push the bracket slot up against the screw before
you tighten it. If this is not done, the bracket may
interfere with an adjacent bracket.
11.
If you have installed a SCSI host adapter board, go
to Appendix A for procedures on cabling these
boards into the system. For all other boards,
continue with step 12.
12.
Connect any external cables (if they are needed) to
the installed option board.
13.
Replace the side panel, power on the system, and
run the SCU if you have installed any EISA option
boards.
Summary of Contents for MT2000
Page 1: ...Server MT2000 U s e r s G u i d e...
Page 6: ...raham...
Page 8: ...Bill Graham...
Page 9: ...Chapter 1 Introduction Contents Organization 1 Notational Conventions 3...
Page 10: ...Bill Graham...
Page 53: ...1231231 Billy Graham...
Page 81: ...4 28 Configuring Your System Figure 4 2 System Board Jumpers...
Page 141: ...5 53 Upgrades and Options Figure 5 25 Removing the Rear Fan modules...
Page 143: ...dfgdfg...
Page 171: ...Bill GrahamBill Graham...
Page 182: ...Appendix B Memory Configurations Contents Memory DIMM Configurations 1...
Page 183: ...Bill Grahamaerrterterter...
Page 186: ...Appendix C Option Boards Contents Introduction C 1...
Page 188: ...Appendix D Devices Contents Introduction 1...
Page 190: ...Appendix E Network Operating Systems Contents Introduction 1...
Page 193: ...rtyrtyrtyrtyry...
Page 203: ...8 Glossary...
Page 204: ......
Page 205: ...101843 1...

