background image

2

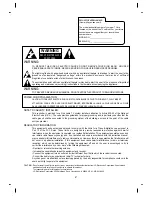
WARNING:

TO REDUCE THE RISK OF ELECTRIC SHOCK DO NOT REMOVE COVER (OR BACK). NO USER
SERVICEABLE PARTS INSIDE. REFER SERVICING TO QUALIFIED SERVICE PERSONNEL.

The lightning flash with arrowhead symbol, within an equilateral triangle, is intended to alert the user to the
presence of uninsulated “dangerous voltage” within the product’s enclosure that may be of sufficient
magnitude to constitute a risk of electric shock to persons.

The exclamation point within an equilateral triangle is intended to alert the user to the presence of important
operating and maintenance (servicing) instructions in the literature accompanying the appliance.

WARNING:

TO PREVENT FIRE OR SHOCK HAZARDS, DO NOT EXPOSE THIS PRODUCT TO RAIN OR MOISTURE. 

POWER CORD POLARIZATION:

CAUTION: TO PREVENT ELECTRIC SHOCK, MATCH WIDE BLADE OF PLUG TO WIDE SLOT, FULLY INSERT.

ATTENTION: POUR ÉVITER LES CHOCS ÉLECTRIQUES, INTRODUIRE LA LAME LA PLUS LARGE DE LA FICHE
DANS LA BORNE CORRESPONDANTE DE LA PRISE ET POUSSER JUSQU´AU FOND.

NOTE TO CABLE/TV INSTALLER:

This reminder is provided to call the cable TV system installer’s attention to Article 820-40 of the National
Electric Code (U.S.A.). The code provides guidelines for proper grounding and, in particular, specifies that the
cable ground shall be connected to the grounding system of the building, as close to the point of the cable
entry as practical.

REGULATORY INFORMATION:

This equipment has been tested and found to comply with the limits for a Class B digital device, pursuant to
Part 15 of the FCC Rules. These limits are designed to provide reasonable protection against harmful
interference when the equipment is operated in a residential installation. This equipment generates, uses and
can radiate radio frequency energy and, if not installed and used in accordance with the instruction manual,
may cause harmful interference to radio communications. However, there is no guarantee that interference will
not occur in a particular installation. If this equipment does cause harmful interference to radio or television
reception, which can be determined by turning the equipment off and on, the user is encouraged to try to
correct the interference by one or more of the following measures: 
• Reorient or relocate the receiving antenna.
• Increase the separation between the equipment and receiver.
• Connect the equipment into an outlet on a circuit different from that to which the receiver is connected.
• Consult the dealer or an experienced radio/TV technician for help.
Any changes or modifications not expressly approved by the party responsible for compliance could void the
user’s authority to operate the equipment.

CAUTION: Do not attempt to modify this product in any way without written authorization from LG Electronics Corporation. Unauthorized

modification could void the user’s authority to operate this product. 
The responsible party for this product’s compliance is :

LG Electronics Corporation, 2000 Millbrook Drive,  Lincolnshire, IL 60069, USA 1-847-941-8000

RECORD THE MODEL NUMBER
(Now, while you can see it)

The model and serial number of your new TV are
located on the back of the TV cabinet. For your future
convenience, we suggest that your record those
numbers here:

MODEL NO.______________________

SERIAL NO.________________________

WARNING

RISK OF ELECTRIC SHOCK
        DO NOT OPEN

Summary of Contents for C27F43

Page 1: ...Installation and Operating Guide Warranty Model Numbers C27F43 C32F43 Direct View TVs Copyright 2004 LG Electronics Corporation...

Page 2: ...provide reasonable protection against harmful interference when the equipment is operated in a residential installation This equipment generates uses and can radiate radio frequency energy and if not...

Page 3: ...face This product should not be placed in a built in installation such as a bookcase or rack unless proper ventilation is provided or the manufacturer s instructions have been adhered to 11 Power Sour...

Page 4: ...dangerous voltage or other hazards Refer all servicing to qualified service personnel 20 Damage Requiring Service Unplug this product from the wall outlet and refer servicing to qualified service per...

Page 5: ...to Sound Control 17 Equalizer Adjustment User mode in ASC 18 Balance Adjustment 18 AVL Auto Volume Leveler 18 DBS Adjustment Dynamic Bass Sound 18 Closed Captions 19 20 Closed Captions Overview 19 Cap...

Page 6: ...sts selected menu option for the menu shown on the screen 8 VCR CONTROL BUTTONS Operate some video cassette recorders 9 SLEEP Sets a TV turnoff time 10 FLASHBACK Returns to previous channel 11 MTS Sel...

Page 7: ...On Off 21 REMOTE CONTROL SENSOR 7 enter ch vol ch vol play p still stop rec rew ff sleep apc fcr mts flashback 0 caption tv video menu color temp arc 1 2 3 4 5 6 7 8 9 power mute dasp a prog memory er...

Page 8: ...mber button on the remote control A channel number will be displayed on the screen The on screen display will disappear after a few seconds Press the power button again on the remote control the TV re...

Page 9: ...auto programming press the enter A button Only the channels searched up to that time will be memorized Turbo auto program works faster than Normal auto program Notes If broadcast signals are of poor...

Page 10: ...he channel number you want to memorize or erase 7 Use the E button to select Name You can make a channel name 8 Use the F G button to select a word position and then D E button to enter blank number 0...

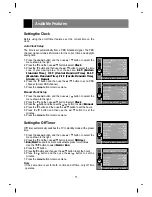
Page 11: ...set the hours 5 Press the G button and then use the D E button to set the minutes 6 Press the menu button to remove menu Setting the Off Timer Off Timer automatically switches the TV to standby mode...

Page 12: ...n below The Sleep Timer begins to count down from the number of minutes selected Notes After a few seconds the desired sleep time setting will disappear and the TV turn off function will operate autom...

Page 13: ...ove menu Notes With the key lock on the display Key lock appears on the screen if any button on the front panel is pressed while viewing the TV This TV is programmed to remember which option it was la...

Page 14: ...nter the Favorite channel mode 4 Use the D E button to memorize a favorite channel 5 Use the F G button to select the desired channel number 6 Repeat steps 4 to 5 7 Press the menu button to remove men...

Page 15: ...tton to remove menu Color Temperature Change the picture color appearance Using the Color temp Button 1 Press the Color temp button 2 Use the Color temp button to select Neutral Warm or Cool 3 Press t...

Page 16: ...Press the menu button and then use D E button to select the menu shown to the right 2 Press the G and then use D E button to select the desired picture menu option 3 Press the G button 4 Use the F G...

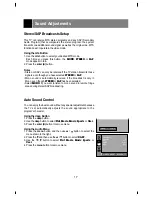
Page 17: ...ono even though STEREO or SAP has been selected Select MONO if you want to listen to mono sound in remote fringe areas during stereo SAP broadcasting Auto Sound Control You can enjoy the best sound wi...

Page 18: ...tains an equal volume level even if you change channels Using the Audio Menu 1 Press the menu button and then use D E button to select the menu shown to the right 2 Press the G and then use D E button...

Page 19: ...ecting from CC 1 to CC 4 you can choose which signal you view CC 1 is usually the signal with the captions while another mode CC 2 might show demonstration or programming information Your TV might not...

Page 20: ...Press the caption button 2 Use the caption button to select Off CC 1 4 or Text 1 4 3 Press the enter A button to remove menu Using the Menu 1 Press the menu button repeatedly until the menu shown to...

Page 21: ...Theaters Movie Ratings Unblocked G and Above general audience PG and Above parental guidance suggested PG 13 and Above 13 years and up R and Above restricted NC 17 and Above 18 years and up X adult If...

Page 22: ...enu button to return from Age block or Content block 5 Use the D E buttons to select Set hours Use the F G buttons to set the number of hours for the blocking Up to 99 Use the D E buttons to select th...

Page 23: ...300 to 75 ohm adapter or the cable from the TV if attached 2 Connect the CATV cable 75 ohm coaxial cable to the 75 ohm antenna jack 300 Ohm Flat Wire 1 Connect the 300 ohm flat wire to the screws on t...

Page 24: ...mber which mode it was last set to even if you turn the TV off External Equipment Connections Connecting AUDIO VIDEO IN Jacks 1 Connect the audio video output jacks from the VCR to IN1 or IN2 A V jack...

Page 25: ...he recording VCR to record VCR Recording Setup for a VCR 1 Connect the output jacks from the playback VCR to the IN 1 or IN 2 A V jacks on the back of the TV or IN 3 jacks on the side of the TV 2 Conn...

Page 26: ...TV off 1 How to connect DVD Connection Panel Note 2 How to use Turn on the DVD Turn the TV on and use the TV VIDEO button on the remote control or TV VIDEO button on the front panel to select COMPONE...

Page 27: ...he TV External antenna impedance 75 Audio output 10W 10W 7W 7W External input output jacks Audio Video input jacks 3 sets Audio Video output jacks 1 set S video input port 1 set Component video input...

Page 28: ...detergent Wring the cloth until it s almost dry and then use it to wipe the screen 2 Make sure the excess water is off the screen and then let it air dry before you turn on your TV 1 Use a soft cloth...

Page 29: ...ages Remote control does not work Cannot tune desired channel CHECK THESE THINGS Is power cord plugged in Is television turned on Check batteries in remote control Try another channel station trouble...

Page 30: ...Notes 30...

Page 31: ...Notes 31...

Page 32: ...ls calibration maintenance or failure to maintain or separate system components and 2 Damages or operating problems that result from normal wear and tear misuse abuse operation outside environmental s...

Reviews: