background image

PIP/Double Window Modes

24

NOTE: PIP is not available if Parental Control is active.

Twin picture doesn't work in zoom and 4:3 mode.

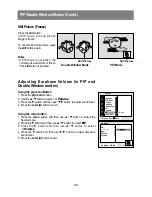
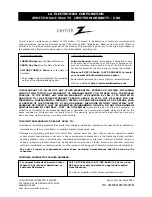
Watching PIP (Picture-in-Picture)

PIP is a smaller picture placed on the larger main picture screen. Using
the PIP feature enables you to view two different programs on the TV
screen at the same time.

1. Use the pip/dw button to select either PIP mode or Double window

mode. Press the pip/dw button repeatedly to select the desired sub
picture size. The sub picture appears as indicated below.

2. Use the ch 

+

/

-

button of the PIP to select the desired channel for

the sub picture.

Note
• Use the 

D

/

E

button to select the next higher/lower channel for the

main picture and use the ch 

+

/

-

button to select the next

higher/lower channel for the sub picture.

Selecting the Viewing Source (in PIP and
Double Window Modes)

Using the pip menu

1. Press the pip menu button.
2. Press the 

D

/

E

button to select 

Input

.

3. Press the 

G

button and then use 

D

/

E

button to select 

TV

Video

1

Video 2

, or

Video 3

.

4. Press the 

F

button to exit.

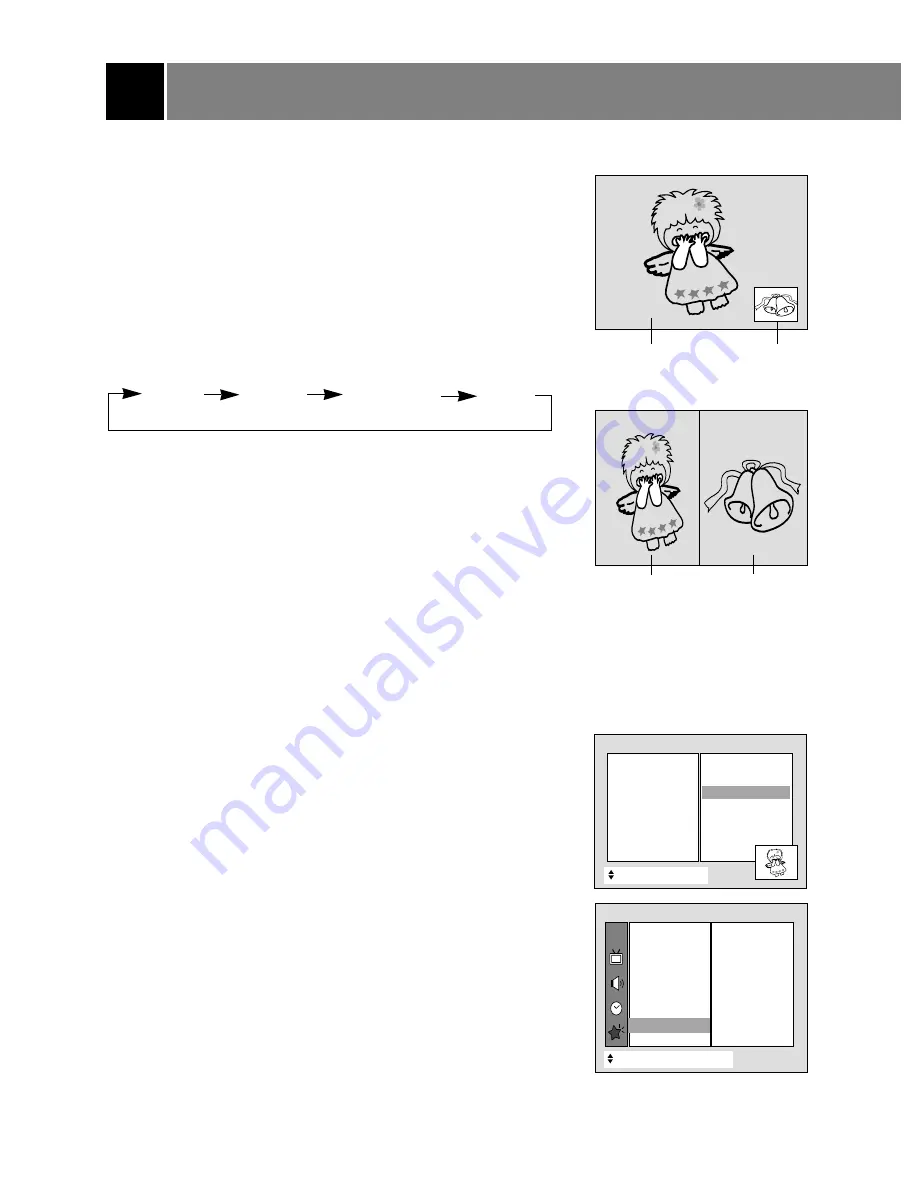
Source selection with the menus

1. Press the menu button and then use 

D

/

E

button to select the

Special menu.

2. Press the 

G

button and then use 

D

/

button to select 

PIP

.

3. Press the 

G

button and then use 

D

/

E

button to select 

Input

.

4. Press the 

G

button and then use 

D

/

E

button to select 

TV

Video

1

Video 2

, or

Video 3

.

5. Press the 

F

button to exit.

Sub Picture

Sub Picture

Main Picture

Main Picture

PIP Mode

Double Window Mode

+

+

Move  

}

Back

PIP

{

Volume

{

Input

{

Channel

{

Position

{

TV
Video 1
Video 2
Video 3

TV

PIP Menu

CH.

+

+

Move  

{

Next

+

}

}

Back

Language

{

{

Main input

{

{

Key lock

{

{

Captions

{

{

Caption/Text

{

{

Tilt

{

{

Degauss

{

{

PIP

{

{

Parental ctl

{

{

To set

Special

PIP                  

{

{

PIP [S]

PIP [M]

Twin picture

PIP off

Summary of Contents for C30W46

Page 1: ...Installation and Operating Guide Warranty Model Numbers C30W46 Direct View TVs Copyright 2004 LG Electronics USA Inc...

Page 2: ...erference when the equipment is operated in a residential installation This equipment generates uses and can radiate radio frequency energy and if not installed and used in accordance with the instruc...

Page 3: ...face This product should not be placed in a built in installation such as a bookcase or rack unless proper ventilation is provided or the manufacturer s instructions have been adhered to 11 Power Sour...

Page 4: ...dangerous voltage or other hazards Refer all servicing to qualified service personnel 20 Damage Requiring Service Unplug this product from the wall outlet and refer servicing to qualified service per...

Page 5: ...15 16 Stereo SAP Broadcast Setups 15 EZ Audio 15 AVL Auto Volume Leveler 16 TV Speakers On Off 16 Adjusting Equalizer User mode in EZ Audio 16 Adjusting Balance 16 Timer Menu Options 17 18 Setting th...

Page 6: ...orite Channel Review Selects favorite channels Refer to Favorite channel memory 6 MENU Displays on screen menus 7 CHANNEL UP DOWN Selects the desired channel Selects the desired menu option when menu...

Page 7: ...level for each channel 17 MTS Selects MTS sound Mono Stereo or SAP 18 MUTE Press to remove sound Press again to restore sound 19 MEMORY ERASE To memorize or erase a channel 20 PIP Picture in Picture P...

Page 8: ...the batteries with correct polarity Install two 1 5V batteries of AAA type Don t mix used batteries with new batteries 21 STANDBY INDICATOR r r Illuminates red bright when the TV is in standby mode R...

Page 9: ...o select the Special menu 2 Press the G button and then use D E button to select Language 3 Press the G button and then use D E button to select the desired language From this point on the on screen d...

Page 10: ...or scan button The EZ Scan starts If you want to stop auto programming press the enter A button Only the channels searched up to that time are memorized Notes Turbo EZ Scan works faster than Normal EZ...

Page 11: ...ou can make a channel name 8 Press the G button and then use F G button to select a word position and then D E button to enter alphabet A to Z number 0 to 9 or blank 9 Repeat steps 3 to 8 to memorize...

Page 12: ...to 4 6 Press the enter A button to exit To select a favorite channel repeatedly press the fcr Favorite Channel Review button Eight channels programmed appear on the screen one by one Auto Demonstratio...

Page 13: ...t in Component 480i input VM Velocity Modulation If you select VM High the TV will automatically enhance the sharpness of the image s edges 1 Press the menu button and then use D E button to select th...

Page 14: ...Sharpness and Tint 3 Press the G button and then use F G button to adjust the level The setting of highlighted menu option is displayed Use the D E button to select other options 4 Press the enter A b...

Page 15: ...no even though Stereo or SAP has been selected Select Mono if you want to listen to mono sound in remote fringe areas during stereo SAP broadcasting EZ Audio You can enjoy the best sound without any s...

Page 16: ...d then use D E button to select On or Off 4 Press the F button to exit Adjusting the Equalizer User mode in EZ Audio 1 Press the menu button and then use D E button to select the Sound menu 2 Press th...

Page 17: ...d Time Alaska or Hawaii 5 Press the G button and then use the D E button to set a PBS channel 6 Press the G button and then use the D E button to set D S T Daylight Saving Time Auto On or Off dependin...

Page 18: ...l automatically revert back to standby mode unless a button has been pressed This function works only in standby mode If the same time is set for the on time and off time only the off time operates Sl...

Page 19: ...tes 1 Press the menu button and then use D E button to select the Timer menu 2 Press the G button and then use D E button to select Auto off 3 Press the G button and then use D E button to select On o...

Page 20: ...s the G button and then use D E button to select Key lock 3 Press the G button and then D E button to select On or Off 4 Press the F button to exit Notes With the key lock on the display Key lock appe...

Page 21: ...tton and then use D E button to select the Special menu 2 Press the G button and then use D E button to select Degauss 3 Press the G button and then use D E button to select On or Off After the degaus...

Page 22: ...als on the same channel By selecting CC 1 or CC 4 you can choose which signal you view CC 1 is usually the signal with the captions while another mode might show demonstrations or programming informat...

Page 23: ...e G button and then use D E button to select Captions 3 Press the G button and then use D E button to select On EZ Mute or Off 4 Press the F button to exit Note EZ Mute shows the selected captions opt...

Page 24: ...annel for the sub picture Selecting the Viewing Source in PIP and Double Window Modes Using the pip menu 1 Press the pip menu button 2 Press the D E button to select Input 3 Press the G button and the...

Page 25: ...nels are searched through on the PIP screen as shown right To stop channel search press the ch search or enter A button Note By pressing the swap button the channel being searched on the PIP screen ap...

Page 26: ...tton and then use F G button to adjust sound level 4 Press the enter A button to exit Using the menu button 1 Press the menu button and then use D E button to select the Special menu 2 Press the G but...

Page 27: ...iously Shown in Theaters Movie Ratings Unblocked G and Above general audience PG and Above parental guidance suggested PG 13 and Above 13 years and up R and Above restricted NC 17 and Above 18 years a...

Page 28: ...en requested 4 Use the D E button to select Lock on off 5 Press the G button and then use the D E button to select on or off 6 Press the F button and then use the D E button to select Set password 7 P...

Page 29: ...m adapter or the cable from the set if attached 2 Connect the CATV cable 75 ohm coaxial cable to the 75 ohm antenna jack 300 Ohm Flat Wire 1 Connect the 300 ohm flat wire to screws on the 300 ohm to 7...

Page 30: ...ee page 26 Stereo and SAP are not available for earphones Also with earphones the Mute button does not work You should turn off the speakers if you don t want to listen to the speaker s sound See page...

Page 31: ...TV 2 Select the program number on the TV 3 Set the recording VCR to record Recording programs from other connected equipment 1 Connect the output jacks from the playback VCR to the IN 1 IN 2 or IN 3...

Page 32: ...T2 480p 1080i Y Pr Pb L AUDIO R TV Notes Component 1 480i 1080i Input for interlace scanning DVD players Component 2 480p 1080i Input for progressive scanning DVD players TVINPUT Y PB PR TVINPUTJACKS...

Page 33: ...use it to wipe the screen 2 Make sure the excess water is off the screen and then let it air dry before you turn on your TV 1 Use a soft cloth with a mild soap solution to wipe the cabinet 2 Rinse th...

Page 34: ...30W46 Power requirements AC 120 V Television system NTSC Television channels VHF 2 13 UHF 14 69 Cable 01 125 Power consumption See the back of the TV External antenna impedance 75 Audio output 7W 7W E...

Page 35: ...iple images Remote control does not work Cannot tune desired channel CHECK THESE THINGS Is power cord plugged in Is television turned on Check batteries in remote control Try another channel station t...

Page 36: ...intenance or failure to maintain or separate system components and Damages or operating problems that result from normal wear and tear misuse abuse operation outside environmental specifications or co...

Reviews: