background image

14

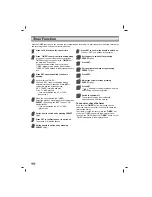
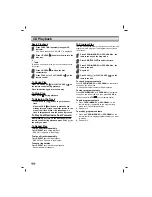
CD Playback

Basic Playback

11

Press FUNCTION repeatedly to appear CD 
indicator. 

If no disc is loaded then “NO DISC” is displayed.

2

2

Press CD OPEN( ) and place the disc into the
disc tray.

Note

To load an 8cm(3 inch) disc, put it onto the inner circle
of the tray.

3

3

Press CD OPEN( ) to close the disc 
compartment.

4

4

Press PLAY (

) or PLAY/ PAUSE (

) on the

remote control.

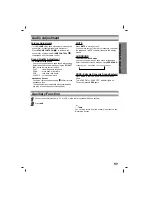
To Pause Play

Press CD PAUSE (CD

) or PLAY/ PAUSE (

) on

the remote control during playback. 

Press this button again it to resume play.

To Stop Play

Press STOP(

) during playback.

To Skipping the Track

• Press the SKIP (

) button to go to the next

track.

• When the SKIP (

) button is pressed once

midway through a track, the player returns to the
start of that track. When it is pressed again, a
track is skipped each time the button is pressed.

To Play Fast Rewind or Fast Forward

After pressing 

/

on the front panel or the

remote control during playback, press PLAY (

) at

the point you want.

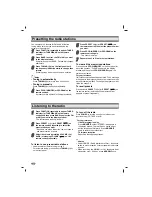
To Repeat Play

To play one track repeatedly

Press 

REPEAT

once during playback.

- “REPEAT 1” appears in the display.

To play all tracks repeatedly

Press 

REPEAT

again during playback.

- “REPEAT ALL” appears in the display.

To cancel repeat play

Press 

REPEAT

once more during playback.

- Repeat indicator disappears.

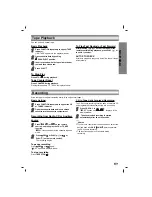
To Program Play

You can arrange the order of the tracks on the discs and
create your own program. The program can contain up
to 20 tracks.

11

Press PROG./MEMORY (or PROGRAM on  the
remote control) on the stop mode.

2

2

Press SKIP(

/

) to select the track.

3

3

Press PROG./MEMORY (or PROGRAM on  the
remote control).

4

4

Repeat 1~3.

5

5

Press PLAY(

) (or PLAY/ PAUSE (

) on the

remote control).

To check program contents

Press  

PROG./MEMORY

(or 

PROGRAM

on the remote

control) on the stop mode.
- A track and program number will be displayed.

To clear program contents

Press 

PROG./MEMORY

(or 

PROGRAM 

on the remote

control) on the stop mode. And then press 

CLEAR

on

the front panel or 

STOP(

)

on the remote control.

To add program contents

1.

Press 

PROG./MEMORY

(or 

PROGRAM

on  the

remote control)  repeatedly on the program stop
mode until “Track Number” blinks.

2.

Repeat 2~5.

To modify  program contents

1.

Press the 

PROG./MEMORY

(or 

PROGRAM

on the

remote control) to display program number you want
to modify.

2.

Repeat 2~4.

Summary of Contents for FFH-192A

Page 1: ...Installation and Operating Guide Machine Number F 192 Main Unit FFH 192A Speakers FE 192E Hi Fi MICRO CD COMPONENT...

Page 2: ...pment in a confined space such a book case or similar unit Note The regulation label is positioned at bottom of this unit This label is located on the interior This Compact Disc player is classified a...

Page 3: ...on 11 OPERATION Presetting the radio stations 12 Listening to the radio 12 Tape Playback 13 Basic Playback 13 To Stop Play 13 Tape Counter Reset 13 To Play Fast Rewind or Fast Forward 13 Recording 13...

Page 4: ...instructions have been adhered to 8 Do not install near any heat sources such as radiators heat registers stoves or other apparatus including amplifiers that produce heat 9 Do not defeat the safety pu...

Page 5: ...or tape on the disc Storing discs After playing store the disc in its case Do not expose the disc to direct sunlight or sources of heat or leave it in a parked car exposed to direct sunlight as there...

Page 6: ...tton 18 SET CLOCK TIMER button CD PAUSE CD button 19 AM FM SELECT BAND button 20 FUNCTION SELECT FUNCTION button TUNER CD TAPE AUX 21 TUNING button TUNER SKIP button CD SEARCH button CD FAST FORWARD P...

Page 7: ...button 9 PROGRAM button 10 VOLUME CONTROL button 11 EQUALIZER PATTERN EQ PATT button 12 MUTE button 13 SURROUND SURR button XDSS MUTE REC REC REC TIMER REC SLEEP SYNC PROG REPEAT MHz kHz STEREO ALL 1...

Page 8: ...ting adjust the volume carefully to avoid excessive output on the speakers Do not disassemble the front cover of supplied speaker Antenna Aerial Connections Connect the supplied FM AM antennas for lis...

Page 9: ...ed 1 1 To specify the time delay before the power is turned off press SLEEP In the display window you can see for about 5 seconds This means that the system turns off automatically after 90 minutes Ea...

Page 10: ...SET to confirm the hour to switch on The minute ON display flashes 8 8 Set the minute to switch on by pressing PRESET 9 9 Press SET to confirm the minute to switch on The hour OFF now flashes in the d...

Page 11: ...3 5mm into the headphone jack The speakers are automatically disconnected when you plug in the headphones not supplied MUTE Press MUTE to mute your unit You can mute your unit in order for example to...

Page 12: ...a moment and then a preset number will flash To change the preset number follow the steps 5 6 To recall presets Press and hold PRESET or PRESET on the remote control until the desired preset number a...

Page 13: ...k cassette into the cassette compartment Recording from Radio CD or Auxiliary source 1 1 Press REC or on the remote control and then play the CD or TUNER function REC flashes and holds the cassette in...

Page 14: ...yback REPEAT 1 appears in the display To play all tracks repeatedly Press REPEAT again during playback REPEAT ALL appears in the display To cancel repeat play Press REPEAT once more during playback Re...

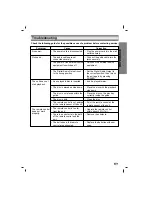
Page 15: ...t pointed at the remote sensor of the unit The remote control is too far from the unit There is an obstacle in the path of the remote control and the unit The batteries in the remote control are exhau...

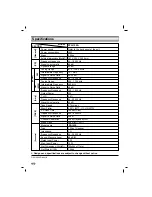
Page 16: ...ncy 450 kHz Signal to Noise Ratio 35 dB Frequency Response 100 1800 Hz Output Power 5W T H D 0 5 Frequency Response 60 20000 Hz Signal to noise ratio 60 dB Tape Speed 4 75cm sec Wow Flutter 0 25 MTT 1...

Reviews: