background image

Summary of Contents for IQVB423

Page 1: ...machine number I 1QVB423 operating guide warranty...

Page 2: ...s transmission for exceLLent sound Upgrades to four stations with additional set Units walt mount or set on table ALG1188 ONLY 49 99 SHIP_TJ_G H_OI KG ZEN TH 5 FUNCTION REMOTE Broken or Lostremote Nee...

Page 3: ...onnectedto the grounding systemof the building as close to the point of the cable entry as practicaL REGULATORY INFORMATION Thisequipment hasbeentested andfoundto comply with theEmitsfor a QassBdigita...

Page 4: ...m paying particular attention to cordsat plugs convenience receptacLes and the point where they exit from product 8 Accessodes Do not place product on an unstable cart stand tripod bracket or table Pr...

Page 5: ...rous voltage or other hazards Refer all servicing to quaUfied service personnel 20 Wall or CeiUng Mounting Mount product to wall or ceiling only as recommended by manufacturer 21 Replacement Parts Whe...

Page 6: ...er Connected to VCR 27 PLayingTapes 28 29 Instant Recording 30 32 RecordingWhiLeYou re Away 33 VCR PLus recording 34 TROUBLESHOOTING 35 37 SPECIFICATIONS 38 INDEX Audio Menu 25 Auto ChannelSearch 11 2...

Page 7: ...ch 181 Channel CapabiLity CAIV TV RecordSpeedsSP EP PlaybackSpeedsSP LP EP Auto Playback System Auto ManuaLDigital Tracking Instant Recording Timer ControLLed Recording Auto PlaybackTapeSpeedAdjust Fo...

Page 8: ...Jack Back Panel of Typical TV This cable is provided with your VCR _ Turnoff poweror unpLug VCR before making any connections ConnectionsWtth a CabLe Box Back Panel of Stereo VCR _ VHFIUHF CATV Back P...

Page 9: ...HFICAT_ _ ANT IN 1 Tum off power or unplugVCR before making any connections A V cable is not provided with VCR Accessory Audio Video A V Connections to VCR Back Panet of Stereo VCR VHF UHF CATV Access...

Page 10: ...ss NUMBER 1 2 3 4 button Sp_EZ CLOCK I 1TMER SETUP AUDIO Pressnumber keys QUIT exR MAIN MENU How to Access Menus Menu operaUon is easy just fottow the instructions shown at the bottom of the menu 1 Pr...

Page 11: ...hannel that is memorized No DATA wilt appear Set Position of the CH3 CH4 Switch Required The CH3 CH4 switch on the VCR s back panel determines which channel the VCR usesto send video signals to your T...

Page 12: ...Press number keys thenENTER QUIT exit Press NUMBER 0 9 then ENTERto set date and time Select Source for VCR Optionat Set the source of the VCRfor the type of program signal you have connected to the A...

Page 13: ...eys QUIT exit SETUPMENU SETUP MENU ON SCREEN DISPLAY ON gON BOFF Pressnumberkeys thenENTER QUIT exit PressNUMBER 1 or 2 to chooseONor OFF If you have a stereo VCR press ENTERto select the audio format...

Page 14: ...t 2 PressVCR on remote and follow aLL on screen instructions Enter channels with Numbers Use AD3 Left Right to erase some models Example of Completed Worksheet Worksheet with Channels Found via Auto C...

Page 15: ..._ QUIT _ numb_ k_Gu_ ezI _11 2 Setup_ _up _mlX_l t Press 0000 to show DoubLeMap Screen t _ J Channel mapping a second PlusCodeTM Channel for _ channel 3 On Screen Instructions for CATVor DBSTuning Ba...

Page 16: ...Station ID PlusCode TM TV Ch Cable Ch Channel VCR Ch Channel found Network or via Auto Channel Station D IV Ch Cable Ch Published PLusCode TM Channel VCR Ch NOTE Two PtusCode TM channel numbers may be...

Page 17: ...asic VCR operations The Remote performs basic as wett as advanced VCR operations POWEROn Off Stop Eject Channei Up Down Cassette PLAY Button Selector Selector Compartment _ _l II SHUTTLERing 7 Audio V...

Page 18: ...apetracking is being adjusted from VCR ALARM Turn VCROn and OFFto erase ALARM message If it is not erased take VCRto an authorized repair center FF Fast Forward Tape is advancing rapidLy CUE Tape is a...

Page 19: ...sffion REM 1 35 TapeTime Remaining VCR Status Display The VCRStatus DispLayappears on the TV when a VCR function starts Uke when you change a channet or setect a different VCR mode For examp e pressin...

Page 20: ...tore TV sound Numbers Chooseschannels and enters programming information PAUSE Pausestape temporariLy during playback or record PLAY Begins tape pLayback Instal Ling Batteries Be sure to instaL I the...

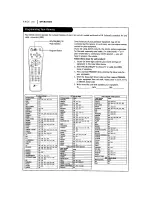
Page 21: ...4 15 a r REALISTIC CANDLE 158 CENTURION 130 5AMSUNG 104 5_ 30 13 _ZEN 56_ 1 5 7_ 158 159 150 151 162 _ANYO 115 125 CORONADO 131 _ SCO_ 15 30 CROWN 131 s _ SEARS 1C4 116 123 124 125_ 13 _mo_ _ _ i 13o...

Page 22: ...e Shuttle ring to rewind or fast forward the tape The Shuttle ffng may be used while in both PLAYand STLLLmodes When the Ring is released PLAYwill resume at normal playback speed Some of the speedsgiv...

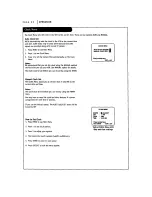
Page 23: ...rd by using the TIMER CL_KM_U A_O_KS_ON _ _NUAL_KS_ m Press number _ys QUIT exit Manual Clock Set TheCLOCK Menuallowsyouto set the dock in the VCR to the currentdate andtime Notes The clock must be se...

Page 24: ...system Note Setthe VER in TIMERmodebypressing POWER to turnoffthe VCR TheTIMER indicator Light appears in the front pane of theVCR When hlghUghted press NUMBER 1 8 to choose program Number REPEAT OPTI...

Page 25: ...DEL De ete channels to create your own List of favorite channels SOURCE Selects TV CATV AUX or AUX2 as the sourceof the program to watch or record ChooseTV if you have an antenna connected to the VCR...

Page 26: ...A voice tells you how to usethe features you select in the menus if SpeakEZis ON ON is recommended pLAYBACK Selects HT FI or NORMALfor tape playback HI FI High FidelibJ providesstereo sound if presen...

Page 27: ...R is ON 1 TurnTVandVCRon 2 place VCRin TV mode by pressing the W VCR button on the remote control repeatedly until the VCR indicator disappears from the front pane of the VCR 3 Select channel you d li...

Page 28: ...choose the SETUPmenu as described in How to Access Menus on page g Press3 for the SETUPmenu sSOURCE item Press4 for AUX2 then ENTER Press QUIT CC to exit Turn off power or unplug VDR before making any...

Page 29: ...tte into the VCR 3 PressPLAYto begin playback 4 Setect the channel 3 or 4 at the TV or select the IV s AUX AuxiUary sourceto see the picture if you are using the A V jacks Refer to your TV operating m...

Page 30: ...creen instructions for Forward or Reverse slow motion PressF FWDor REWto controLstow speed duffng stow motion PressPLAYto resume normal tape playing Note When the reverse stow mode continues for mine...

Page 31: ...a cable box select the cable box output channel usually 3 or 4 at the VCR Select cable box channels at the cable box Insert a VHS cassette tape into the VCR PressSP EP to select recording speed if des...

Page 32: ...tect cable box channels at the cable box Insert a VHS cassette tape intothe VCR B Press SP EP to select recording speed if desired Recording speed is always SP unlessyou select EP Note The SP mode det...

Page 33: ...sert a VHS cassette tape into the VCR m Press SP EP to select recording speed if desired Recording speed is always SP unless you select EP PressREC ZTRuntil recording begins REC indicator Lightappears...

Page 34: ...V VCR buttonon the remoterepeatedly unUL theVCR indicator Light appearsin the VCR frontpaneL SeLectchannel 3 or 4 at the IV Insert a VHS cassette tape intothe VCR VCROperationwith Timer Off or On VCR...

Page 35: ...utomaticaLLy SimpLyenter the PLusCode _M number for your favorite show from the TV Listing and your VCR does the rest Tt turns on at the roper time selects the channel to be recorded and starts record...

Page 36: ...io Video in or tune TV to Channel 3 or 4 as appropriate Pressthe TV VCR button on remote repeatedly to chooseVCR mode VCR indicator light appears in VCRfront ane Disconnect VCR powercord for three 3 m...

Page 37: ...oes not appear after programmingtimer VCR isinTimerRecording mode TIMER indicator Light appearsafter VCR isturnedoff VCR Plus Recording Problems Observed Condition Possible Cause Probable Solution VCR...

Page 38: ...Keep the power cord pLugged into an ACoutlet and POWER On This wiLl help prevent condensation When condensation has occurred wait a few hours for the VCR to d_Jbefore using it Magnetic Field from Oth...

Page 39: ...annel Coverage UHF 75 ohms VHF 75 ohms ChanneL 3 or4 VHF 2 13 UHF 14 59 CAW 1 125 4A A W W l W 84 A 5_A 1 VIDEO VideoSignalSystem Input Output Stgnatto Noise Ratio AUDIO FM audio FrequencyRange Dynami...

Page 40: ...rset and howto adjustthe customer conmlL_ Laely llt Service Thevideoproduct mustbe taken to a U S orCanadianZenith authorized service centerfor warrantyserviceand mustbe picked up bythe owner IV Set P...

Reviews: