Size (UNC
Recommended
Alloy Steel)
Torque (in-lbs)
1/2-13
922
9/16-12
1,331
5/8-11
1,836
3/4-10
3,257
7/8-9
5,800
1-8
8,000
1 1/8-7
12,000
10
Reassembly
continued
Bolt Torque
Size (UNC
Recommended
Alloy Steel)
Torque (in-lbs)
#8-32
30
#10-24
43
#10-32
49 (UNF thread)
1/4-20
103
5/16-18
213
3/8-18
378
7/16-14
605
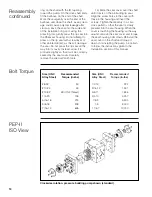
PEP-II
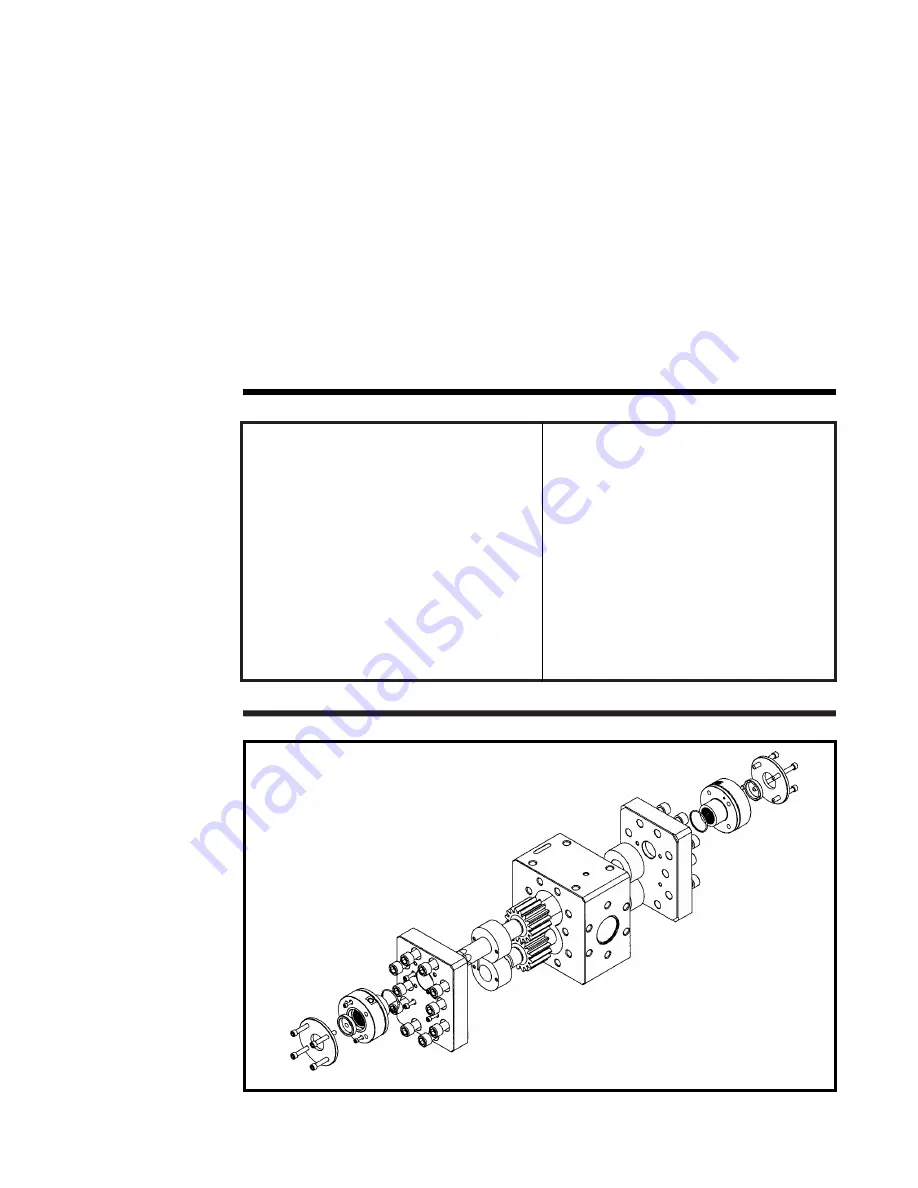
ISO View
Clockwise rotation, pressure building pump shown (standard).
ring on the shaft with the ID tapering
toward the pump. On the drive shaft ends,
fit the bullnose on the end of the shaft.
Work the seal gently over the end of the
bullnose and down the shaft, as any dam-
age could cause polymer leakage after
start-up. Ease the seal into the wide end
of the installation ring and, using the
pressing tool, gently press the lip seal into
the Rheoseal housing. Do not attempt to
press on the lip seal with screwdriver or
other pointed object, as this will damage
the seal. Do not press the lip seal all the
way into its cavity. Instead, allow it to
protrude slightly so that it will be correctly
seated by the seal cover. Carefully
remove the special Zenith tools.
14) Slide the seal cover over the shaft
until it rests on the protruding lip seal.
Align the screw holes in the cover with
those in the housing and insert the
screws. Tighten them evenly in a criss-
cross pattern so that the seal is slowly
pressed into the seal housing. When the
cover is touching the housing all the way
around, remove the seal cover and torque
the seal housing bolts down. Reinstall the
seal cover on the shaft and torque it
down. In reinstalling the pump, be certain
to follow the instructions given in the
Installation section of this manual.


