Pg 8 of 9
C
C
C
F
7.
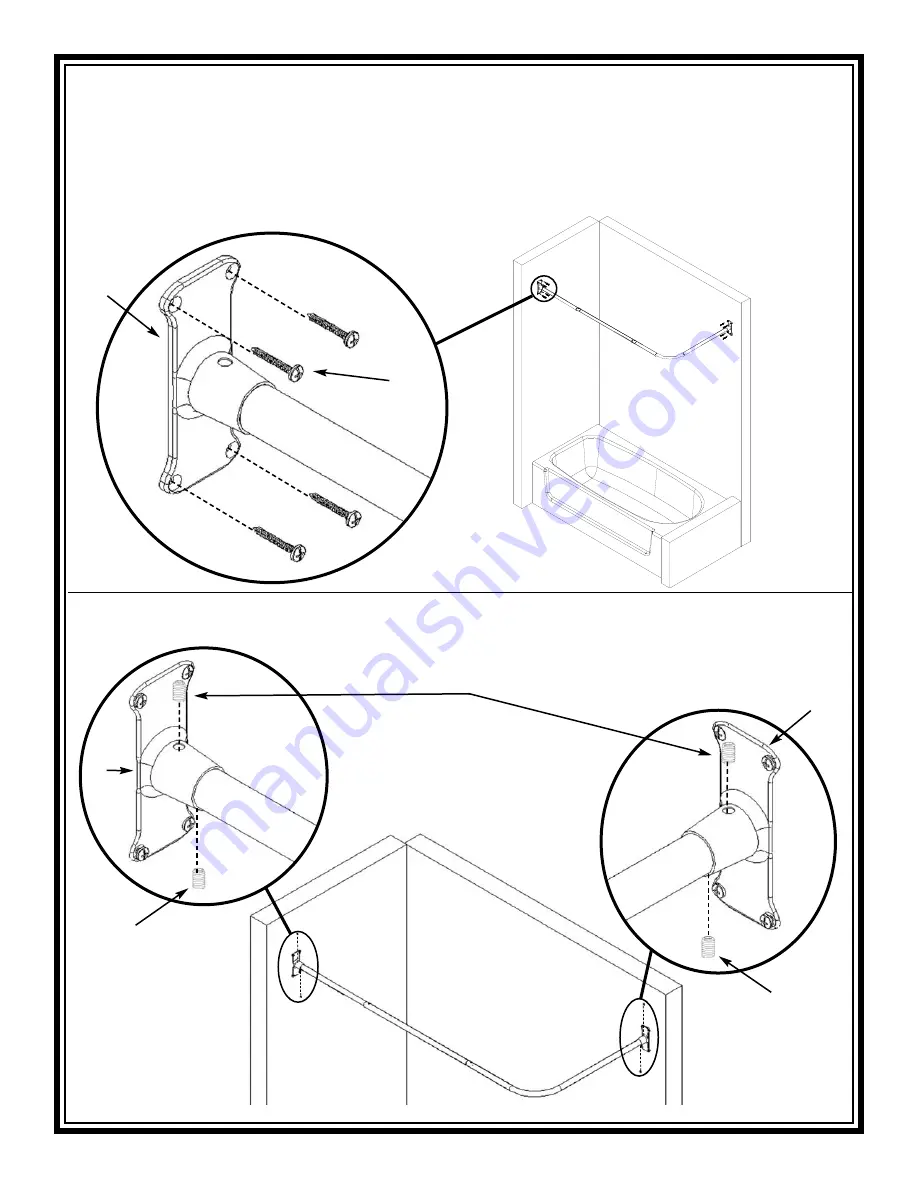
Making sure the end cap (C) is in the
upright position with the screw hole
closest to the wall (in the neck of the
endcap) is on top, fasten the endcap
(C) to the side wall.
NOTE:
Screw hole
closest to the wall in the “neck” of the
endcap is on top, as shown.
Repeat for
the other end cap (C).
Asegurándose de que la cubierta
terminal (C) esté en la posición vertical
con el orificio del tornillo (en el cuello de
la cubierta terminal) en la parte superior,
fije la cubierta terminal (C) a la pared
lateral.
NOTA:
El orificio del tornillo más
cercano a la pared en el «cuello» de la
cubierta terminal está en la parte superior,
como se ilustra.
Repita el mismo paso
para la otra cubierta terminal (C).
En vous assurant que l’embout (C) est en
position verticale, le trou de vis (dans la
gorge de l’embout) se trouvant sur le
dessus, fixez l’embout (C) au mur latéral.
REMARQUE :
le trou de vis dans la « gorge »
de l’embout le plus près du mur se trouve
sur le dessus, comme indiqué.
Répétez
l’opération pour l’autre embout (C).
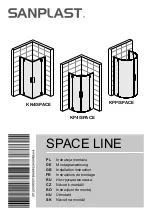
Then fasten the tube asembly to the
endcaps (C) using allen wrench (H),
as shown.
Asegure el ensamble de tubos a las
cubiertas terminales (C) con una llave
allen (H), del modo ilustrado.
Fixez les tubes assemblés aux embouts (C)
à l’aide de la clé hexagonale (H), comme
indiqué.
8.
E
E
E
www.zennahome.com IS033941-I7


