18
■
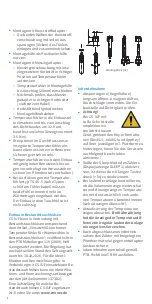
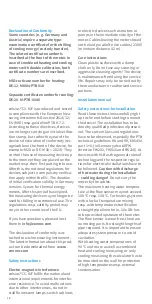
Mounting with brass adaptor:
–
Slide brass screwing with loosely
mounted groove pin onto tem-
perature sensor in right position
–
Slide temperature sensor into
mounting aid until mechanical
stop (28 mm)
–
Check again, if brass screwing is in
right position (the groove pin must
be pressed in the upper groove
which is in the closest position to
the temperature sensor cable)
–
Press in groove pin flush
–
Remove mounting aid
■
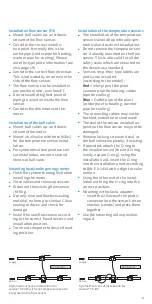
Insert the temperature sensor into
the installation point and screw
it in tightly until the dead stop of
the seal on the 12-point is reached
(mounting torque 3-5 Nm).
■
The temperature sensor installation
point which is optionally integrated
in the flow sensor must be secured.
■
Secure the sensor after installation
against unauthorised removal with
appropriate sealing (included in
accessories kit)!
■
At the versions with temperature
sensor type TS-45-5 (see type plate
at the sensor cable) both sensors
must be always immersed directly
in contact with the heat conduct-
ing fluid. The installation in sensor
pockets is not allowed.
Installation with existing immersion
sleeves
In Germany the C5-IUF can be put into
use in connection with existing immer-
sion sleeves in accordance with the
article “Putting into use of MID homolo
-
gated temperature sensors” released in
the PTB notifications 119 (2009), Edition
4. Based on current information, the
regulation has a period of validity
until 30.10.2026. For the identification
and marking of the usable existing
immersion sleeves in connection with
the C5-IUF meter, an identification and
marking set can be delivered from our
company (order number 137382).
Commissioning
■
Open valves carefully. Vent the sys
-
tem. Avoid sudden pressure shocks.
Check installation for leakage.
■
Attention!
For zelsius C5-IUF with
LoRa interface, we
recommend at first to
do the onboarding of
the device on your respective IoT
platform by putting in the key
information belonging to the device
(DevEUI, JoinEUI and AppKey) before
activating the device as described
below!
■
If the sleep mode of the counter is
enabled (Display: SLEEP 1), then
it must be deactivated by longer
pressing the button (>5s).
■
While the system is operating,
check whether the volume display
advances and the temperatures
displayed correspond with the ac-
tual temperatures (see the display
overview). In case of cooling plants
in regular operation the tempera-
ture difference must have a negative
leading sign.
■
Wait for the temperature display to
be updated.
■
Secure meter with the enclosed
sealing material against unauthor-
ised removal.
■
Fill in the putting into use report
in accordance with PTB-Directive
TR K9.
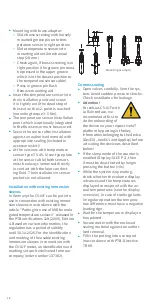
Mounting example
Summary of Contents for zelsius C5 -IUF
Page 26: ...Notice ...
Page 27: ......

