


GB-11
BK3420FL-EZ
G
B
6. Set up
■
INSTALLING THE BLADE
WARNING
• Do not install or remove the blade while the engine
is in operation.
• Use ZENOAH’s genuine replacement blades and
metal fixtures when installing the blade.
• When installing or removing the blade, fix the
machine securely, and wear robust gloves.
• The blade turns counterclockwise (viewed from
the gear case). When using an inside-out blade,
check the direction of the blade before installing
it. In particular, if you install a chip saw in the wrong
direction, the chips might break and scatter.
INSTALLING THE METAL BLADE
1. Remove the blade mounting bolt which is temporar-
ily fastened in the gear shaft (and which can be
loosened by turning it clockwise as it is a left-hand-
ed bolt) and the outer holder.
2. Put the blade on the blade rest plate with the blade
surface on which there is writing facing toward the
gear case, then fit the hole of the blade to the project-
ing part of the blade rest plate correctly.
3. Put the outer holder into the gear shaft with its convex
surface facing toward the blade.
4. Put the bolt cover on the outer holder, stop the whirl
of the blade rest plate with the L-shaped round rod,
and put the spring washer into the blade mounting
bolt (left-handed bolt). Then, tighten the bolt firmly.
[Tightening torque]
14.7 to 19.6 N
•
m (150 to 200 kgf
•
cm)
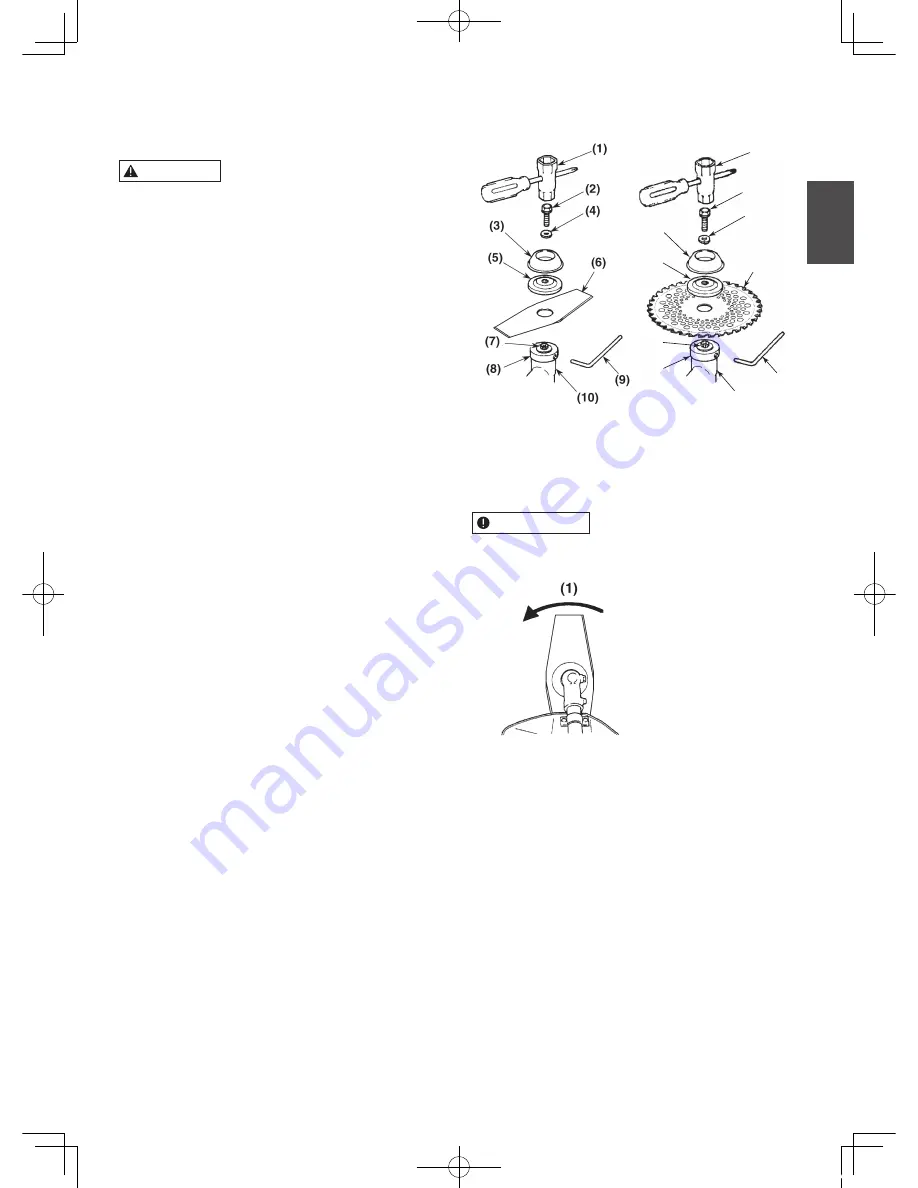
(1)
(2)
(3)
(4)
(5)
(6)
(7)
(8)
(9)
(10)
(1) Socket wrench
(6) Blade
(2) Blade mounting bolt (7) Gear shaft
(3) Bolt cover
(8) Blade rest plate
(4) Spring washer
(9) L-shaped round rod
(5) Outer holder
(10) Gear case
IMPORTANT
Look at the blade from above, and make sure that the
direction in which the blade is mounted is correct.
(1) Rotating direction
01-BK3420FL-EZ_GB_207_三.indd 11
12.9.21 1:24:14 PM


