background image

INTRODUCTION

CONGRATULATIONS ON THE PURCHASE OF YOUR NEW AIRHOME

5

 MULTIROOM AUDIO SYSTEM.

AIRHOME

5

 IS THE MOST STATE OF THE ART MULTIROOM AUDIO SYSTEM ON THE MARKET TODAY!

Your new AIRHOME

5

 can accommodate up to 4 x AMP

40

’s and 1 x AMP

5.1S

 for a total of 4 stereo rooms and 1 surround sound room throughout your 

home. 

(AMP40 & AMP5.1S not included - sold separately.)

To install AIRHOME5 you will require the following:

 - in-wall or in-ceiling speakers wired throughout your home with all speaker wiring homerun to a preferred central location
   where the AIRHOME

5

 can be safely mounted on a wall, and

 - a grounded electrical power outlet located adjacent to the homerun speaker wiring 

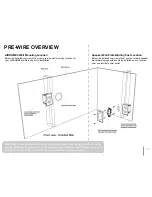
(See Page 11, "PRE-WIRE OVERVIEW".)

To activate your AIRHOME5 you will require:

 - a minimum of 1 x AMP

40

 or 1 x AMP

5.1S

, and

 - an operational wireless network 

(See ZENOVIA AMP40 & AMP5.1S USER GUIDE for more details.)

IMPORTANT:

 AIRHOME

5

 is not a standalone product. You will required at least 1 x AMP

40

 or 1 x AMP

5.1S 

and an operational wireless network to 

activate and operate the AIRHOME

5

 multiroom audio system. 

(See ZENOVIA AMP40 & AMP5.1S USER GUIDE for more details.)


NOTICE

: Read the important information printed in these boxes throughout the AIRHOME

5

 USER GUIDE & INSTALLATION INSTRUCTIONS. 

6

Summary of Contents for AIRHOME 5

Page 1: ...USER GUIDE INSTALLATION INSTRUCTIONS ...

Page 2: ......

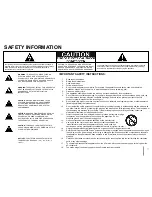
Page 3: ... damaged liquid has been spilled or objects have fallen into the apparatus the apparatus has been exposed to rain or moisture does not operate normally or has been dropped Care should be taken so that objects do not fall and liquids are not spilled into the unit through the ventilation ports or any other openings To completely disconnect this apparatus from the AC mains disconnect the power supply...

Page 4: ...e Canada This device complies with Industry Canada IC RF radiation exposure limits set forth for the general population This device complies with Industry Canada license exempt RSS standards Operation is subject to the following two conditions 1 This device may not cause interference and 2 this device must accept any interference including interference that may cause undesired operation of the dev...

Page 5: ...Your AIRHOME5 B Installing The Aluminium Mounting Bracket C Wall Mounting Your AIRHOME5 D Levelling Your AIRHOME5 E Strip All Speaker Wires And Add Speaker Wire Labels F1 Connecting Stereo 2 1 Speaker Wires F2 Connecting Surround Sound 5 1 Speaker Wires G Insert 6 Pole Speaker Connectors H Plug Grounded AC Power Cable Into Electrical Outlet I Re insert Aluminium Access Panel HOW TO ACTIVATE YOUR A...

Page 6: ...l location where the AIRHOME5 can be safely mounted on a wall and a grounded electrical power outlet located adjacent to the homerun speaker wiring See Page 11 PRE WIRE OVERVIEW To activate your AIRHOME5 you will require a minimum of 1 x AMP40 or 1 x AMP5 1S and an operational wireless network See ZENOVIA AMP40 AMP5 1S USER GUIDE for more details IMPORTANT AIRHOME5 is not a standalone product You ...

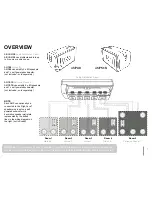
Page 7: ... not included AIRHOME5 Audio Distribution Panel AIRHOME5 can distribute audio to up to 5 rooms or audio zones AMP40 Stereo 2 1 AMP40 can amplify 2 x 8Ω speakers and 1 x self powered subwoofer not included sold separately AMP5 1S Surround Sound 5 1 AMP5 1S can amplify 5 x 8Ω speakers and 1 x self powered subwoofer not included sold separately IMPORTANT You will require at least 1 x AMP40 or 1 x AMP...

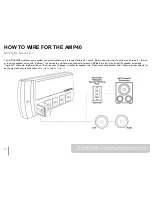
Page 8: ...al connection to a self powered subwoofer for each AMP40 Each left L and right R speaker output and optional subwoofer high level line out Sub requires 16 gauge 2 conductor speaker wire When connecting speaker wires observe proper polarity for each output and ensure connection of to and to IMPORTANT AMP40 will not power a passive subwoofer AMP40 must be connected to the speaker wire High Level Inp...

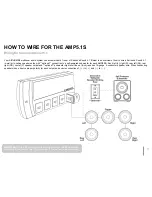
Page 9: ...n to a self powered subwoofer for each AMP5 1S Each left L right R rear left RL rear right RR center C speaker output and optional subwoofer high level line out Sub requires 16 gauge 2 conductor speaker wire When connecting speaker wires observe proper polarity for each output and ensure connection of to and to IMPORTANT AMP5 1S will not power a passive subwoofer AMP5 1S must be connected to the s...

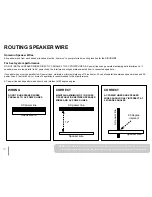
Page 10: ...aker wires must run parallel to AC power lines maintain a minimum distance of 12 inches or 30 cm of separation between speaker wires and AC power lines 2 feet or 60 cm or more of separation is recommended for best performance AC power lines and speaker wires should only intersect at 90 degree angles NOTE The installation of the speaker wiring and the type of speaker wire used must conform to the r...

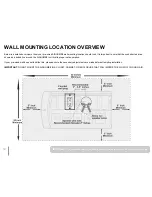
Page 11: ...ed electrician may also be mandated by some jurisdictions or insurance policies AIRHOME5 Wall Mounting Location Below is a detailed overview of how your pre wire wall mounting location for your AIRHOME5 should look prior to installation Speaker Wall Plate Binding Post Location Below is a detailed overview of how your decorative speaker wall plate binding posts should be installed and co located ne...

Page 12: ...ine around the AIRHOME5 is critical to proper safe operation If your pre wired wall does not look like this please ensure the necessary adjustments are made before attempting installation IMPORTANT DO NOT MOUNT THE AIRHOME5 IN A CLOSET CABINET OR ENCLOSURE THAT WILL IMPEDE THE FLOW OF COOLING AIR IMPORTANT The electrical power outlet wall plug must have a protective earth contact for grounding 12 ...

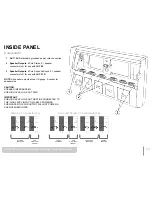
Page 13: ...x2 for use with AMP5 1S 1 2 3 NOTE All speaker outputs accept 16 gauge 2 conductor speaker wire CAUTION SPEAKER IMPEDANCE 8Ω SUB HIGH LEVEL LINE OUT 500Ω IMPORTANT SUB HIGH LEVEL LINE OUT MUST BE CONNECTED TO THE HIGH LEVEL INPUT ON A SELF POWERED SUBWOOFER THE SUB OUTPUT WILL NOT POWER A PASSIVE SUBWOOFER STEREO SPEAKERS SUB HIGH LEVEL LINE OUT FRONT SPEAKERS SUB HIGH LEVEL LINE OUT SURROUND SPEA...

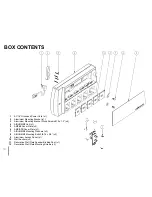
Page 14: ...crews 10 x 1 5 x4 AIRHOME5 Unit x1 AMP40 Cover Plate x4 AMP5 1S Cover Plate x1 AIRHOME5 Mounting Washers x2 AIRHOME5 Mounting Bolts 3 8 16 x 3 4 x2 Aluminium Access Panel x1 Wall Anchors x2 Decorative Wall Plate Speaker Binding Post x1 Decorative Wall Plate Mounting Screws x2 1 2 3 4 5 6 7 8 9 10 11 12 14 ...

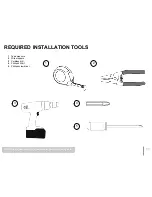
Page 15: ...REQUIRED INSTALLATION TOOLS Tape measure Wire strippers Cordless drill Phillips drill bit Phillips screwdriver 1 2 3 4 5 3 4 5 1 2 NOTE Always wear protective eyewear and or gloves when using tools 15 ...

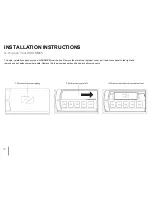
Page 16: ...refully unpack your new AIRHOME5 from the box Remove the protective top foam cover pull the access panel to the right and remove and set aside somewhere safe Remove the foam component box and unpack all components A Unpack Your AIRHOME5 16 ...

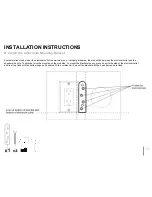
Page 17: ...the electrical outlet and the speaker wire hole The bracket must be mounted on the stud side To mount the bracket properly place it next to the side of the electrical outlet and line it up flush with the bottom edge as illustrated With a cordless drill mount the bracket with the 4 wood screws provided B Install The Aluminium Mounting Bracket 17 ...

Page 18: ...INSTALLATION INSTRUCTIONS C Wall Mounting Your AIRHOME5 With the mounting bolts and washers in one hand place the AIRHOME5 onto the bracket and thread the bolts loosely into the 2 holes illustrated 18 ...

Page 19: ...INSTALLATION INSTRUCTIONS D Levelling Your AIRHOME5 Using the incorporated level bubble level your AIRHOME5 Tighten the 2 bolts from step C to secure your AIRHOME5 in a level position 19 ...

Page 20: ...rip all wire ends so that there is 3 16 of an inch or 5mm of bare wire It is important that this is done accurately Too much bare wire may cause problems We recommend that you take the time to label each wire so that you can easily associate it with a corresponding audio listening zone NOTE Color coded labels are provided for your convenience 20 ...

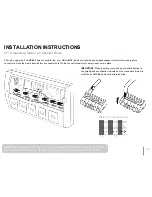
Page 21: ...ed into a connector hole flip the connector hammer to secure each wire in place Stereo 2 1 Connector x4 IMPORTANT When inserting your wires pay special attention to the polarity and specification indicated on the connectors Below is what the 4 x AMP40 6 pole connectors look like IMPORTANT SUB HIGH LEVEL LINE OUT MUST BE CONNECTED TO THE HIGH LEVEL INPUT ON A SELF POWERED SUBWOOFER THE SUB OUTPUT W...

Page 22: ...ed into a connector hole flip the connector hammer to secure each wire in place Surround Sound 5 1 Connectors x2 IMPORTANT When inserting your wires pay special attention to the polarity and specification indicated on the connectors Below is what the 2 x AMP5 1S 6 pole connectors look like IMPORTANT SUB HIGH LEVEL LINE OUT MUST BE CONNECTED TO THE HIGH LEVEL INPUT ON A SELF POWERED SUBWOOFER THE S...

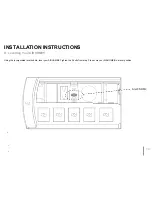
Page 23: ...STALLATION INSTRUCTIONS G Insert 6 Pole Speaker Connectors Insert the wired 6 pole connectors back into the corresponding audio listening zones NOTE Color coded labels are provided for your convenience 23 ...

Page 24: ... side of the wiring cavity and plug the other end into one an available grounded electrical power outlets IMPORTANT A grounding type plug has two blades and a third grounding prong The wide blade or the third prong are provided for your safety If the provided plug does not fit into your outlet consult an electrician for replacement of the obsolete outlet 24 ...

Page 25: ...urely installed Installation of your AIRHOME5 is now complete With the access panel firmly in the track and flush with the AIRHOME5 slide it to the left until it stops Locate the bottom edge of the access panel into the wiring cavity track as shown Pivot the access panel towards the wall 25 ...

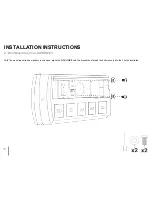
Page 26: ... AMP5 1S is intended to power 5 x 8Ω speakers 1 x self powered subwoofer Not included Sold separately Configure your AMP40 or AMP5 1S to join your preferred wireless network Insert your AMP40 or AMP5 1S into the corresponding slot on the AIRHOME5 NOTE The guidance slot on each AMP must be facing up Remove the AMP cover plates that correspond to the wired speakers that will be used The cover plates...

Page 27: ...mum of 1 x AMP40 or 1 x AMP5 1S and an operational wireless network for activation See ZENOVIA AMP40 AMP5 1S USER GUIDE for more details You don t hear any sound Confirm speakers and speaker wires are connected to the 6 pole connectors on the AIRHOME5 See AMP40 AMP5 1S USER GUIDE for more details Your AIRHOME5 will not play music Confirm you have at least 1 x AMP40 or 1 x AMP5 1S securely inserted...

Page 28: ...ALONE PRODUCT AIRHOME5 requires a minimum of 1 x AMP40 or 1 x AMP5 1S and an operational wireless network for activation See ZENOVIA AMP40 AMP5 1S USER GUIDE for more details IMPORTANT SUB HIGH LEVEL LINE OUT MUST BE CONNECTED TO THE HIGH LEVEL INPUT ON A SELF POWERED SUBWOOFER THE SUB OUTPUT WILL NOT POWER A PASSIVE SUBWOOFER NOTE ZENOVIA reserves the right to change product features specificatio...

Page 29: ...IA Hardware Product they are replacing or in which they are installed whichever is longer WARRANTY LIMITATIONS THAT MAY AFFECT CONSUMER LAW APPLICABLE TO ALL OF CANADA EXCEPT QUEBEC TO THE EXTENT PERMITTED BY LAW THIS WARRANTY AND THE REMEDIES SET FORTH ARE EXCLUSIVE AND IN LIEU OF ALL OTHER WARRANTIES REMEDIES AND CONDITIONS WHETHER ORAL WRITTEN STATUTORY EXPRESS OR IMPLIED ZENOVIA DISCLAIMS ALL ...

Page 30: ... Electronics Inc All Rights Reserved No part of this work may be reproduced modified distributed or otherwise used without written permission ZENOVIA AIRHOME are trademarks of Zenovia Electronics Inc All other trademarks and copyrights are property of their respective owners ZEN 003 400 CA060713ZN USER GUIDE INSTALLATION INSTRUCTIONS ...

Reviews: