background image

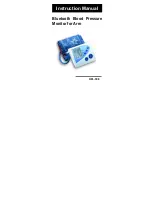
Instruction Manual 


Bluetooth  Blood  Pressure 
Monitor for Arm   


                                                    HPL-308 


Summary of Contents for HPL-308

Page 1: ...Instruction Manual Bluetooth Blood Pressure Monitor for Arm HPL 308...

Page 2: ...ols 6 Installing Replacing Batteries 7 Program Date and Time 8 How to Apply the Arm Cuff 8 Correct Measurement Position 10 How to Take A Measurement 10 How to Use the Memory Features 12 How to Delete...

Page 3: ...ssure Monitor For other specific information about your own blood pressure CONTACT YOUR PHYSICIAN Warning Signs Safety Statements ATTENTION Read user s manual before use Type BF applied part Health an...

Page 4: ...Leaving the batteries in the blood pressure monitor for a long period and not using the device may damage the main unit Suggestions before Measuring Blood Pressure 1 It is recommend that persons has o...

Page 5: ...pressure measurements 7 Keep the records for your physician as reference Reminded that one measurement does not provide you with real blood pressure value only long term records will reveal the long...

Page 6: ...mit data to PC mobile phone or turn on turn off Bluetooth in power off mode TIME To set the Date Time MEMO To review the measured record s manually To select the digit of Sate Time SCAN Automatically...

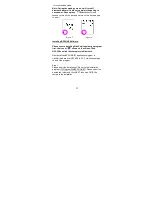
Page 7: ...hen Low Battery indicator appears on the display the batteries are weak Warning a Be sure to follow the instruction above when plugging the adapter and installing or replacing the batteries b We recom...

Page 8: ...nfirm the Year setting Then the number representing the Date will flash 4 In the same manner set the Month Date Hour and Minute Note After replacing batteries always check the Date Time is properly se...

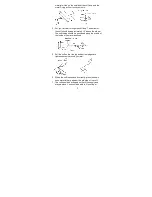
Page 9: ...elbow The cuff tubing should be positioned along the middle of the inside of your arm as shown 5 Pull the cuff so that the top and bottom edges are tightened evenly around your arm 6 When the cuff is...

Page 10: ...me level as your heart 2 Relax your arm and turn your palm upward 3 Make sure there are no kinks in the air tubing 4 After taking deep breaths for several times before measurement take a natural breat...

Page 11: ...tion continues and doesn t stop please untie the cuff immediately or turn off the unit by pressing the POWER for 1 second 4 The monitor exhausts the residual air when the measurement is completed The...

Page 12: ...of Systolic Diastolic and Pulse Averaged from all memorized readings Press MEMO button again to review the measurement from the latest to the earlies The latest measurement M 01 appears when you press...

Page 13: ...tion 2 Delete all measurements Turned off the unit first then keep pressing SCAN until dEL ALL displayed Press SCAN button again and all memories will be deleted when 00 ALL shown on the screen Search...

Page 14: ...ay Please type the bluetooth address from up to down and left to right and each device has different address code Figure 3 Figure 4 5 Press Send button again It shows and 41 41 means 41 records and it...

Page 15: ...Software Please ensure installing BlueSoleil application program first the icon of shows on the screen Then HPL 308 can link the computer via Bluetooth Next install the BPPLINK BT application program...

Page 16: ...16 Step 2 When you finish installing BPPLINK BT program the icon of BPPLINK will show on the desktop...

Page 17: ...ind the icon of BPPLINK BT and BlueSoleilon on the screen Step 2 Please connect the Bluetooth USB Adapter to the USB port on computer and turn on the HPL 308 unit Step 3 Click the icon of BPPLINK on t...

Page 18: ...and press BT button again the computer will connect the HPL 308 unit automatically Step 4 When PC screen shows below dialogue box it means connecting successfully You can start to take measurements re...

Page 19: ...se Click the button to take a measurement on real time and show the measuring curves of blood pressure pulse Sample Result Click the button to transfer the measured results of HPL 308 to PC for data s...

Page 20: ...20 View Pulse Look up the measured values that you have already stored on the computer View Result Look up the measured curves that you have already stored on the computer...

Page 21: ...21 Step 5 Manage Measured Results Line Graph Bar Graph...

Page 22: ...22 Circle Graph Compare Analyze Graph...

Page 23: ...23 Print the statistical graph 2 3 4 3 6 7 1 5 2...

Page 24: ...ve of blood pressure in left and right sides 6 Adjusting curve of blood pressure in upper and lower 7 Storing the measured curves Note 1 Listing one of the result information 2 Average values of blood...

Page 25: ...s of installing and uninstalling on user manual of the mobile phone How to Set up the program 1 System Setting Please install the BPPLINK application program on mobile phone Please click the file BPPL...

Page 26: ...on you can start taking measurements Note You have to power off HPL 208 and then power on before operating BPPLINK program It cannot establish blue tooth connection to power off HPL 208 3 Bluetooth Li...

Page 27: ...icon indicates the mobile phone can not find the Bluetooth service and Bluetooth Link failed Figure 7 Figure 8 7 Figure 8 Red icon indicates the mobile find the Bluetooth service but not connect yet...

Page 28: ...BPPLINK program 2 Disconnect means to disconnect the link of present Bluetooth 4 Measurement You can start to take measurements when Bluetooth Link set up successfully Please select Measure on main fu...

Page 29: ...which represent normal normal high warning and dangerous 4 Send a SMS to the programmed number automatically when the measurement results are over the setting value twice Meas Warning Normal Warning D...

Page 30: ...17 Figure 18 6 Historical Measurement Select Historical Meas on main function list Different colors indicate different results of the measurements green yellow purple and red colors which represent n...

Page 31: ...31 Figure 19 Figure 20 Figure 21 Figure 22 Figure 23 Figure 24 7 System setting Select System setting on main function list Refer to Figure 2 to set following functions...

Page 32: ...ook Set the SMS phone numbers Refer to Figure 27 3 ALARM Set the alarm clock to remind users to measure blood pressure Up to 6 times daily Refer to Figure 28 4 BlueTooth Manage the bluetooth address s...

Page 33: ...ne gasoline or solvent agent to clean the device 2 Wipe with a moistened cloth with clean water or a mild cleaning agent and then dry the device with a soft and dry cloth 3 The dirt on the cuff can be...

Page 34: ...to correct Incorrect posture in measurement or the user moves or talks during measurement There are any artificial interference and noise during measurement User is tense and does not relax or has sev...

Page 35: ...Insufficient or failure inflation Cuff broken Cuff is not fastened well please re fasten the cuff by following the instructions Pump or venting valve or deflation valve failure please contact the dist...

Page 36: ...ry polarities Remove the old batteries and wait for one minute then install the new batteries The inflation cannot be done or the air pressure cannot rise Cuff is not wrapped properly Check the arm po...

Page 37: ...oblem and the blood pressure reading may not be correct Under normal operating circumstance the reading at home is different from that of the clinics Usually people feel tenser in the hospital or clin...

Page 38: ...exhaust valve Sensor Semiconductor pressure sensor Power Supply 6V DC 4 AA alkaline batteries Measuring Interval 1 mmHg Operating Temperature Humidity 10 40 50 0 F 104 0 F 40 85 R H maximum Storage Te...

Page 39: ...instructions may cause harmful interference to radio communications However there is no guarantee that interference will not occur in a particular installation If this equipment does cause harmful int...

Reviews: