14
Milano Island Use, Care, and Installation Guide
M I L A N O
I S L A N D
C O R E
Mounting the Hood
Ceiling Preparation
1. Determine hood mounting location and
temporarily tape paper template (included with
the hood) to the ceiling.
2. Cut-out internal shaded area of template
to allow the ducting and electrical to pass
through.
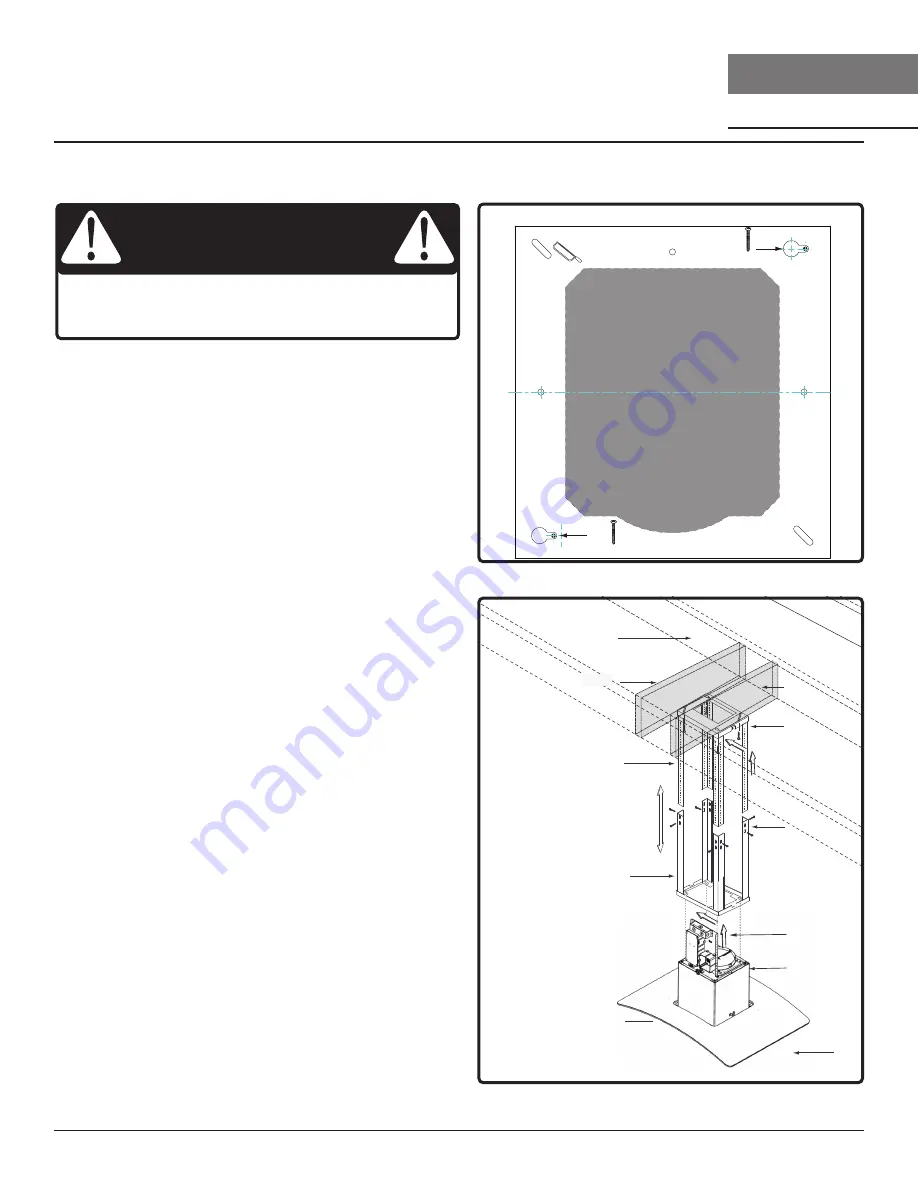
3. Add wood blocking (min. 2” x 4”) onto ceiling
joists to reinforce ceiling above the drywall.
(FIG. C1).
4. Secure (2) 1-1/2” wood screws into points A
and B of the paper template (FIG. B). Do not
completely tighten screws, leave approximately
1/4” exposed.
Hood Preparation
5. Remove screws securing top and bottom
support frames together.
6. Adjust support frame to accommodate the
desired hood height and re-assemble the frame
using the previously removed screws (2 screws
for each support frame arm). (FIG. C2).
3
1
2
Ceiling Joists
Wood Blocking
Top Support Frame
Bottom Support Frame
front
Hood Body/Canopy
4
6
5
FIG. C
Hood is intended to be mounted to a finished
ceiling.
CAUTION
A
B
Cut-Out Shaded Area
FIG. B
Installation Instructions
Front of Hood


