7
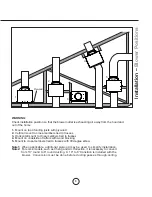
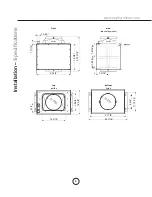
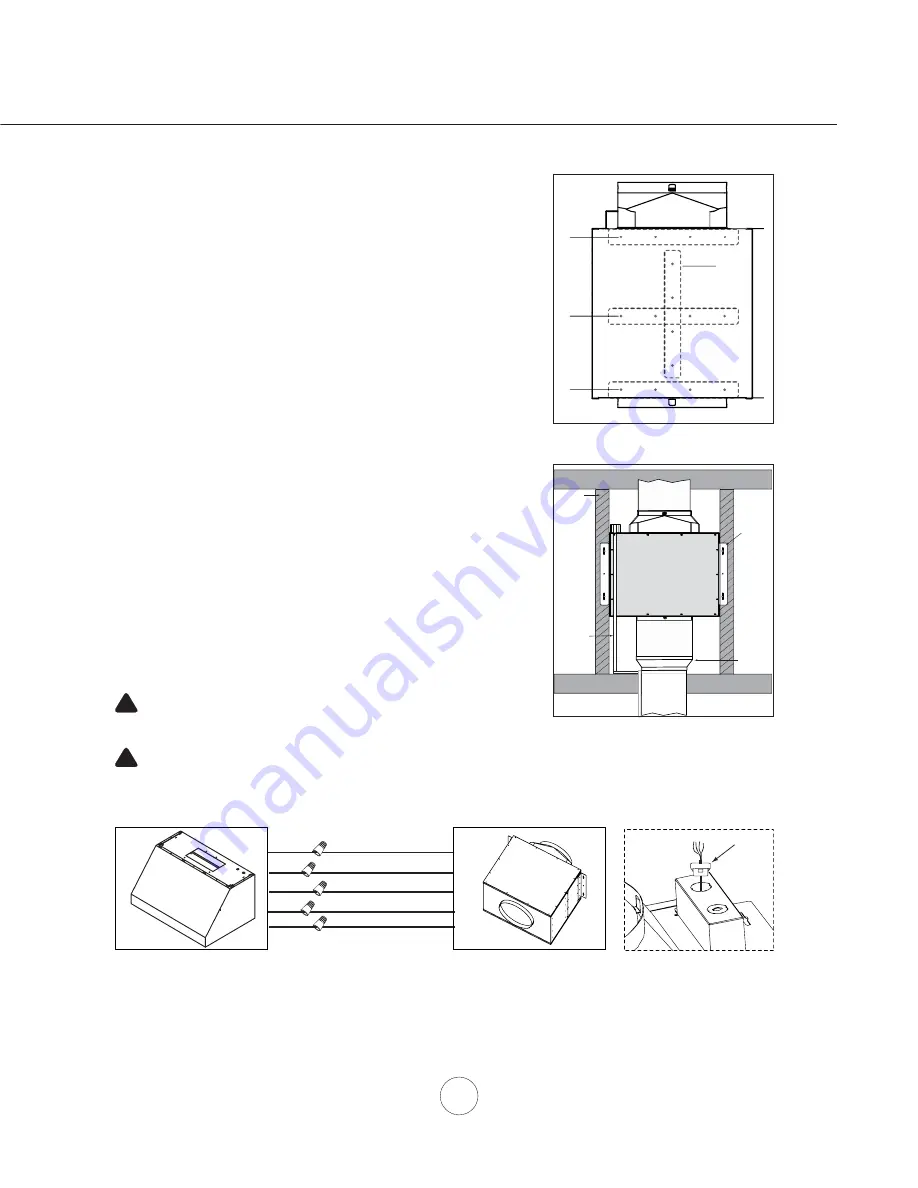
1. Determine blower position (examples on page 5).
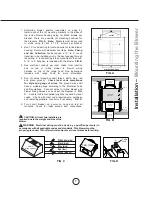
Install each of the (2) mounting brackets to the sides of
the in-line blower housing using (4) M4x8 screws per
bracket. There are possible (4) mounting positions for
the brackets.
FIG. A
Note:
Brackets must be secured
to studs using (2) M4 x 1-1/2” screws per bracket.
2. Run 10” round ducting to inlet and outlet of in-line blower
housing. Secure with aluminum duct tape.
Note: Cheng
and Arc Collection
hoods require a 10” to 8” round
transition to be installed prior to the duct passing through
the ceiling. 8” round ducting is then connected to the hood.
A 10” to 8” transition is included with the blower.
FIG. B
3. Run electrical conduit per local codes from junction
box on top of in-line blower to blower wiring
harness on top of the range hood. See instructions
included with range hood for more information.
4. Run (5) wires through conduit (black, white, blue, red
and green ground).
Check local code compliance
for style and gauge of wires.
The ground wire shall
have a suitable gauge according to the Electrical Code
and Regulations. Connect wires to in-line blower and
blower wiring harness on hood per the diagram in
FIG.
C.
A cable lock (not supplied) might be required by local
codes. Check with local code requirements, purchase
and install appropriate connector if necessary.
FIG. D
5. Turn circuit breaker on, power on hood and test all
functions. Check for leaks around duct connections.
1
2
3
4
bracket positions
outlet
CAUTION: At least two installers are
required due to the weight and size of the
blower.
!
WARNING: Electrical wiring must be done by a qualified person(s) in
accordance with all applicable codes and standards. This blower must be
properly grounded. Turn off electrical power at service entrance before wiring.
!
Installation –
Mounting the Blower
White (common)
Black (high)
Blue (med)
Red (low)
Green (ground)
PBN-1000A
HOOD
wiring harness
FIG. A
outlet
10” round
ducting
10” round
ducting
10” to 8”
transition
(if needed)
ceiling
wood
stud
PBN-1000A
in-line blower
PBN-1000A
in-line blower
bracket
electrical
conduit
8” round
ducting
FIG. B
Cable
Lock
FIG. C
FIG. D
Summary of Contents for PBN-1000A
Page 2: ...www zephyronline com...


