ZDK 250 135/155
22
Installation
www.zepro.com
14. Remove the mounting jig.
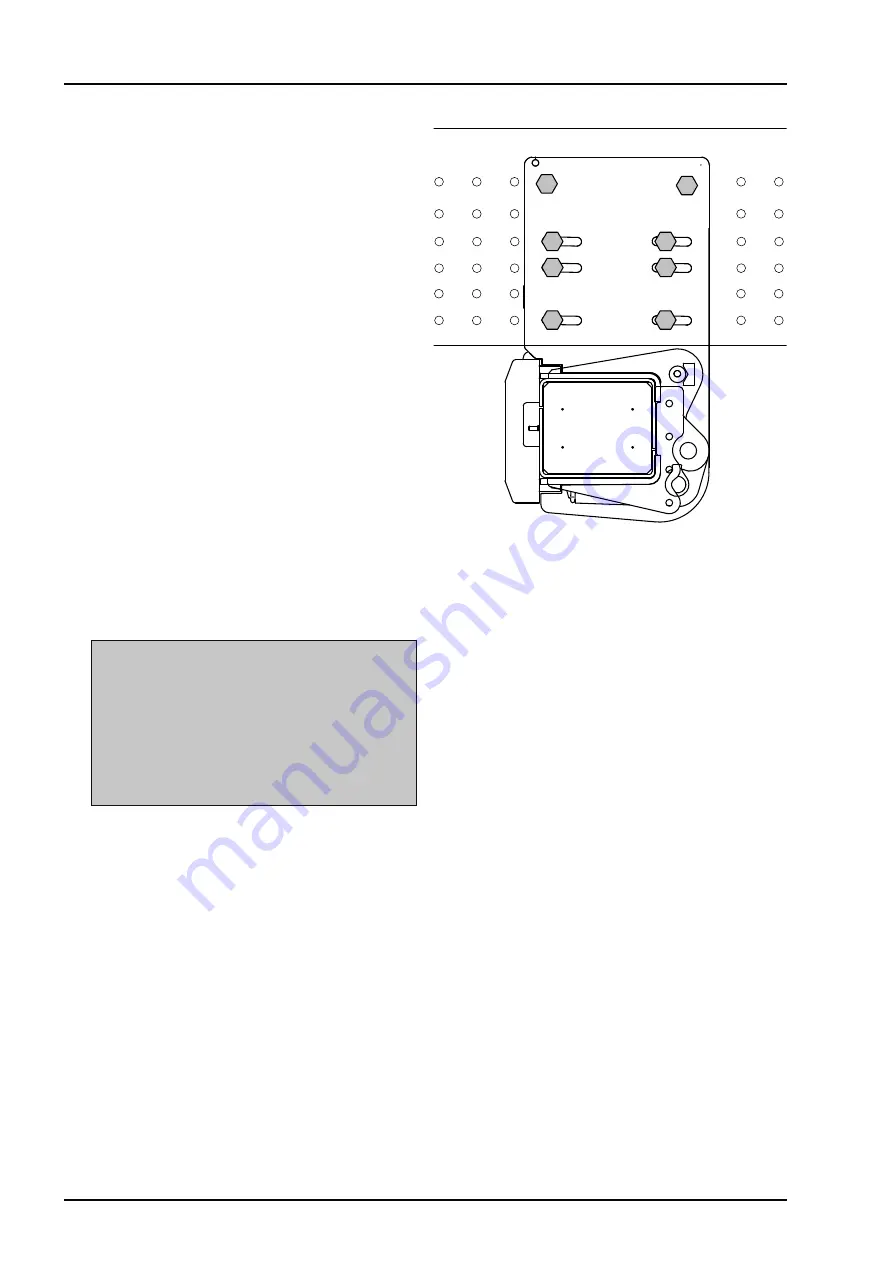
15. Bolt the brackets securely on the outside of the
vehicle chassis. Install in the slot-shaped holes
with at least 6 screws. Use suitable bolts (dura-
bility equivalent to M14 10.9 or higher) and install
the associated washer and nut on the inside of
the vehicle chassis. Install the bolts but do not
tighten. See Image 29.
16.
Check and perform fine adjustment regarding the
position of the lift. Then tighten the bolts with a
torque wrench.
Tightening torque: Standard for
selected screw.
17. Using a torque wrench, tighten the bolts holding
the U-profiles.
Tightening torque: 280 Nm.
18. Drill holes in the vehicle chassis for mounting
bolts in each bracket’s two upper round holes.
Use suitable bolts (durability equivalent to M14
10.9 or higher) and install the associated washer
and nut on the inside of the vehicle chassis.
See Image 29. Tighten the bolts with a torque
wrench.
Tightening torque: Standard for se-
lected screw.
m
WARNING!
Welding is not permitted on the chassis brackets.
Do not run the lift against the arm stop or with the
platform installed until all bolts are properly tightened
against the frame.
Do not place the lift under load until:
- the correct number of bolts are installed and
tightened to torque.
- the body is mounted to strengthen the truck frame.
19. Remove the mounting jig.
When installing on chassis with pre-drilled holes
Image 29. Installing the chassis bracket on
vehicle chassis with pre-drilled holes
Summary of Contents for ZDK 250 135
Page 2: ......
Page 65: ...ZDK 250 135 155 Registration 65 www zepro com...


