21
Cues
Cues
Once you have set up a scene that you like you can then record that into a cue.
Selecting a Cue Stack
Cues can be programmed into any of the 1000 user programmable cue stacks.
On an ORB, press the SELECT button above the cue stack you wish to program in. The LED in the SELECT button
illuminates to indicate that it is the active cue stack.
On an ORB XF, enter the syntax STACK n ENTER.
Recording a Cue
To record a cue, simply enter the command:
RECORD CUE n ENTER
Where N is the number of the cue you wish to record. As you have not specified any fade times or names, the desk
will enter the default values for the cue and the cue will be recorded.
After recording a cue, the command line is cleared, the fixtures remain selected but the parameters are untagged.
Subsequent cues can then be set up and recorded using the same method.
As you become more experienced with the desk, you will find the most efficient way of programming your cues -
for more methods. (See Page 96 of the full User Manual).
Note - Record Options Window
When you press the RECORD key the Record Options Window is displayed. This window allows you to adjust what
data is recorded, as required - see the Programming chapter (Page 86 of the full User Manual for further details).
Adjusting Fade and Delay Times
As well as the actual output levels recorded in the cue, each fixture parameter also has it’s own fade and delay times.
Default fade and delay times for Intensity, Colour, Beamshape and Position are defined in Desk Setup and can be
adjusted if required, prior to programming cues.
Once a cue has been programmed its times can be adjusted by using the following syntax:
CUE n TIME x DELAY y COLOUR {Fade} z ENTER
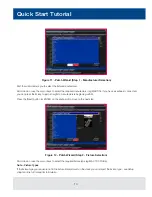
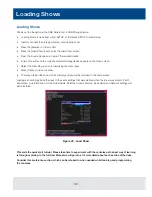
Any adjusted fade times display on the monitor in the Cue Stack window, which can also be manipulated using the
cursor keys and ENTER button in a similar format to a spreadsheet on a computer.

