


Introduction
This kit will give a Sirius 24 or a Sirius 48 the
ability to control up to 512 DMX channels, and
enables the user to define his own output patch.
Each desk channel can be programmed to control
any number of dimmer channels via DMX512,
with analogue outputs functioning simultaneously.
Using the DMX512 protocol eliminates the need
for bulky and expensive multicore cables by using
only three wires to control all 512 channels.
DMX512 is the most widely used digital
communication system between lighting desks
and DMX devices such as dimmers, colour
scrollers and moving lights
Controlling the Dimmers
The DMX output from the Sirius will normally be
connected directly to dimmers with DMX 512
inputs or to 0 to 10v input dimmers using one or
more Zero 88 demultiplexers.
(eg Demux 48 - Stock No 00-276-00).
Cable Details
The maximum cable length between a Sirius and
a Demultiplexer will depend on several factors
including:
Type of cable used
Number of DMX devices connected in the line
Electrical environment
Zero 88 recommend that shielded twisted pair
cable approved for RS422/485 (eg. Belden 9841
or Proplex PC222P) is used.
Communication over a hundred metres should
normally be possible without problem, for longer
cable runs it may be necessary to fit a DMX
Termination Plug (Stock No 00-269-00) to the last
DMX device in order to ensure completely error
free data transmission. It is good practice to
allways use a Termination Plug
Substitution of microphone or other types of cable
may be possible, but data transmission errors are
more likely, particularly over long distances.
Installation
Some modifications may be needed to your desk
to allow this DMX kit to be fitted.
All Sirius from
serial number: 283950 have been modified
.
To find out if your Sirius has been modified, follow
instructions below to remove the back of the
desk.
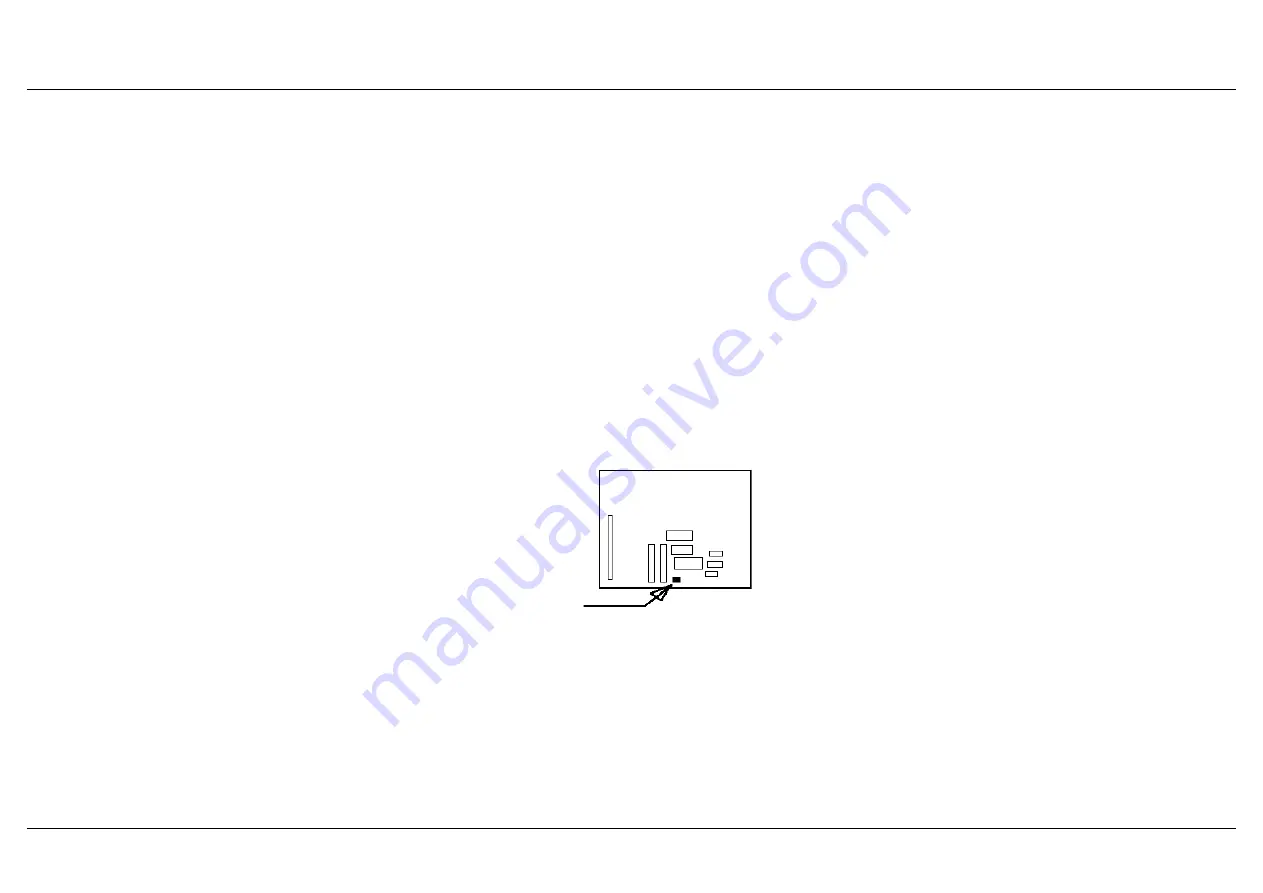
Find the microprocessor PCB,
(two in the Sirius 48).
Compare it with this sketch
Is there
a 2 way
connector
present
in the position
shown ?
If there is, your desk HAS BEEN modified, so
continue with these instructions..
If your Sirius is not modified, then go to the
enclosed modification kit, follow instructions to
modify the PCB’s then refit the PCB’s, and then
continue with these instructions.
Installation
Fitting the Sirius DMX Kit
Remove the bottom covers:
1 Switch off the desk;
remove the mains lead
and the key.
2 Carefully turn the desk over with the outputs
away from you.
3 Remove the ten screws in the large bottom
panel that are nearest you.
4 Remove the four screws (two in each side
plate) that secure the wide rear plate
containing the rubber foot.
5 Remove the bottom panel assembly.
REASSEMBLE IN THE REVERSE ORDER
To fit the DMX kit
1 Remove the hole plug from the spare hole in
the rear (connector) panel (see diagrams).
2 Pass the three wires through the hole, and fix
the XLR connector in place using the two
small self tapping screws provided.
3 You may find it easiest to connect the 3 XLR
wires to the screw terminals on the DMX
board at this stage. The connections are:
XLR 5
DMX board
Pin 1
Yellow
0V (Signal Common)
Pin 2
Red
1-
(Dimmer drive complement)
Pin 3
Black
1+
(Dimmer drive true)
4 Locate the three fixing holes for the DMX
board (see diagrams), and fix the DMX pcb in
place using the long screws and grey spacers
provided.
5 Locate the 5 changeable links at the end of
the DMX board, and set the end one to the
‘24’ position if the board is to be installed into
a Sirius 24, or to the ‘48’ position for a Sirius
Installation
Page 2


