Installation & Operation • 21
INSTALLATION & OpERATION
Rear load Cases
Rear load cases are shipped with the rear sliding doors removed and shipped loose with the case. To maintain proper temperature, the Rear
load case must be positioned in the opening of a walk-in cooler. Before attaching the cases to the walk-in, measure the diagonal opening of the
Rear load case to ensure a square case installation. If the diagonal measurements are not within 1/8", the case must be re-leveled. After the
cases are set, install the doors into the opening by inserting the top of the door into the upper track and then sliding the bottom of the door into
the lower track.
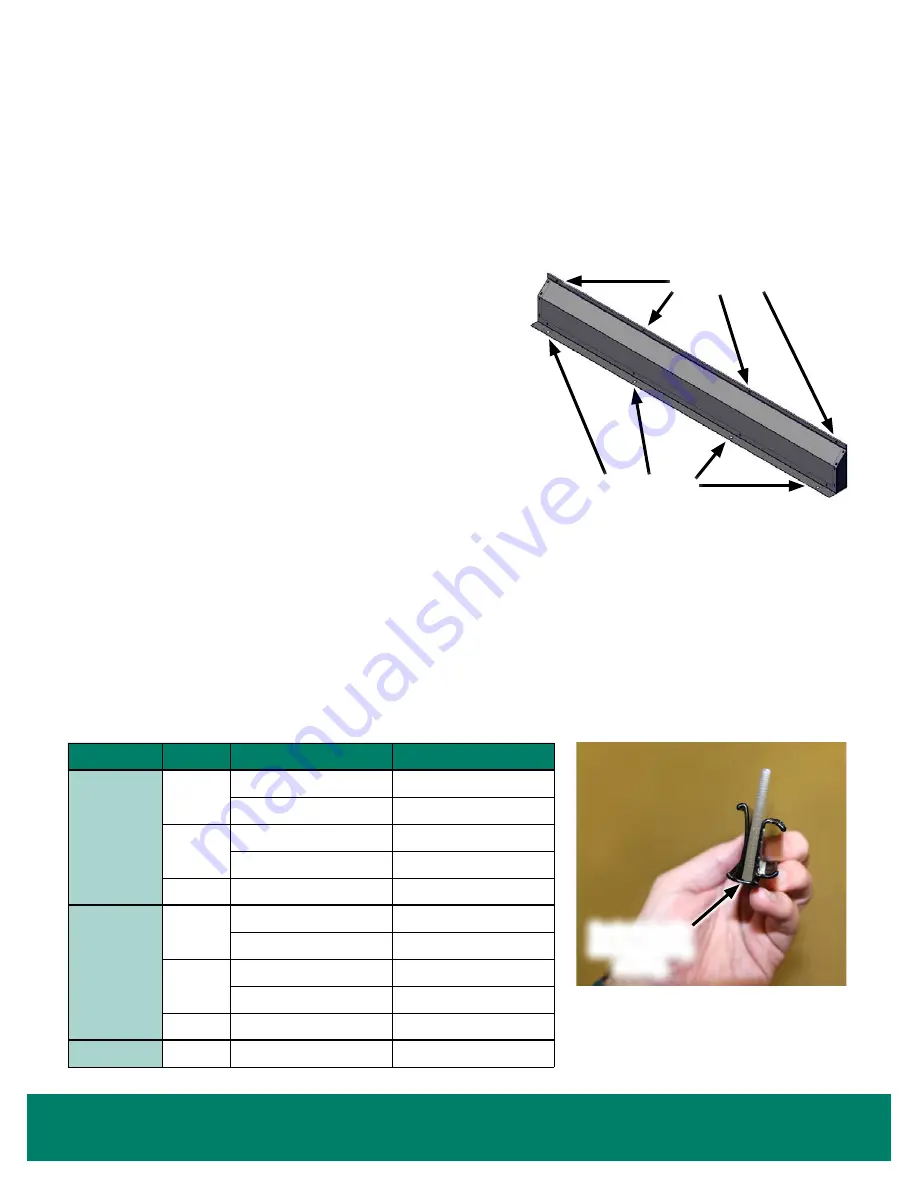
Rear load cases may be ordered with an optional insulated close-off for
applications where a walk-in cooler does not have a curb along the floor (
). After the case is set, the close-off must be installed to the bottom
rear of the display case. It protects the display case from potential damage if a
pallet of food or beverages is smashed into the back of the display case. It also
prevents warm air from entering the walk-in cooler and prevents water from
flowing underneath the display case.
Shelves & Stocking Product
Shelf location may be adjusted in 1" vertical increments in any position for best
display advantage. Make sure the shelf brackets are securely seated before
placing any product on the shelf. The standard shelves may be tilted down at a
10° angle. Optional shelf assemblies are available that may be tilted at 5°, 10°, or 15° angle.
The case may be stocked with product after it has operated at least 24 hours with correct case temperature and proper control operation. When
stocking the shelves, leave a gap between the product and the shelf above, which allows an air curtain on top of the product. Product should not
extend beyond the front of the shelves or bottom wire rack. Do not exceed shelf load capacity (
).
To unassemble a shelf, insert a putty knife between the side of the shelf and the shelf bracket. Pry the pieces apart to disengage the bracket.
Shelves can be ordered with 1", 2", or 3" acrylic product stops, which fit into aluminum price tag molding. Slide the product stop into the price
tag molding and push it down to the bottom of the channel (
). The channel of the price tag molding may need to be pried open
with a screwdriver, but the product stop should slide in easily once started.
FIGURE 28: Rear Load Insulated Close-Off
Fasten to Floor
Fasten to Case
SHELF TYPE
DEPTH
BRACKET TYPE
LOAD CAPACITY (LBS.)
Solid Shelf,
Standard Duty
22"
2-Position (0°/10°)
250/150
4-Position (0°/5°/10°/15°)
250/250/150/100
24"
2-Position (0°/10°)
250/150
4-Position (0°/5°/10°/15°)
250/250/150/100
27"
2-Position (0°/10°)
250/150
Solid Shelf,
Heavy Duty
22"
2-Position (0°/10°)
350/150
4-Position (0°/5°/10°/15°)
350/250/150/100
24"
2-Position (0°/10°)
350/150
4-Position (0°/5°/10°/15°)
350/250/150/100
27"
2-Position (0°/10°)
350/150
Wire Shelf
22"
2-Position (0°/10°)
250/150
FIGURE 29: Shelf Load Capacities
FIGURE 30: Acrylic Product Stops (1" Shown)
Product stop fits
into the price tag
molding.


