Installation & Operation • 9
INSTALLATION & OPERATION
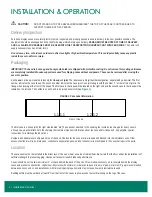
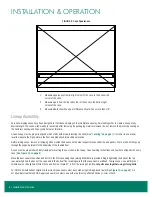
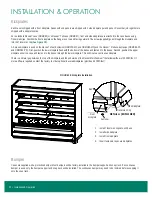
FIGURE 10: Case Joint Caulking Instructions
IT IS CRITICAL TO FOLLOW THIS PROCEDURE TO
ENSURE CASES ARE PROPERLY SEALED.
Note: Apply sealant to only one case—not both cases—as
excessive amounts of sealant may squeeze out of the case
joint. The sealant will spread out when the cases are joined.
1. Apply 1/4" to 3/8" wide beads of Butyl caulk along the ceiling,
rear wall, and base of the case where indicated by the dotted
lines in the drawing. Always apply 2 beads where specified.
2. After cases are joined and tightened, caulk the top and back
exterior seams, if possible, to ensure a tight seal.
3. Repeat this process between each case in the lineup.
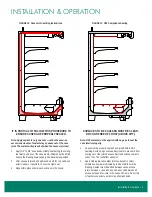
SURFACES TO BE CAULKED MUST BE CLEAN,
DRY, AND FREE OF FROST (ABOVE 40ºF).
Note: NSF sealant must be applied with no gaps to seal the
case interior properly.
1. Cases must be properly caulked and joined before NSF
caulking. Avoid using excessive Butyl caulk to prevent it from
coming out of the joints because Butyl and silicone sealants
will not mix. That will affect adhesion.
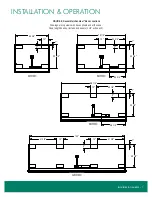
2. Apply NSF-approved sealant (silicone-based) in small,
smooth beads where indicated by the dashed lines in the
drawing. Sealant must be added between cases at case
joints, between a case and an end panel, and between all
access holes and cut-outs in the case end frame. Do not thin
or feather excessively, as that may affect adhesion.
FIGURE 11: NSF Compliance Sealing

