PREMIER QUATRO INSTALLATION MANUAL (Fyreye MKII) Firmware Versions: PANEL 1.84 & LOOP 3.70
Doc No: GLT-215-7-1 Issue: 1.36 Author: NJ/TE DATE: 25/05/2017
33
7.1.11 ALARM TONE SETUP
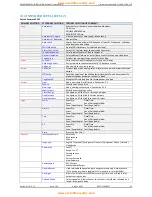
In the Fyreye MKII Protocol, the Quatro allows the alarm tone to be chosen from a list of 16 predefined tones (The panel will be set
at a default of TONE 0). The tone is selected on a “per loop” basis, but most installations would require the same tone to be
selected on each loop
(This applies to MKII addressable sounders only)
.
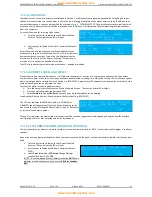
From the installer menu, select the option
Loop
Press
ENTER
Select the option
Alarm Tone Setup.
The panel then displays which tone is selected for each loop. Adjust as required.
Press
F1 (Accept)
to accept the selection, or
F4 (Cancel)
to retain the previous settings.
7.1.12 FLASHER OPERATION
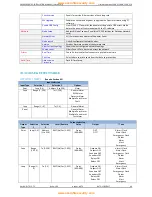
In the Fyreye MKII Protocol, the Quatro allows the flashers to operate in one of two ways. To turn off when the sounders are
silenced or to stay running until the panel is reset. This is selected on a “per loop” basis, but most installations would require the
same setting to be selected on each loop
(This applies to MKII addressable flashers and sounder flashers)
.
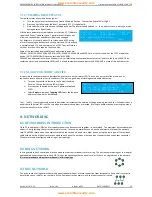
From the installer menu, select the option
Loop
Press
ENTER
Select the option
Flasher Operation
The panel then displays which setting is selected for each loop (Normal or Until Reset). Adjust as required.
Press
F1 (Accept)
to accept the selection, or
F4 (Cancel)
to retain the previous settings.
To investigate how the entire menu command structure of the Quatro panel interlinks, refer to Section 18. This illustrates the
command structure in a menu tree flowchart of the control keys.
7.1.13 CONFIGURING THE LOOPS
Turn the key switch clockwise to the Controls Enabled Position. The controls Active LED will light.
Press any key followed by the level 2 password (default is 2222).
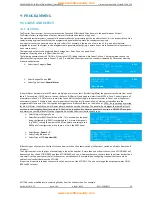
The display changes to the view indicated in the yellow box
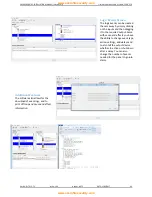
to the right. Select Loop (by pressing
ENTER
or
or
►
)
and then
Autosearch
and choose Loop No. 1 and Accept
(by pressing the
F1
key). The panel searches the chosen
loop. After the search has reached 100%, the panel
displays the number of valid points (i.e. devices) found, and
the number of double addresses (i.e. points with the same
address), and the number of addresses that have been
modified since the last search.
Loop ►| INSTALLER
Zones ►|
Points ►|
Actions ►▼
Check that the number of VALID devices is the same as the
number of devices actually installed on the loop.
If the panel reports an open or short circuit for a loop,
select
Autocheck
. This checks the number of points found when the
loop is checked from the start of the loop (S) and then checked
from the end of the loop (R). The Start and Return values indicate
the position of the loop fault from each end of the loop.
Loop ►|*Autosearch |
| Autocheck |
| LED Flash Setup |
▼ Alarm Tone Setup ▼
Loop 1 is now configured. Press
Accept
and then repeat
the operations above for the remainder of the loops fitted
to the panel.
Press
Accept
then
Cancel
then the
◄
key until the screen
either shows SYSTEM NORMAL or FAULT. The panel will
now function as a basic system.
SEARCH LOOP REPORT 1
VALID :115 DOUBLE ADDRESS :003
CHANGED TYPE :002
[Accept][Cancel] [Reports]
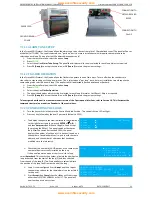
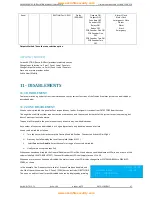
FRONT LOADING
COVER
PAPER FEED
CONNECTION TO
NETWORK CARD
RS232
CONNECTION TO
24v DC
www.acornfiresecurity.com
www.acornfiresecurity.com


