background image


ZETRON 


Model 4010 Radio Dispatch Console 

Programming Manual 

Part No. 025-9229C.1 


Please check for change information at the front of this manual. 


Copyright © 2008 by Zetron, Inc. 

All Rights Reserved 

Summary of Contents for 4010

Page 1: ...ZETRON Model 4010 Radio Dispatch Console Programming Manual Part No 025 9229C 1 Please check for change information at the front of this manual Copyright 2008 by Zetron Inc All Rights Reserved...

Page 2: ......

Page 3: ...pied or reproduced in any form without the prior written consent of Zetron Inc TRADEMARK NOTICE GE is a trademark of General Electric Company USA IBM MDA PC AT and PC XT are registered trademarks of I...

Page 4: ......

Page 5: ...Channel 3 4 Defining Console Keys 3 7 Moving Console Keys 3 11 Copying Console Keys 3 11 Listing Key Definitions to Printer 3 12 QUITTING CPS 3 13 TUTORIAL CONCLUSION 3 15 4 PROGRAM OPERATION INTRODU...

Page 6: ...D 1 Top Menu D 1 EDIT D 2 Position Configuration D 2 System Configuration D 31 OTHER MENUS D 41 APPENDIX E PAGING FORMAT REFERENCE TABLES MOTOROLA AND G E TONE GROUP FREQUENCIES E 1 MOTOROLA AND G E C...

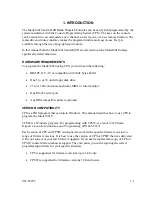
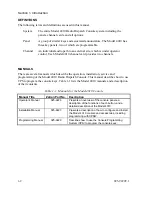
Page 7: ...1 INTRODUCTION HARDWARE REQUIREMENTS 1 1 DEFINITIONS 1 1 MANUALS 1 2...

Page 8: ......

Page 9: ...row x 80 column monochrome MDA or color monitor One RS 232 serial port Any IBM compatible printer optional VERSION COMPATIBILITY CPS is a DOS program that can run in Windows This manual describes how...

Page 10: ...ion service and programming of the Model 4010 Radio Dispatch Console This manual describes how to use CPS to program the console keys Table 1 1 lists the Model 4010 manuals and a description of their...

Page 11: ...2 INSTALLATION TO USE CPS START HERE 2 1 Making a Working Program Diskette floppy diskette system 2 1 Making a Working Directory fixed disk system 2 2...

Page 12: ......

Page 13: ...A label side up and close the drive door Make drive A the default drive by typing A and pressing the ENTER or RETURN key looks like If your machine has two floppy disk drives skip to step 12 Format t...

Page 14: ...N to exit the FORMAT program Copy the CPS master diskette to the new diskette by typing COPY A B and pressing ENTER The COPY program now copies the files from the CPS master diskette to the new diske...

Page 15: ...orrect drive letter in the above command Copy the CPS master diskette files to your fixed disk by typing COPY A C CPS and then pressing ENTER When the files are copied remove the CPS master diskette f...

Page 16: ...Section 2 Installation 2 4 025 9229C 1...

Page 17: ...3 1 Getting Help 3 2 The ESC Key 3 2 Data Editing Keys 3 2 CREATING YOUR FIRST CONSOLE CONFIGURATION 3 3 Creating a New Channel 3 4 Defining Console Keys 3 7 Moving Console Keys 3 11 Copying Console K...

Page 18: ......

Page 19: ...now loaded and begins by clearing the screen and displaying the MAIN menu CPS MENU AND DATA EDITING KEYS Before you program your first key on the console read the following information on how the men...

Page 20: ...1X shows the keys that are used to move the cursor between data fields while editing The means to also press the CTRL key Table 3 1 Keyboard Function Assignment PC Keyboard Key Use Home Moves cursor t...

Page 21: ...ew The program now prompts you to enter a new system name Enter a name up to eight characters and press ENTER Looking at the highlighted status line at the bottom of the screen you will note that the...

Page 22: ...w the channel number and name are entered Select E Read Write drIve New Edit List Upload Program Quit Help ZETRON MODEL 4010 CONSOLE PROGRAMMING SYSTEM Position configuration System configuration Sele...

Page 23: ...e 3 5 Channel is Undefined Window Next the program wants to know the type of channel for channel 1 For this tutorial assume you wish to create a tone control channel Pressing the DOWN ARROW key twice...

Page 24: ...with T1R1 stands for one transmitter and one receiver base station A base station designated T2R2 will have a transmitter that can be remotely signaled to transmit on one of two frequencies and a rec...

Page 25: ...you return to the MAIN menu and then press the E key Press the P key or position the menu bar to Position Configuration and press ENTER The menu shown in XFigure 3 9X will be displayed Select E Read...

Page 26: ...ING SYSTEM Position configuration System configuration Selection P A Key Definition B Audio Control C ANI Decode Display D Display Operation E Miscellaneous Selection A Upper Panel Lower Panel Spare I...

Page 27: ...by pressing the A key or by positioning the menu bar to Channel Functions and pressing ENTER The KEY FUNCTIONS menu is overlaid with the channel selection windows XFigure 3 14X Channel Number Channel...

Page 28: ...at was just defined When an X is displayed on a key it indicates that the key has been defined Second the key definition is now displayed in the Key Definition window A frequency select F1 key is the...

Page 29: ...tion and press ENTER Now the frequency select keys are in their correct locations The next keys to be defined are Volume Adjust and Volume Mute They are programmed in much the same manner as the previ...

Page 30: ...the program pops up a window asking if it should change the channel numbers to another channel If you answer Yes to this prompt a channel selection window will be displayed on the screen Enter the di...

Page 31: ...ing Remember that pressing the ESC key will cancel the report To return to the MAIN menu press the ESC key QUITTING CPS Press Q from the MAIN menu to quit CPS As a precaution the program checks if you...

Page 32: ...new file name the CREATE FILE menu XFigure 3 19X is displayed Select Q Read Write drIve New Edit List Upload Program Quit Help ZETRON MODEL 4010 CONSOLE PROGRAMMING SYSTEM Select file name to save con...

Page 33: ...TORIAL CONCLUSION This tutorial described how to create a new channel define move and copy console keys and print reports For a complete description of CPS functions see Section 4 The complete CPS men...

Page 34: ...Section 3 Tutorial 3 16 025 9229C 1...

Page 35: ...ey Definition 4 4 B Position Layout 4 10 C Audio Controls 4 10 D ANI Decode Display 4 11 E Display Operation 4 13 F Miscellaneous 4 13 System Configuration 4 15 A Channel Configuration 4 15 B Channel...

Page 36: ......

Page 37: ...rmally the first operation performed after starting CPS is reading a system configuration file from the disk to the edit buffer A system configuration contains all of the key definitions for the two p...

Page 38: ...e program will check if the file exists on the current drive and directory If the file exists the program will display a menu asking if you want the file overwritten Answering Y overwrites the file Pr...

Page 39: ...current configuration before changing to a new system Changing the Current System Name Pressing N from the MAIN menu displays the New System Name window If modifications have been made to the current...

Page 40: ...Display Operation F Miscellaneous Selection A Upper Panel Lower Panel Spare Inputs Selection U Figure 4 4 PANEL SELECTION Menu To edit the key definitions for a panel press U to select the upper pane...

Page 41: ...ing a Channel Function key is selecting the channel to use After the program displays the channel selection window enter a channel number from 1 to 14 or use the UP and DOWN arrow keys to move through...

Page 42: ...play the Voting Aux Input window Enter a previously defined auxiliary input number and press ENTER Table 4 1 Key Categories General Channel Functions System Functions Select Transmit Keys Frequency Se...

Page 43: ...nds with the word keys displays a submenu requesting more information Selecting any other function completes the key definition and removes the System Functions windows All the system functions are de...

Page 44: ...8 are relay closures See Model 4010 Radio Dispatch Console Service Manual Part No 025 9228 for pin outs Selecting Auxiliary Input Output Functions will display the AUXILIARY INPUT OUTPUT menu From th...

Page 45: ...Function is not required select either No Tone for tone controlled channels or No Current for DC controlled channels and press ENTER Next the Transmit Function menu is displayed Select the function t...

Page 46: ...r Panel 2 Undefined Panel 3 Undefined Select Panel 2 or 3 2 Figure 4 7 Position Layout D Model 4115 Console Expander E Model 4015 Console Expander F Model 4011 Console Expander Select Model A Figure 4...

Page 47: ...nnels If you select options B or C the program will prompt if you wish to have the channels unmute when the CTCSS monitor function is active if appropriate for this type of channel Muting Signaling To...

Page 48: ...display Select option E to configure Emergency ANI Acknowledge A No ANI display B Selected Channels C ANI Channel Unmute Operation D All Channels E Emergency ANI Acknowledge ANI Operation C Figure 4 9...

Page 49: ...MF digit accepted If the calling unit has automatic ANI calling 1 or 2 seconds should be sufficient If the calling unit uses a manual keypad to enter the ANI address 5 seconds is the normal timeout En...

Page 50: ...n lamp or B for a solid green lamp Select option C to set the duration the Call lamp remains on after the received audio stops Enter a value from 0 to 60 in the next window Note that this time duratio...

Page 51: ...face card and cannot be assigned to radio control channel cards If the channel does not exist the program will prompt to Create new channel Answering Y will create a new channel and place the cursor i...

Page 52: ...mat defined and must have a leading digit assigned to it There are 14 leading digits available to be assigned among the nine different paging formats the Model 4010 console is capable of generating so...

Page 53: ...t ports are defined in exactly the same way To create a new input port enter a port number between 1 and 38 or 9 and 38 and press ENTER If the port does not exist the program will prompt Create new in...

Page 54: ...ect Key Configuration to print a graphical representation of the two programmable key panels showing which keys have been defined and their definitions Select System Configuration to print the channel...

Page 55: ...ramming Interconnection The console s display should now display PROGRAM If not try sliding the switch back and forth until the display shows PROGRAM From the PROGRAM menu select Program Console and p...

Page 56: ...elect Upload and press ENTER The console now checks its internal configuration data and sends it to the PC while displaying UpLoading CPS if the data is valid After a few moments the display shows DON...

Page 57: ...FF F6 1150Hz PL3 WC 2 ON PL3 WC 2 ON WC 2 ON F5 1250Hz PL2 WC 1 OFF PL2 WC 1 OFF F4 F4 1350Hz PL1 WC 1 ON PL1 WC 1 ON F3 F3 1450Hz RPTR ON RPTR ON RPTR ON RPTR ON 1550Hz RPTR OFF RPTR OFF RPTR OFF RPT...

Page 58: ......

Page 59: ...D T1R1 PAGING T2R2 T4R4 0 0 mA RX RX RX RX 2 5 mA 5 0 mA F1 F1 F1 7 5 mA 10 0 mA 12 5 mA RPTR ON F1 W PL F2 F2 15 0 mA 15 5 mA 2 5 mA PL MON PL MON PL MON PL MON 5 0 mA RPTR OFF R2 OFF F3 7 5 mA 10 0...

Page 60: ......

Page 61: ...el of a Dual Channel Card needs Motorola GE standard currents set bit switch 3 of the card s configuration switch to the ON position If the B channel of the Dual Channel Card needs Motorola GE standar...

Page 62: ......

Page 63: ...s D 30 System Configuration D 31 A Channel Configuration D 32 B Channel Monitor Configuration D 35 C Channel Paging Configuration D 35 D Paging Format Configuration D 37 E Edit Custom Calls D 39 F Inp...

Page 64: ......

Page 65: ...her menus are described in the final subtopic Top Menu After loading and starting the program the top level MAIN menu will be displayed see Figure D 1 Using the arrow keys or the highlighted letter se...

Page 66: ...ition configuration System configuration Selection P Figure D 2 EDIT Menu Position Configuration This menu see Figure D 3 allows you to assign Model 4010 key functions and define certain system option...

Page 67: ...er selecting the appropriate panel you will see a key map of the particular panel that you are configuring All key definitions are performed from this screen Use the arrow keys to position the cursor...

Page 68: ...Select with Voting D Instant Select E Instant Select with Voting F Instant Transmit G Volume Keys H Patch I Main Standby J ANI Source K Site Intercom L Monitor M Phone ON OFF Hook N Phone Hook Flash S...

Page 69: ...No Tone B 2 5 ma B 650 HZ C 5 0 ma C 750 HZ D 7 5 ma D 850 HZ E 10 0 ma E 950 HZ F 12 5 ma F 1050 HZ G 15 0 ma G 1150 HZ H 15 5 ma H 1250 HZ I 0 0 ma I 1350 HZ J 2 5 ma J 1450 HZ K 5 0 ma K 1550 HZ L...

Page 70: ...N 12 5 ma N 1850 HZ O 15 0 ma O 1950 HZ P 15 5 ma P 2050 HZ DC Current C Tone Frequency A FREQUENCY SELECT WITH VOTING This function is identical to the frequency select function with the added featur...

Page 71: ...cation of the voter result only The channel is not selected by the voter input INSTANT TRANSMIT The Instant Transmit function will cause the transmitter on the assigned channel to activate even though...

Page 72: ...pwards Releasing the key will cause the volume to be set to the displayed level The red key indicator will illuminate while the key is pressed VOLUME DOWN KEY This key is assigned to a specific channe...

Page 73: ...radio allowing the received audio to be heard at the console The indicator LED will remain on until the channel s transmitter is keyed This key is functionally the same as the Monitor key on the lowe...

Page 74: ...mit Selected Channels F Last Call Transmit Unselected Channels Figure D 12 TRANSMIT KEYS Menu NORMAL TRANSMIT This key will cause the selected channel s to transmit This is functionally the same as th...

Page 75: ...om key allows the console operator to communicate with the Selected radio site by using the audio lines as an intercom path When this key is pressed only the audio is sent to the channel the transmitt...

Page 76: ...MUTE KEYS Menu ALL MUTE This All Mute function key will cause the audio from all Unselected channels to be muted The selected channel will be unaffected If a muted channel is selected it will be unmut...

Page 77: ...lection of a unique Remote TX Function appropriate for that type of channel F1 F8 or Custom DC Tone The first choice in these menus is always None allowing the Remote TX Function to remain unchanged I...

Page 78: ...not been defined it will not appear in the GROUP INSTANT TX menu CH 1 E CH 2 CH 3 CH 4 CH 5 CH 6 E CH 7 CH 8 Enter E to select a channel a space to disable a channel GROUP INSTANT TX Press ESC when y...

Page 79: ...this key clock setting can be initiated by pressing the CLOCK SET key on the key panel The first time the CLOCK SET key is pressed the seconds unit on the time display will be highlighted with an und...

Page 80: ...nterface Card Part No 702 9403 is installed in the console The transfer keys are used to cause the next channel select key pressed to perform the indicated function eliminating the need for individual...

Page 81: ...red to different channel s Begin by entering the previously defined leading digit representing the desired paging format and then the page code in the window shown in Figure D 22 Press ENTER to go on...

Page 82: ...one with Instant Call option A Select Stack another page option B instead to enter the new page If the page stack editing required is extensive it may be easier to erase the key s programming see the...

Page 83: ...rolled channels A CTCSS Select B Repeat On Off C Coded Clear D Second Receiver Unmute Mute E Wild Card I On Off F Wild Card II On Off Selection A EXTENDED CHANNEL FUNCTIONS Figure D 25 EXTENDED CHANNE...

Page 84: ...I O Ports If these I O ports are defined as Spare ports instead of Auxiliary in the System Configuration section of the main Edit menu then Auxiliary Input Output port numbers 1 8 become unavailable a...

Page 85: ...reflect the state of the input Pick the desired input by entering the input number or using the UP and DOWN ARROW keys The input must have been previously defined using the SYSTEM CONFIGURATION menu A...

Page 86: ...ION menu Output Number 1 Output Name door Figure D 30 Output Number Window Type an interlock group number 1 32 in the window shown in Figure D 31 If the interlock group has been already used this inpu...

Page 87: ...if the main PC board Spare Aux outputs have not been defined as Auxiliary Outputs in the SYSTEM CONFIGURATION menu this is the default e Custom Channel Functions The Custom Channel Functions are used...

Page 88: ...ed if you really want to erase this function as shown in Figure D 34 Erase key Y Yes No Figure D 34 Erase Window 3 Move The Move selection moves the function currently assigned to this key to another...

Page 89: ...in Figure D 37 Panel 0 Main Upper Panel 1 Main Lower Panel 2 Undefined Panel 3 Undefined Select 2 or 3 2 Figure D 37 POSITION LAYOUT Window Note Panel 2 must be defined prior to panel 3 Selecting the...

Page 90: ...the received audio level can be set using the volume control This will prevent a channel from being turned completely off by setting the audio to an inaudible level 3 Default Volume Level This allows...

Page 91: ...the Delay Eliminator the transmitter key will be held on for approximately one second after the PTT is released D ANI Decode Display The ANI keys only have meaning if the ANI option is installed in th...

Page 92: ...Operation Selecting option C opens the window shown in Figure D 43 Unmute upon receiving ANI Y Yes No Figure D 43 ANI Channel Unmute Window d Emergency ANI Acknowledge Selecting option D opens the win...

Page 93: ...estination addresses will not be displayed Only the last six digits following the destination address will be displayed If more than six digits follow during the timeout period the leading digits will...

Page 94: ...y A Dynamic Mic Deskmic Gooseneck B Electret Mic Handset Headset C Spare Input 9 steered D Hookswitch steers Soft Xmit keys Electret PTT Selection Figure D 49 AUDIO SOURCE FOR SOFT TRANSMIT KEYS Menu...

Page 95: ...y that is always generated by the channel card itself 4 Dynamic Mic Selection This feature determines the physical device assigned to the D Mic input Choose either Gooseneck or Desk Mic 5 Parallel Rem...

Page 96: ...tem The types of control are Tone Direct Current DC and Local In the window shown in Figure D 52 enter a channel number from one to 14 or use the UP and DOWN ARROW keys to edit a previously defined ch...

Page 97: ...ol Figure D 54 STANDARD CUSTOM Menu If Standard was selected in the menu in Figure D 54 the next parameter to enter is the type of radio connected to the channel The standard configuration choices wil...

Page 98: ...STANDARD Menu T1R1 WITHOUT PAGING Single frequency standard tone controlled radio without paging option This is the option to use if the channel is to be used without an external paging terminal T1R1...

Page 99: ...le or if the particular channel is inoperative This will prevent the system from reporting errors on a defective or absent channel card B Channel Monitor Configuration The Private Line Monitor control...

Page 100: ...finished keying up the transmitter and the start of the first page in a stack De emphasis enabled If enabled this option will roll off the amplitude of paging tones above approximately 1200 Hz Inter...

Page 101: ...d 4 Undefined 5 Undefined 6 Undefined 7 Undefined 8 Undefined 9 Undefined A Undefined B Undefined C Undefined D Undefined Selection 0 PAGING FORMAT LEADING DIGIT Figure D 58 Paging Format Leading Digi...

Page 102: ...g the TRANSMIT key or a PTT button This will maintain the talk time until the key is released even if the programmed value has not yet expired Entering a value of zero will disable this feature for th...

Page 103: ...ay and is in the receive mode for the number of seconds specified in the fourth window shown in Figure D 60 After this time the normal transmit mode is resumed and paging continues with the next page...

Page 104: ...rd main PC board Spare Aux Ports Port numbers 9 38 are assigned to any optional Expanded Aux I O Card s in the Model 4010 console A Auxiliary Inputs B Auxiliary Outputs C Spare Input Output Mode Selec...

Page 105: ...arker tone transmissions It should be between one and 300 seconds K Priority Marker Amplitude Enter the desired amplitude of the marker tone It should be between one and 100 percent L Custom HLGT Dura...

Page 106: ...tion or the system configuration as described in Section 4 UPLOAD Use this function to transfer a previously downloaded console configuration back up to the CPS program running on your PC All key defi...

Page 107: ...ect to save your changes you will be prompted for the file in which you wish to store them The highlighted file name in the displayed menu will be the configuration file that was originally loaded To...

Page 108: ...Appendix D CPS Menu Structure D 44 025 9229C 1...

Page 109: ...MOTOROLA AND G E CODE PLANS E 2 GENERAL ENCODING PLANS E 3 REACH ENCODING PLAN E 4 ZETRON TONE GROUPS FOR REACH ENCODING E 4 REACH CODE PLAN E 5 FIVE SIX TONE FREQUENCIES AND TIMINGS E 5 DTMF TONE PA...

Page 110: ......

Page 111: ...none none 1011 6 B none none none none none none 1122 1 Diagonal Tone 569 1 979 9 569 1 569 1 979 9 979 9 979 9 Tone Tone Groups No Mot B Mot Z GE A GE B GE C Mot 10 Mot 11 0 371 5 346 0 682 5 652 5...

Page 112: ...2 2 2 2 2 2 2 2 2 2 4 3 4 3 3xx 5 1 3 3 3 3 3 3 4 2 4 2 5 2 3 3 3 3 4xx 1 6 4 4 3 2 3 2 4 4 4 4 2 6 4 4 4 4 5xx 5 5 3 2 5 5 2 6 5 5 2 6 5 5 5 5 3 6 6xx 6 6 2 4 2 5 6 6 2 5 6 6 6 6 3 5 6 6 7xx 6 1 4 2...

Page 113: ...4xx 4 4 569 1 4 4 569 1 4xx 953 7 Mot 4 5xx 5 5 979 9 5 5 979 9 5xx 953 7 Mot 5 6xx 2 1 N A 6 6 979 9 6xx 979 9 Mot 1 7xx 4 5 N A N A N A 7xx 979 9 Mot 5 8xx 5 4 N A N A N A 8xx 979 9 Mot 4 9xx 2 4 N...

Page 114: ...09 0 10 2799 0 25 1664 0 40 990 0 55 588 0 11 2704 0 26 1608 0 41 956 0 56 568 0 12 2612 0 27 1553 0 42 923 0 57 549 0 13 2523 0 28 1500 0 43 892 0 58 530 0 14 2437 0 29 1449 0 44 862 0 59 512 0 60 49...

Page 115: ...des 1xx 5xx and 7xx FIVE SIX TONE FREQUENCIES AND TIMINGS Tone Set CCIR EEA EIA ZVEI DDZVEI DZVEI PZVEI Tone No 0 1981 1981 600 2400 2400 2200 2400 Tone No 1 1124 1124 741 1060 1060 970 1060 Tone No 2...

Page 116: ...nce Digits 1 through 14 including A B C D and QUICK CALL ONE TWO PLUS TWO FREQUENCIES AND TIMING Tone A Series B Series Z Series No Freq Code Freq Code Freq Code 0 358 9 CA 371 5 CB 346 7 CZ 1 398 1 D...

Page 117: ...ker Duration I PagingFormat Configuration D PriorityMarker Interval J Edit CustomCalls E PriorityMarker K Input Output Configuration F CustomHLGTDuration L CHANNEL CONFIGURATION A DCControl Momentary...

Reviews: