

3
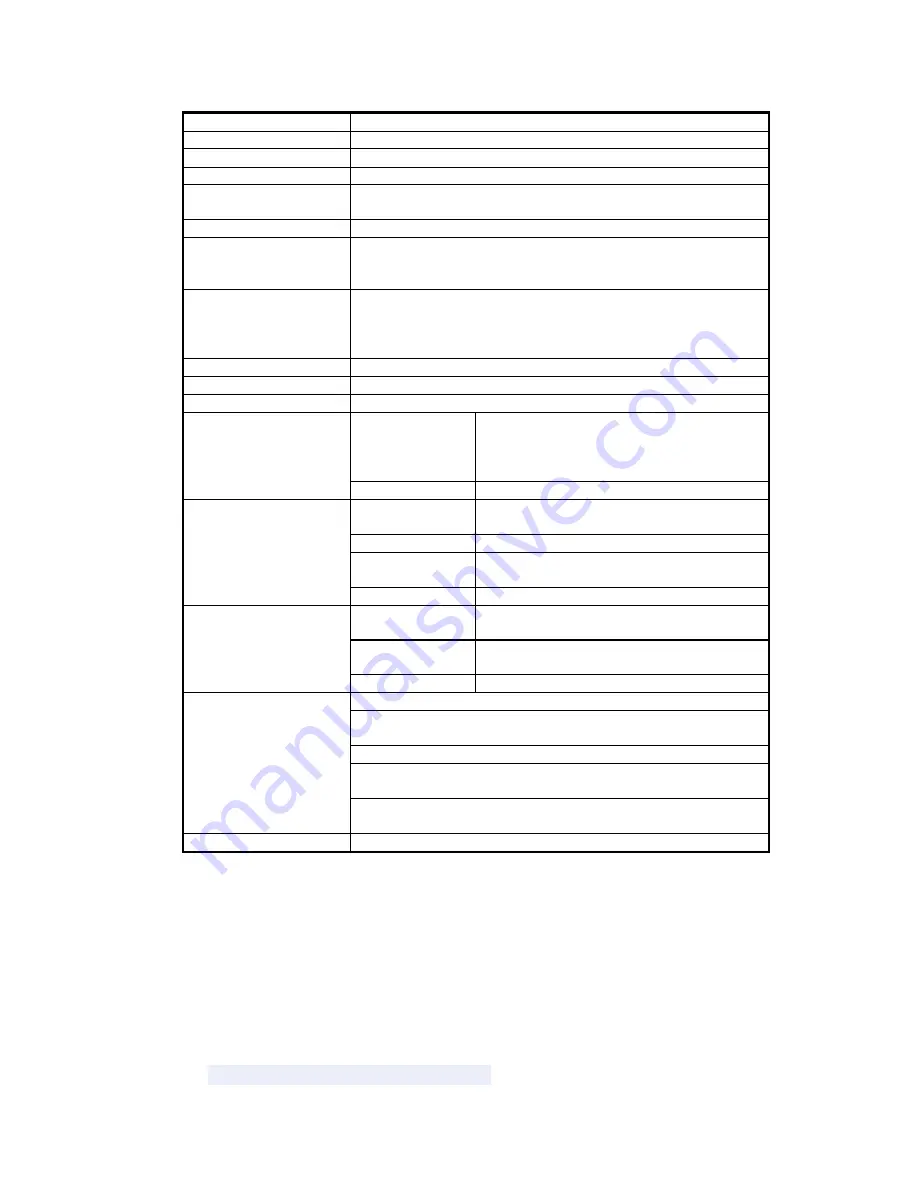
Dot pitch (Vertical)
0.125 mm (8 dots/mm) line feed pitch
Effective Printing area
72mm
Number of Columns
ANK 48 columns/line (maximum 12x24 dot font)
Paper width
80mm
Paper thickness
60 to 100 um: some paper in this range may not be used because of
paper characteristics
Printing Speed
Maximum 80mm/sec (640 dot line/sec)
Character type
Alphanumeric, kana: 159 types
International characters: 195 types
JIS Kanji (Kanji CG loaded board: about 6800types
Character, dimensions
(WxH), number of columns
12x24 dots, (1.5x3.0mm), 48 columns:ANK
24x24 dots, (3.0x3.0mm), 24 columns: ANK
8x16 dots, (1.0x2.0mm), 72 columns:ANK
16x16 dots (2.0x2.0mm), 36 columns: ANK
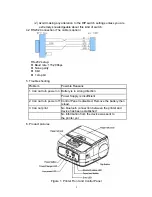
Interface
Conforms to RS232C / Centronics/USB
Dimensions
112 x 116.5 x 59.5mm (WxLxH)
Weight
470g (with battery)
Head
Pulse resistance: 50 million pulses/dot (under our
standard conditions);
Abrasion resistance: paper travelling distance
50km (print ratio: 12.5% or less)
Life
Cutter 500,000
cuts
Operating
temperature*
0°C to 50°C
Operating humidity
20 to 85% RH (no condensation)
Storage
temperature
~20 to 60°C (paper not included)
Operating Environment
Storage humidity
5 to 95% RH ( no condensation)
Head temperature
detection
Detected by thermistor
Paper out/mark
detection
Detected by photo-interrupter
Detection
Platen release
Detected by sliding switch
High Sensitive Paper TF50KS-E4 (Nippon paper)
Standard paper: TF60KS-E (Nippon paper),
FTP-020PU001 (58mm), PD105R (Oji Paper), FTP-020P0701 (58mm)
Long Life Paper PD160R-N (Oji Paper)
AFB-235 (Mitsubishi Paper), TP50KJ-R (Nippon Paper), HA220AA
(Nippon Paper)
Recommended thermal
sensitive paper
Medium Life Paper TF60KS-F1, FTP-020P0102 (58mm), PD17OR (Oji
Paper), P220VBB-1Mitsubishi Paper)
RAM
256K (MAX:4M flash&SRAM)
Remark: All contents are subject to change without notice.
3. Operation Guide
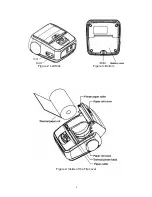
3.1. Loading Paper Roll and Placing the Battery
(1) Open the top cover then lift up the paper compartment.
(2) Place the paper roll in the compartment and make sure it is aligned to fit
inside.
(3) Pull the leading edge of the paper roll straight to pass over the paper
cutter. Close the top cover.
(4) Place the battery according to the + & - markings.
(5) Push the battery rightward to the end.
(6) Close the battery cover and tighten screw to lock it.


