3.6 HOUSING
3.6.1 Disassemble the transmission housing
halves
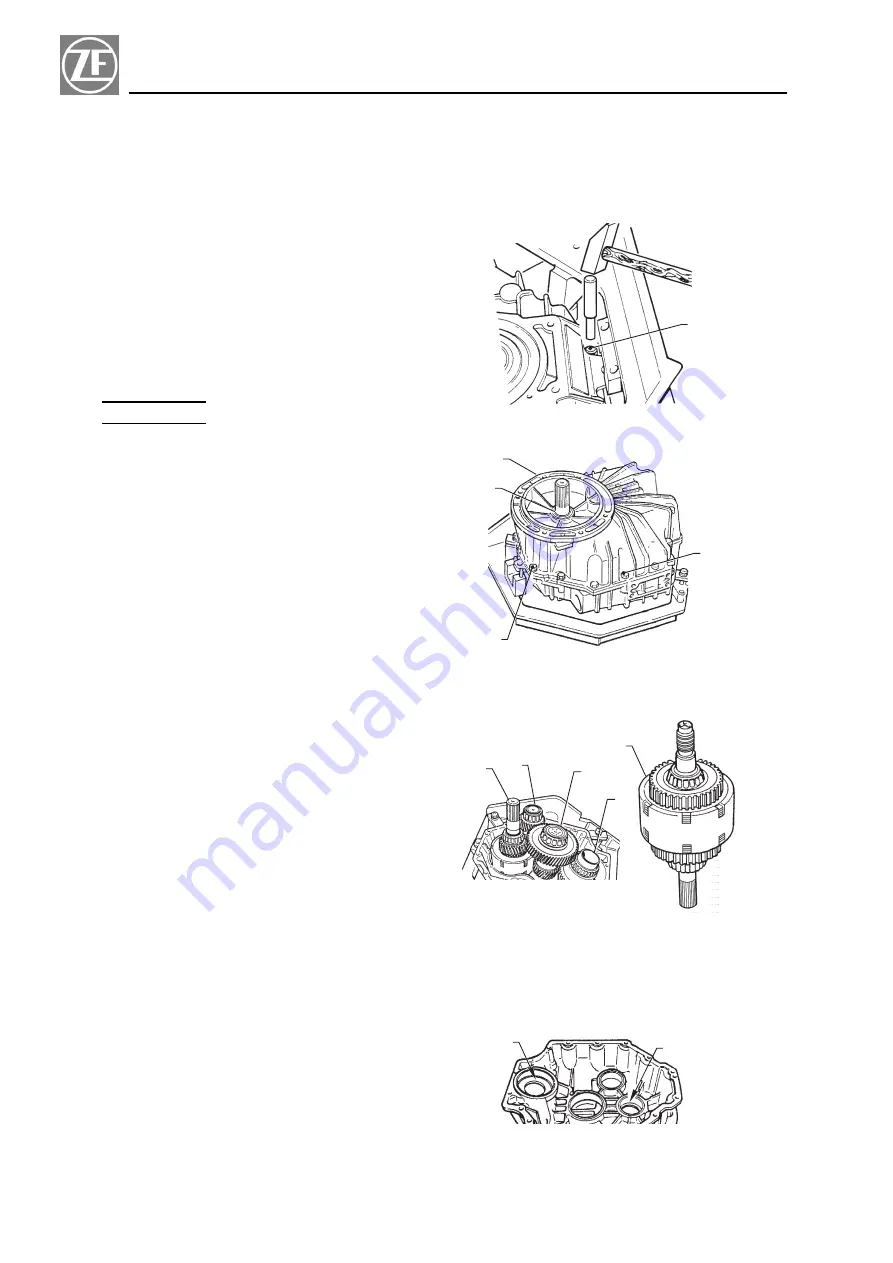
Using a adequate drift punch, top the locating pins
(item 1, Fig. 6-1a and 6-1b) out of the housing.
Loosen and remove all hex head bolts and lock
washers (item 2 and 3, Fig. 6-1b). Using a plastic ham-
mer slightly top the split line of the case halves to break
the seal. Then remove the input side of the housing.
+
|
IMPORTANT
|
Only transmission type ZF 63 IV, i=2.0and i=2.5.
First remove radial shaft seal ring (item 4, Fig. 6-1b)
to remove the housing half.
3.6.2 Removal of shafts and gears
Take the gear set out of the housing
.
intermediate shaft (item 1, Fig. 6-2)
.
input shaft (item 2, Fig. 6-2)
.
output shaft (item 4, Fig. 6-2)
.
reversalshaft (item 3 Fig. 6-2).
Check all gears, bearings and three piston rings on the
input shaft (item 2, Fig. 6-2) for signs of wear or failure.
If any of the gears are damaged or showing signs of ex-
cessive wear ZF-HURTH MARINE recommends repla-
cing the complete gear set.
When taper roller bearings need replacing on the input
shaft, the butting rings and needle bearings should
also be replaced. When replacing inner roller bearings
use the same manufacturer.
To check for correct clutch operation, rotate the gears
on the input shaft. If it is hard to turn the gears, the
clutch is probably damaged.
3.6.3 Removal of radial shaft seals
Input shaft seal
Using a sealmandrelinside the housing top the input
shaft sealout. Discard sealand replace with a new
seal. (item 2, Fig. 6-3a).
NOTE
For transmission types ZF63 IV, i=2.0and i=2.5
(item 2, Fig. 6-3a) the radial shaft seal ring has al-
ready been removed before dismounting the hous-
ing half.
12
Repair Manualand Spare Parts List
Section 3
1
FIG. 6 - 1a
1
2
3
4
FIG. 6 - 1b
1
2
3
4
2
FIG. 6 - 2
1
2
FIG. 6 - 3a


