17
17
GB
Using the tyre inflation device (fig. 6, 7, 8)
The compressed air tyre inflation device (G) is used
to inflate car tyres. With the corresponding accesso
-
ries it can also be used to inflate and regulate bicycle
tyres, inflatable dinghies, air mattresses, balls etc.
Pressure can be released by actuating the vent valve
(7).
m
Attention!
The manometer has not been officially
calibrated! After inflating, please check the air pres
-
sure with a calibrated device.
Using an air blow gun
You can also use the tyre inflation device (G) as an
air blow gun to clean out cavities and to clean soiled
surfaces and work equipment.
To do so, please first remove the hose with the valve
adapter (8).
Now screw the blow-out adapter (D) to the tyre infla
-
tion device (G).
Using the adapter set
The adapter set enables you to use the following ad-
ditional capabilities of the tyre inflation device:
• Pumping up balls with the help of the ball needle
(F).
• The valve adapter (E) enables bicycle tyres to be
inflated.
• Filling pools, air mattresses or boats with the help
of the additional adapter (K).
• Filling items with threaded valves (e.g. Boats) with
the screw-in valve adapter (J).
•
Deflating large volume items. The deflating adapter
(C) can be used for this.
• The two conical universal adapters (A/B) can like-
wise be used for inflating air mattresses.
Electrical connection
The electrical motor installed is connected and
ready for operation. The connection complies
with the applicable VDE and DIN provisions.
The customer‘s mains connection as well as
the extension cable used must also comply with
these regulations.
Damaged electrical connection cable
The insulation on electrical connection cables is of-
ten damaged.
This may have the following causes:
•
Passage points, where connection cables are
passed through windows or doors.
•
Kinks where the connection cable has been im-
properly fastened or routed.
•
Places where the connection cables have been cut
due to being driven over.
•
Insulation damage due to being ripped out of the
wall outlet.
•
Cracks due to the insulation ageing.
Such damaged electrical connection cables must not be
used and are life-threatening due to the insulation dam-
age.
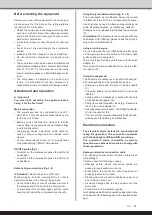
Before starting the equipment
Before you connect the equipment to the mains sup-
ply make sure that the data on the rating plate are
identical to the mains data.
•
Check the equipment for damage which may have
occurred in transit. Report any damage immedi-
ately to the transport company which was used to
deliver the compressor.
•
Install the compressor near the point of consump-
tion.
•
Avoid long air lines and supply lines (extension
cables).
•
Make sure that the intake air is dry and dustfree.
•
Do not install the compressor in a damp or wet
room.
•
The compressor may only be used in suitable rooms
(with good ventilation and an ambient temperature
from +5 °C to 40 °C). There must be no dust, acids,
vapors, explosive gases or inflammable gases in the
room.
•
The compressor is designed to be used in dry
rooms. It is prohibited to use the compressor in
areas where work is conducted with sprayed water.
Attachment and operation
n
Important!
You must fully assemble the appliance before
using it for the first time!
Mains connection
• The compressor can be connected to any 220 -
240-240 V~ 50 Hz shock-proof socket which is pro-
tected by a 16 A fuse.
• Before you use the machine, make sure that the
mains voltage is the same as the operating voltage
(see the rating plate).
• Long supply cables, extensions, cable reels etc.
cause a drop in voltage and can impede motor
start-up.
• At low temperatures below +5°C, sluggishness
may make starting difficult or impossible.
ON/OFF switch (fig. 1)
• To switch on the compressor, press the button (2)
on position I.
• To switch off the compressor, press the button (2)
on position 0.
Establishing connections (fig. 3, 4)
m
Attention!
Switch the device off for this.
When doing so, hold the coupling firmly in order to
avoid injuries due to the hose springing back.
•
Connect the fitting of your compressed air tool to
the compressed air hose (5) of the compressor.
• To disconnect this coupling again, pull the quick-
coupling (4) back at the compressed air hose (5).
Summary of Contents for YELLOW PROFILINE YPL 183-2 KIT
Page 2: ...2...
Page 3: ...3 1 1 3 2 7 G H J K B C D E F A 4 6 8 C H J K...
Page 4: ...4 5 3 4 4 4 6 8 5 4 2 5 7...
Page 5: ...5...
Page 20: ...20...
Page 21: ...21...
Page 22: ...22...


