background image

22

The reference figures can be found on pages 3, 4, 5, 6 and 7 of this manual and in the Quick Guide. 

 EN 

zeta sonic

CHAPTER 6:   INSTALLATION AND COMMISSIONING

6.1  WARNINGS AND PRECAUTIONS

Before carrying out installation, make sure that all safety conditions exist 

and follow the indications given below carefully.

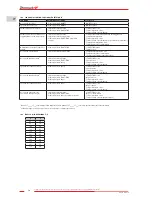
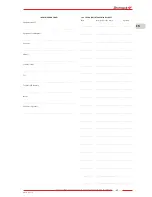
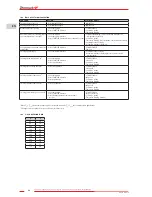
6.2  ACCEPTED ENVIRONMENTAL CONDITIONS

Unless stated otherwise, at the time of ordering, it is intended that the 

equipment must be envisioned to function regularly in the following 

environmental conditions:

Place of Use  

Indoors

Altitude  

Up to 2000 m

Working temperature                                 

 From 10°C to 35°C

Humidity  

Max 80%

Conditions different to those prescribed can cause anomalies or sudden 

breakdown.

Lighting in the installation area of the equipment must be sufficient to 

guarantee good visibility in all points of the equipment.

Luminosity not less than 200 lux must be guaranteed. The lighting must be 

uniform without reflections, which could dazzle the operator.

The equipment itself cannot cause explosions or fire: the 

equipment is not prepared and/or designed to operate in 

environments with explosive atmosphere or with the risk of fire.

The working area lighting plant is an important factor for the 

safety of persons and the quality of work. In Italy this subject is 

governed by a Ministerial Decree that clearly determines the 

average level of prescribed lighting. In other countries the 

regulations in force are valid regarding  accident-prevention and 

hygiene in the workplace.

6.3  SPACE NECESSARY FOR USE

The choice of the place and space required for installation is an important 

factor for the quality of work and safety and for correct maintenance 

activities.

This area must not only be spacious enough to allow for optimum 

equipment operation - also during cleaning and maintenance phases - but 

must also be well lit, aired, not dusty and not exposed to direct sunlight. 

6.3.1  WorkToP

Fig. F: zeta sonic has been designed to work on a rigid worktop and parallel 

to the ground. Suitable worktops include service furniture (operator is 

standing) or modelling tables (operator is sitting). All worktops must be 

checked for stability. 

Note also that the unit must be positioned so the connection plug can be 

handled/manipulated with ease.

6.4  CONNECTION TO ENERGY SOURCES

The connection is made using the power supply cable. Check:

•  that  mains  power  supply  voltage  and  frequency  correspond  to  those 

indicated on the identification plate (an incorrect power supply voltage 

may damage the equipment);

•  that the power supply mains has a suitable earth connection.

Do not tamper with the power supply cable and relative plug. 

For replacement of the same due to damage and/or wear, only 

contact Authorised After-Sales Centres.

An earth connection is mandatory. If an extension 

must be used temporarily, it must be in compliance 

with the standards in force in the country of use.

6.5  OPERATING THE DRAINAGE CIRCUIT

Zeta sonic is supplied with the drainage circuit closed with a screw cap 

and without the filter (fig. C, 19) in the tank. Before using the ultrasonic 

cleaning unit, you must prepare the drainage circuit.

Fig. 1:  rest the appliance on a level work surface. Place the filter (x) in the 

filter housing inside the tank.

Fig. 2:  Unscrew the cap on the back of the appliance (fig. A, 5). Screw the 

threaded connector (fig. C, 18) clockwise into the drain connector on the 

appliance.  When screwed tight, the threaded connector is hermetically 

sealed.


Unscrewing the threaded connector anticlockwise may 

jeopardise the hermetic seal.

CHAPTER 5:   TRANSPORT AND HANDLING

5.1  GENERAL WARNINGS

In order to prevent injury/damage to persons/objects, pay great 

care when handling the equipment, scrupulously complying 

with all precautions and instructions contained in the following 

paragraphs.

5.2  PACKAGING AND UNPACKING

Fig. E: All material is carefully controlled by the Manufacturer before delivery. 

on receiving the equipment, make sure that it has not been damaged 

during transport and that the packaging has not been tampered with, 

resulting in missing parts. Should any damage or missing parts be noted, 

inform the Dealer and the Carrier immediately by forwarding photographic 

evidence. The packaging, made up of a cardboard box with expanded 

plastic internal protections, contains:

• the zeta sonic equipment;

• the material supplied (see par. 4.2.1);

• the Use and Maintenance Manual;

• the quick guide.

IMPORTANT: Always keep the original product packaging 

throughout the guarantee period. You will need the 

packaging if the product has to be returned to the Service 

Centre for repairs or replacement in the event of 

manufacturing defects or malfunction (with the exception 

of wilful damage, negligence, failure to perform routine 

maintenance or damage during transport). If you are not in 

possession of the original packaging, contact Zhermack and 

ask for instructions (possible repackaging costs will be 

charged on delivery). The customer is responsible for all 

costs associated with unsuitable packaging of the product 

to be returned to the manufacturer. Zhermack is not liable 

for faults, malfunctions or damage to the product deriving 

from or consequent to the use of unsuitable packaging, or 

packaging not of a quality equal to or better than the 

packaging used for the original shipment.

5.3 TRANSPORT AND HANDLING

If the equipment must be moved:

•  disconnect the equipment from the electric point;

•  hold  the  equipment,  always  keeping  it  in  a  vertical  position.  Regarding 

this, pay attention to the weight and clearance of the equipment (see par. 

4.2.3), in order to prevent any type of damage occurring due to the failure 

of considering these values;

•  pack the equipment in the original packaging. If this is not possible, take 

all necessary precautions to protect the equipment from knocks and 

drops, as the goods are transported at the owner’s risk.

•  Failure  to  comply  with  the  rules  stated  above  relieve  the 

Manufacturer from any liability regarding equipment 

malfunctioning   and consequently makes the warranty null 

and void. 

•  When  shipping  and/or  delivering  the  equipment  to  an 

Authorised After-Sales Centre always enclose a copy of the 

purchase document and a copy of the properly filled-in 

identification form. 

5.4  DISPOSAL / DISMANTLING

When disposing of the packaging material the user must follow the 

regulations in force in the country of use relative to the following materials:

•  wood/paper: non-polluting materials, but must be re-cycled correctly;

•  polystyrene/plastic:  pollutant  material,  do  not  burn  (toxic  fumes)  or 

dispose of in the environment. Dispose of these materials in compliance 

with the regulations in force in the country of use.

If the equipment is to be dismantled, the operator must be in charge 

of dismantling, elimination and re-cycling of the following materials in 

compliance with the EEC Directives and the laws in force in the country 

of use:

•  plastic parts; steel parts; glass parts; insulated electric cables; rubber parts.

•  there are no toxic or corrosive substances.

Dispose of the cleaning solution in accordance with the instructions given on 

the labels of the specific detergent/disinfectant used; in all cases, respect the 

EEC Directives and Laws in force in the country of use.

The device must not be disposed of as urban waste. At the 

end of its working life, it must be taken to a waste separation 

and recycling centre in compliance with European Directive 

no.  2012/19/UEC or in accordance with the legislation in 

force in the country of sale. 

Summary of Contents for Zeta sonic

Page 1: ...zeta sonic IT EN FR ES DE RU Ultrasonic cleaning unit zeta sonic...

Page 2: ......

Page 3: ...rmack S p A via Bovazecchino 100 45021 Badia Polesine RO Italy Tel 39 0425 597 611 C306403 zeta sonic 230V SN 20000000 230V 50 60Hz 280W A B C D B 17 15 16 18 19 C 20 21 22 D zeta sonic zeta sonic z e...

Page 4: ...2 2 3 cm OK 3 BEYOND INNOVATION ZHERMACK SpA Badia Polesine RO Italy C303230 ZETA SONIC 230V SN xxxxxxxx 230V 50 60Hz 280W 4 6 MAX 2 LT MIN OK zeta sonic zeta sonic 7 1 OK ZETA SONIC 5 zeta sonic 8 X...

Page 5: ...17 ON LED ON zeta sonic ON LED ON zeta sonic ON LED ON ZETA SONIC 5 10 ON LED ON ZETA SONIC OFF LED OFF ZETA SONIC 2 OFF 10 ON ZETA SONIC ON LED ON 5 10 ZETA SONIC MIN OK MAX zeta sonic 9 zeta sonic 1...

Page 6: ...30 80 A B C zeta sonic 30 80 A B C zeta sonic B A zeta sonic 01 E F D zeta sonic 01 E F D zeta sonic 23 22 ON LED ON zeta sonic G 2 ON LED ON zeta sonic 26 27 ON LED ON ZETA SONIC OFF LED OFF ZETA SO...

Page 7: ...eta sonic 30 31 G zeta sonic BEYOND INNOVATION ZHERMACK SpA Badia Polesine RO Italy C303230 ZETA SONIC 230V SN xxxxxxxx 230V 50 60Hz 280W 32 34 33 15 35 zeta sonic 40 30 60 zeta sonic 40 10 30 zeta so...

Page 8: ...8 zeta sonic...

Page 9: ...funzione del circuito di scarico 6 6 Usi previsti 6 7 Usi non previsti Usi vietati 7 USO DELL APPARECCHIO 7 1 Avvertenze generali 7 2 Utilizzo 7 3 Introduzione del liquido di lavaggio e degli oggetti...

Page 10: ...per zone o situazioni pericolose o eventuali operazioni il cui non rispetto delle istruzioni possa causare il decadimento della garanzia nonch danni all apparecchio o ad altri elementi ad esso associa...

Page 11: ...RT STOP 11 Spia temperatura 12 Pulsante degas 13 Manopola temperatura 14 Pulsante ON OFF 3 3 DATI DI IDENTIFICAZIONE Fig B l apparecchio descritto nel presente manuale provvisto di una targhetta indic...

Page 12: ...tato per lavorare appoggiato su di un piano rigido e parallelo al suolo A tale scopo costituiscono validi piani di appoggio i mobili di servizio per un uso in piedi o i banchi da modellazione per un u...

Page 13: ...quidi detergenti di primo impiego per circa 5 10 minuti Fig 18 Spegnere la funzione degas premendo il tasto degas fig A 12 La spia led della funzione degas si spegne 6 4 ALLACCIAMENTO A FONTI DI ENERG...

Page 14: ...ontario zeta sonic dotata di un dispositivo di spegnimento di sicurezza Dopo 12 ore di funzionamento continuo l apparecchio si spegne automaticamente Se si vuole riutilizzare subito l apparecchio nece...

Page 15: ...o tossici nelle operazioni di pulizia dell apparecchio e o dei componenti PULIZIA DELLA VASCA Eseguire a intervalli regolari la pulizia disinfezione della vasca a ultrasuoni con un efficace disinfetta...

Page 16: ...anualmente DIFETTO L apparecchio non funziona le spie START STOP e temperatura si accendono ad intermittenza luce intermittente segnalazione di errore nella programmazione CAUSA 1 Disfunzione elettron...

Page 17: ...k S p A che provveder alla spedizione del ricambio Qualora il pezzo cambiato non venga sostituito verr addebitato all ordinante 8 Il fabbricante nonch il Deposito Dentale non sono tenuti a dare in uso...

Page 18: ...mperatura impostata 1 Accensione funzione sweep2 Impostare tempo pulitura Premere pulsante START STOP Premere pulsante sweep START STOP accesa Sweep accesa Tempo impostato fissa Tempo residuo intermit...

Page 19: ...rainage circuit 6 6 Declared use 6 7 Non declared and prohibited use 7 USING THE EQUIPMENT 7 2 Use 7 3 Adding the cleaning solution and objects to be cleaned and or disinfected 7 3 1 Using the glass b...

Page 20: ...null and void will be highlighted with PROHIBITED This symbol calls attention to operations that are prohibited Any general information and or useful advice referring to any subject will be highlight...

Page 21: ...d deteriorate with use and become illegible even partially request a replacement from the Manufacturer stating all data Do not remove and or ruin the plate so that the equipment identification data ca...

Page 22: ...jects pay great care when handling the equipment scrupulously complying with all precautions and instructions contained in the following paragraphs 5 2 PACKAGING AND UNPACKING Fig E All material is ca...

Page 23: ...ched fig 20 B The appliance starts heating the cleaning solution During heating ultrasound mixing of the cleaning solution is activated automatically active for five seconds at one minute intervals du...

Page 24: ...hout anti corrosive aldehydes Fig 32 Measure a quantity of 10 ml 1 per litre of water using the graduated reservoir on the bottle Immerse the instruments in the ultrasonic cleaning unit for 15 minutes...

Page 25: ...turer from any liability If the necessary maintenance interventions are not considered in this Use and Maintenance Manual contact the Authorised After Sales Centre 8 4 RE START AFTER LONG PERIOD OF IN...

Page 26: ...ter Sales Centre with the equipment Persons wishing to make use of the warranty must inform of the fault within 8 days of its discovery for the effects and purpose of art 1495 of the Civil Code The wa...

Page 27: ...s manual and in the Quick Guide EN zeta sonic IDENTIFICATION FORM Equipment Model Equipment Serial Number Purchaser Address Town Post Code Tel Tax Code VAT Number Dealer Purchaser s Signature 10 3 TEC...

Page 28: ...y Actual temperature flashing moves towards the set temperature 1 Turning the sweep function on2 Set cleaning time Press START STOP button Press sweep button START STOP on Sweep on Set time steady Tim...

Page 29: ...en service du circuit de vidange 6 6 Emplois admis 6 7 Emplois non admis Emplois interdits 7 UTILISATION DE L APPAREIL 7 1 Instructions g n rales 7 2 Utilisation 7 3 Introduction du liquide de lavage...

Page 30: ...s en vidence par le symbole ATTENTION Ce symbole se r f re certaines normes de s curit respecter scrupuleusement afin de garantir la s curit des personnes et d viter tout endommagement de l appareil L...

Page 31: ...ouche degas 13 Bouton temp rature 14 Touche ON OFF 3 3 IDENTIFICATION Fig B L appareil d crite dans ce manuel poss de une plaque d identification Celle ci contient les donn es concernant l appareil et...

Page 32: ...pour une utilisation assise constituent d excellentes tables de support condition qu elles soient bien stables De plus l appareil doit tre plac de fa on ce qu il soit possible de man uvrer facilement...

Page 33: ...14 Le voyant ON OFF s allume Fig 13 Appuyer sur la touche START STOP fig A 10 Le voyant START STOP s allume Fig 14 Appuyer pendant plus de 2 secondes sur la touche degas fig A 12 Le voyant degas comme...

Page 34: ...tiquement les ultrasons L utilisateur doit donc d sactiver manuellement la fonction ultrasons la fin du processus de nettoyage en appuyant sur la touche START STOP fig 27 Pour remettre les valeurs 0 t...

Page 35: ...s alcalins ou toxiques pour nettoyer l appareil NETTOYAGE DE LA CUVE La cuve ultrasons doit tre nettoy e d sinfect e r guli rement l aide d un d sinfectant pour surfaces efficace ex zeta 3 soft Zherma...

Page 36: ...s adresser un SAV agr CHAPITRE 10 ANNEXES 10 1 D CLARATION DE CONFORMIT CE Le fabricant Zhermack S p A Via Bovazecchino 100 45021 Badia Polesine RO Italy Tel 39 0425 597611 Fax 39 0425 53596 Personne...

Page 37: ...a soci t Zhermack S p A laquelle s occupera de l exp dition de la pi ce de rechange Toute pi ce non restitu e implique le paiement de la pi ce de rechange de la part de la personne l ayant command e 8...

Page 38: ...temp rature programm e 1 Allumage fonction sweep2 Programmer le temps de nettoyage Appuyer sur la touche START STOP Appuyer sur la touche sweep START STOP allum Sweep allum Temps programm fixe Temps...

Page 39: ...vaciado 6 6 Usos previstos 6 7 Usos no previstos Usos prohibidos 7 USO DEL APARATO 7 1 Advertencias generales 7 2 Uso 7 3 Introducci n del l quido de lavado y de los objetos a limpiar o desinfectar 7...

Page 40: ...las cuales no respetar las instrucciones podr an causar el vencimiento de la garant a da os al aparato o a otros elementos asociados a la misma o al ambiente circunstante se evidenciar n con el s mbo...

Page 41: ...el agua 6 Enchufe para la alimentaci n el ctrica 7 Indicador luminoso del tiempo 8 Bot n sweep 9 Mando del tiempo 10 Bot n de START STOP 11 Indicador luminoso de la temperatura 12 Bot n degas 13 Mando...

Page 42: ...a conexi n deber comprobarse que el voltaje y la frecuencia de la red de alimentaci n correspondan con las indicadas en la tarjeta una tensi n err nea de alimentaci n puede da ar el aparato que la red...

Page 43: ...luminoso led de START STOP est encendido Fig 17 Presione el bot n degas fig A 12 El indicador luminoso led degas est encendido Desgasifique los l quidos detergentes antes de su primer empleo durante u...

Page 44: ...tiva autom ticamente los ultrasonidos Por consiguiente el usuario deber desactivar manualmente la funci n de ultrasonidos al final del proceso de limpieza mediante la presi n del bot n de START STOP f...

Page 45: ...ado y en condiciones de estabilidad Antes de realizar la limpieza externa del aparato asegurarse de apagar siempre el interruptor general Se prohibe limpiar el aparato conectado a la red de alimentaci...

Page 46: ...os botones de START STOP y degas o mezcle manualmente 2 No encienda el calentamiento 3 Encienda los ultrasonidos solo durante un breve periodo de tiempo DEFECTO Durante la fase de calentamiento se oye...

Page 47: ...rectamente c Se ha presentado un error en la conexi n de red tensi n nominal de alimentaci n err nea o no se han instalado los dispositivos de protecci n adecuados d Se ha extra do borrado o alterado...

Page 48: ...programada 1 Encendido de la funci n sweep2 Programe el tiempo de limpieza Presione el bot n de START STOP Presione el bot n sweep START STOP encendido Sweep encendido Tiempo programado fijo Tiempo r...

Page 49: ...laufkreislaufs 6 6 Vorgesehener Gebrauch 6 7 Nicht vorgesehener Verbotener Gebrauch 7 GEBRAUCH DES APPARATES 7 1 Allgemeine Warnungen 7 2 Gebrauch 7 3 Einf llen der Reinigungsfl ssigkeit und Einlegen...

Page 50: ...tung der Anweisungen den Verfall der Garantie sowie auch Sch den an den Apparaten oder anderen damit verbundenen Bestandteilen oder in dem umgebenden Raum verursachen k nnen wird hervorgehoben mit dem...

Page 51: ...uf 6 Steckverbinder Spannungsversorgung 7 Kontrolllampe Zeit 8 TasteSweep 9 Zeitregler 10 Taste START STOP 11 Kontrolllampe Temperatur 12 Taste Degas 13 Temperaturregler 14 Taste ON OFF 3 3 ANGABEN ZU...

Page 52: ...nem Zufuhrkabel hergestellt Pr fen ob Volt und Frequenz der Netzleitung den Hinweisen auf dem Maschinenschild entsprechen eine falsche Spannung kann die Apparate besch digen ob in der Netzleitung eine...

Page 53: ...Taste START STOP dr cken Abb A 10 Die LED Kontrolllampe START STOP ist eingeschaltet Abb 17 DieTaste Degas Abb A 12 dr cken Die LED Kontrolllampe Degas ist eingeschaltet Erstmalig eingesetzte Reinigu...

Page 54: ...et das Ger t den Ultraschall nicht automatisch ab Der Anwender muss daher die Ultraschallfunktion nach Beendigung des Reinigungsdurchgangs durch Dr cken der Taste START STOP Abb 27 manuell abschalten...

Page 55: ...lter abgeschaltet ist Es ist verboten den Apparat zu s ubern wenn er mit dem Stromnetz verbunden ist Der Gebrauch von entz ndbaren korrosiven und giftigen Fl ssigkeiten f r die S uberung den Apparat i...

Page 56: ...hall nur f r einen kurzen Zeitraum einschalten FEHLER W hrend des Aufheizvorgangs ist das typische Ger usch siedender Fl ssigkeit zu h ren URSACHE 1 Die Reinigungsfl ssigkeit wurde nicht gemischt ABHI...

Page 57: ...nung der Einspeisung dort wo oder falls keine angebrachte Schutzvorrichtung eingebaut wurde d die Matrikelnummer beseitigt gel scht oder ge ndert wurde 7 Die unter Garantie zu ersetzenden Bestandteile...

Page 58: ...Temperatur 1 Einschaltung der Funktion sweep2 Die Reinigungszeit einstellen Die Taste START STOP dr cken Die Taste Sweep dr cken START STOP eingeschaltet Sweep eingeschaltet Eingestellte Zeit permanen...

Page 59: ...2 3 3 4 4 1 4 2 4 2 1 4 2 2 4 2 3 5 5 1 5 2 5 3 5 4 6 6 1 6 2 6 3 6 3 1 6 4 6 5 6 6 6 7 7 7 1 7 2 7 3 7 3 1 7 4 degas 7 4 1 7 4 2 7 5 7 5 1 7 5 2 7 5 2 1 7 5 3 sweep 7 6 7 7 7 8 7 8 1 8 8 1 8 2 8 3 8...

Page 60: ...sonic Zhermack 1 2 1 2 2 2 1 Zhermack S p A Via Bovazecchino 100 45021 Badia Polesine RO Italy 39 0425 597611 39 0425 53596 http www zhermack com e mail info zhermack com zeta sonic Zhermack 2 2 Zher...

Page 61: ...ack 3 3 1 zeta sonic 3 2 1 2 3 4 5 6 7 8 sweep 9 10 START STOP 11 12 degas 13 14 ON OFF 3 3 B A B C D Zeta sonic CEE CE 4 4 1 Zhermack Zhermack o Zhermack zeta sonic jet zeta sonic sweep degas 4 2 230...

Page 62: ...C 35 C 80 200 6 3 4 2 1 C 15 1 XI0140002 16 1 XC0140001 17 1 XR0140001 18 1 XR0140002 19 1 XC0140002 4 2 2 D 20 1 XR0140008 21 1 XR0140003 22 1 XC0140003 4 2 3 2 75 1 9 240x137x100 300x179x214 198x106...

Page 63: ...6 7 zeta sonic RU 7 7 1 6 7 2 sweep 7 3 5 6 zeta 1 ultra Zhermack 7 2 3 8 7 3 1 7 8 1 9 10 11 7 4 DEGAS degas 6 3 1 F 6 4 6 5 zeta sonic 19 1 2 5 18 3 17 18 4 fig A 6 6 4 6 6 zeta sonic 6 7 6 6 a Zher...

Page 64: ...STOP 17 degas 12 degas 5 10 18 degas degas 12 degas 7 5 42 zeta sonic 7 7 7 5 1 19 ON OFF 14 ON OFF 20 21 D F 22 2 START STOP 10 START STOP G 20 5 1 7 5 2 23 ON OFF 14 ON OFF 24 25 D F Fig 26 START S...

Page 65: ...zeta 1 ultra Zhermack 32 10 1 15 35 algitray Zhermack 33 500 50 2 algitray algitray 10 30 40 gipstray Zhermack 34 gipstray 30 60 40 7 8 7 8 1 7 NaCl 7 3 1 2 4 8 8 1 zeta 3 soft Zhermack zeta 3 foam Zh...

Page 66: ...2 ON OFF 1 2 3 1 2 3 1 0 2 3 1 2 ON OFF 3 1 1 ON OFF 1 2 1 2 START STOP degas 1 2 30 86 F 3 1 START STOP degas 2 3 1 1 START STOP degas START STOP 1 1 10 10 1 CE Zhermack S p A Via Bovazecchino 100 45...

Page 67: ...67 3 4 5 6 7 zeta sonic RU 93 42 E 2014 30 UE EMC 2014 35 UE 10 85 374 E Badia Polesine 20 04 2016 Paolo Ambrosini 10 2 1 36 1495 c c 8 2 85 374 CE 3 4 5 6 a b c d 7 Zhermack S p A 8 9 10 11 12 10 3...

Page 68: ...RT STOP START STOP 1 sweep2 START STOP sweep START STOP Sweep sweep2 sweep START STOP Sweep degas2 START STOP degas START STOP Degas degas2 degas START STOP Degas degas2 START STOP degas 2 START STOP...

Page 69: ...69 zeta sonic...

Page 70: ...70 zeta sonic...

Page 71: ......

Page 72: ...XM0140000 16 12...

Reviews: