23
The reference figures can be found on pages 3, 4, 5, 6 and 7 of this manual and in the Quick Guide.
EN
zeta sonic
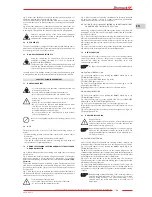
Fig. 8: Cover the ultrasonic cleaning unit with the lid provided. Using the
lid keeps the cleaning solution at a stable temperature, guaranteeing
maximum cleaning and/or disinfection efficiency.
7.3.1 USING THE GLASS BEAKERS (OPTIONAL) FOR DETERGENTS NOT
COMPATIBLE WITH THE STAINLESS STEEL TANK
When using detergents which could damage the stainless steel tank, (see
paragraph 7.8.1), you must use the special glass beakers and lid for beakers
(provided on request).
Fig. 9: Fill the cleaning tank without reaching the indentation. The water
must touch the indentation when the beakers are inserted in the tank.
Fig. 10: Pour the potentially corrosive detergent solution into the special
glass beakers and immerse the objects to be cleaned and/or disinfected in
the beakers.
Fig. 11: Use the lid for beakers to suspend the beakers in the tank. Immerse
the beakers in the cleaning solution to at least half their height.
7.4 DEGAS FUNCTION
The degas function reduces the presence of air in the cleaning solution,
optimising cleaning efficiency. Degassing is strongly recommended
whenever you change the cleaning solution. Degassing can be done
automatically or manually.
The degas and sweep functions cannot be used simultaneously.
7.4.1 AUTOMATIC DEGASSING
Fig. 12: Turn the appliance on by pressing the ON/OFF button (fig. A, 14).
The ON/OFF light comes on.
Fig. 13: Press the START/STOP button (fig. A, 10).
The START/STOP light comes on.
Fig. 14: Hold the degas button down for at least 2 seconds (fig. A, 12). The
degas light starts flashing.
Degassing takes place for 10 minutes then goes off automatically.
7.4.2 MANUAL DEGASSING
Fig. 15: Turn the appliance on by pressing the ON/OFF button (fig. A, 14).
The ON/OFF light comes on.
Fig. 16: Use the time dial to set the required time. Press the START/STOP
button (fig. A, 10). The START/STOP light comes on.
Fig. 17: Press the degas button (fig. A, 12). The degas light comes on.
Degas the detergent solution when being used for the first time for about
5-10 minutes.
Fig. 18: Turn the degas function off by pressing the degas button (fig. A, 12).
The degas light goes off.
7.5 ULTRASONIC CLEANING
Danger of burns!
While the appliance is in operation, do not touch the detergent
solution or the ultrasonic conductors. Touch the appliance and
basket with protective gloves only!
When cleaning impurities containing traces of blood or protein,
make sure the temperature remains below 42°C/ 107°F. The
detergents/disinfectants recommended for use with zeta sonic
are listed in section 7.7.
7.5.1 AUTOMATIC CLEANING
After correctly filling the tank with the cleaning solution, immerse the
instruments to be cleaned/disinfected, close the lid and proceed as follows:
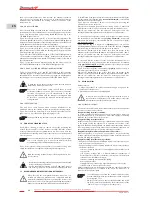
Fig. 19: Turn the appliance on by pressing the ON/OFF button (fig. A, 14).
The ON/OFF light comes on.
Fig. 20: Use the temperature dial (A) to set the required temperature. The
continuous light (B) indicates the set temperature, while the flashing light (C)
displays the actual temperature of the cleaning solution. As the solution heats
up, the light moves in the direction of the set temperature.
Fig. 21: Use the time dial (D) to set the required time. The continuous
light (E) displays the set time, while the flashing light (F) displays the time
remaining to the end of the cycle.
Fig. 22: Hold the START/STOP button down for at least 2 seconds (fig. A, 10).
The START/STOP light (G) starts flashing and comes on steadily when the set
temperature is reached (fig. 20, B). The appliance starts heating the cleaning
solution.
During heating, ultrasound mixing of the cleaning solution is
activated automatically (active for five seconds at one minute
intervals during heating). The ultrasound mixing is only
activated when the actual temperature is less than the set
temperature.
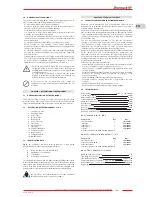
Fig. 3: Connect the threaded connector to the transparent hose (fig. C, 17)
and fasten with the hose clip provided (fig. C, 18).
The device drains through gravity. Place the drain hose at the same height
as, or below, the surface on which the appliance is resting and avoid upward
curves.
Fig. 4: Insert the main power socket into the appropriate outlet at the rear
of the device (fig.A, 6) and subsequently connect the plug to the mains.
In this regard, strictly follow the indications described in paragraph 6.4.
Failure to comply with any of the above-stated equipment
installation regulations can lead to equipment malfunctioning
and render the warranty null and void.
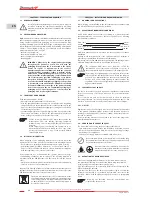
6.6 DECLARED USE
The zeta sonic appliance is designed for the rapid in-depth cleaning and/or
disinfection of dental prostheses and dental and surgical instruments made
from metal, glass, ceramic and other material.
6.7 NON-DECLARED/PROHIBITED USE
Using the equipment for any purpose not considered in
paragraph regarding “Declared use” shall be considered
improper and thus forbidden.
The improper use of the equipment renders the warranty null
and void and Zhermack declines all liability for any damage to
objects and injury to operators or third parties.
The main reasons for which the warranty is rendered null and void are given
in paragraph 2.2 and in the “Warranty Certificate” attached to this Manual.
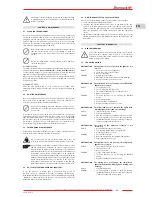
CHAPTER 7: USING THE EQUIPMENT
7.1 GENERAL WARNINGS
• For total certainty of safe operation, scrupulously follow the
work phases given below.
• Use only products suitable for ultrasonic treatment.
• Never pour very hot liquids into the cold ultrasonic tank.
• Always use personal protection devices (e.g. gloves, goggles
and mask).
• Always operate the appliance with the lid closed.
• Do not overload the appliance with instruments and make
sure they are covered with cleaning solution.
• Never go below the minimum level and never exceed the
maximum filling level indicated (fig. 6).
• Do not pour water on live electrical parts to avoid residual
risks (see paragraph 7.8).
Do not use the appliance without the cleaning solution in the
tank.
7.2 USE
The principal steps for correct use of the ultrasonic cleaning unit are as
follows:
• fill with cleaning solution and insert the objects to be cleaned and/or
disinfected;
• degas the cleaning solution (optional but recommended);
• close the lid and perform the ultrasonic cleaning (possibly using the
sweep function for optimum efficiency).
7.3 ADDING THE CLEANING SOLUTION AND OBJECTS TO BE CLEANED
AND/OR DISINFECTED
Fig. 5: Before filling the ultrasonic cleaning unit, make sure the drainage
knob is closed.
Fig. 6: Prepare the cleaning solution using the quantities of detergent/
disinfectant specified in the manufacturer’s instructions. For optimum
disinfection and cleaning of instruments, we recommend using zeta 1 ultra
Zhermack®.
Fill the tank with about 2 litres of cleaning solution. The indentation in the
tank indicates the maximum recommended filling level which must never
be exceeded, even after the objects to be cleaned and/or disinfected have
been inserted.
Fig. 7: Place the objects to be treated in the stainless steel basket. Immerse
the basket in the ultrasonic cleaning unit. The objects must be immersed 2-3
cm below the level of the cleaning solution.
To avoid damage to the appliance:
• never place objects directly on the bottom of the tank;
• do not overload the instrument basket.
Summary of Contents for Zeta sonic
Page 1: ...zeta sonic IT EN FR ES DE RU Ultrasonic cleaning unit zeta sonic...
Page 2: ......
Page 8: ...8 zeta sonic...
Page 69: ...69 zeta sonic...
Page 70: ...70 zeta sonic...
Page 71: ......
Page 72: ...XM0140000 16 12...


