background image

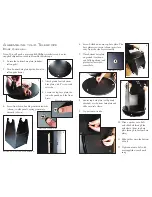
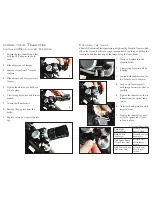
28. Loosen thumbscrew on 

finderscope mounting slot.

29.  Slide finderscope bracket 

into mounting slot with 

open end of bracket facing 

the objective end of the 

telescope (objective end is 

the open end of the optical 

tube).

30. Tighten thumbscrew on 

finderscope mounting slot.

A

SSEMBLING


YOUR

 T

ELESCOPE

F

INDERSCOPE

 A

SSEMBLY

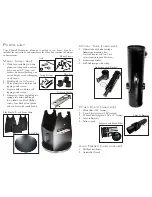
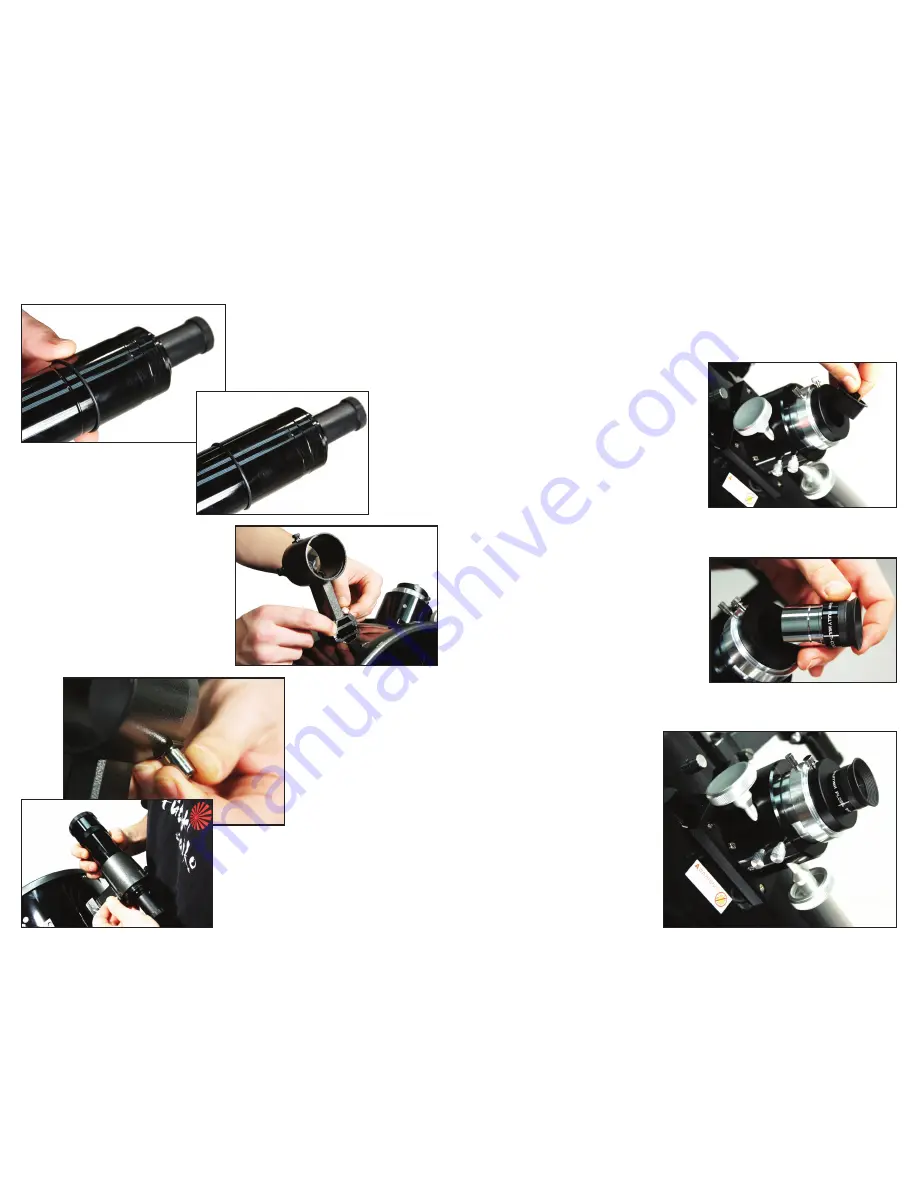
26. Locate finderscope, finderscope 

bracket, and o-ring.

27.  Slide o-ring over small end of 

finderscope and into groove.

27

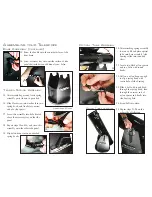
31.  Pull tension knob on 

finderscope bracket.

32. Slide narrow end 

of finderscope into 

bracket with wide end 

of finderscope facing 

the objective end of 

telescope.

33. Release tension 

knob on finderscope 

bracket.

30

32

31

U

SING


YOUR

 T

ELESCOPE

I

NSTALLING

/R

EMOVING

 1.25“ E

YEPIECES

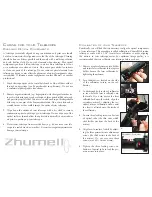
You are now ready to use your telescope. Make certain that you remove the 

dust cover on the optical tube prior to viewing.

1.  Remove dust cover from eyepiece 

holder.

2.  Loosen thumbscrew on the eyepiece 

holder.

3.  Remove covers from 1.25’’ format 

eyepiece.

4.  Slide chrome end of eyepiece into 

eyepiece holder.

5.  Tighten thumbscrew to hold 

eyepiece in place. 

6.  View through eyepiece and focus as 

needed.

7.  Loosen the thumbscrew.

8.  Remove the eyepiece from the 

holder.

9.  Replace covers on eyepiece 

for storage.

1

4

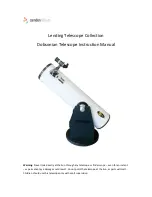
Summary of Contents for Dobsonian

Page 1: ...DOBSONIAN TELESCOPES...

Page 2: ...amage the telescope and your eyes Make sure no screws are loose before using telescope Do not drop shake or throw your telescope as doing so may damage the telescope or people around you Objects in te...

Page 3: ...nylon pull loops two washers two black Phillips screws four black nylon spacers and two bolts with round knobs MOUNT SMALL BOX Side Panels 2 and Front Brace Base Plate Axle Spring System Mount Screws...

Page 4: ...eeve from top base plate through to bottom base plate 11 Slide washer onto the bottom of bolt 12 Tighten nut onto bolt with user supplied wrench until snug 5 Screw front brace handle grommets inwards...

Page 5: ...l 18 Repeat steps 15 and 16 and screw this assembly onto the other side panel 19 Slip nylon hoops into non attached spring hooks 16 17 19 OPTICAL TUBE ASSEMBLY 20 After attaching spring assembly to mo...

Page 6: ...inderscope into bracket with wide end of finderscope facing the objective end of telescope 33 Release tension knob on finderscope bracket 30 32 31 USING YOUR TELESCOPE INSTALLING REMOVING 1 25 EYEPIEC...

Page 7: ...us quickly by pushing or pulling the focus tube and fine focusing of the image using the focus knobs 1 Insert an eyepiece into the eyepiece holder 2 View through eyepiece while focusing 3 Loosen both...

Page 8: ...l surfaces Instead allow the optics to dry naturally in warm indoor air prior to packing up your telescope 4 Protect your telescope from excessive heat e g do not store your tele scope in a sealed car...

Page 9: ...nt dust cover should be removed to maximize the light which enters the optical tube Can I use the optical tube from my Dobsonian on any other mounts The optical tube from you Dobsonian telescope will...

Page 10: ...noticed may be hard to find by our techni cian A letter will speed up the warranty process and save a phone call Oh yes please include your phone number and an address Since three years is a long time...

Page 11: ...any questions comments or stories about expe riences with your Zhumell telescope we would like to hear them We are confident that you will be pleased with your new Zhumells and hope to hear from you...

Reviews: