1
104
Make sure the power supply to the stove is unplugged completely.
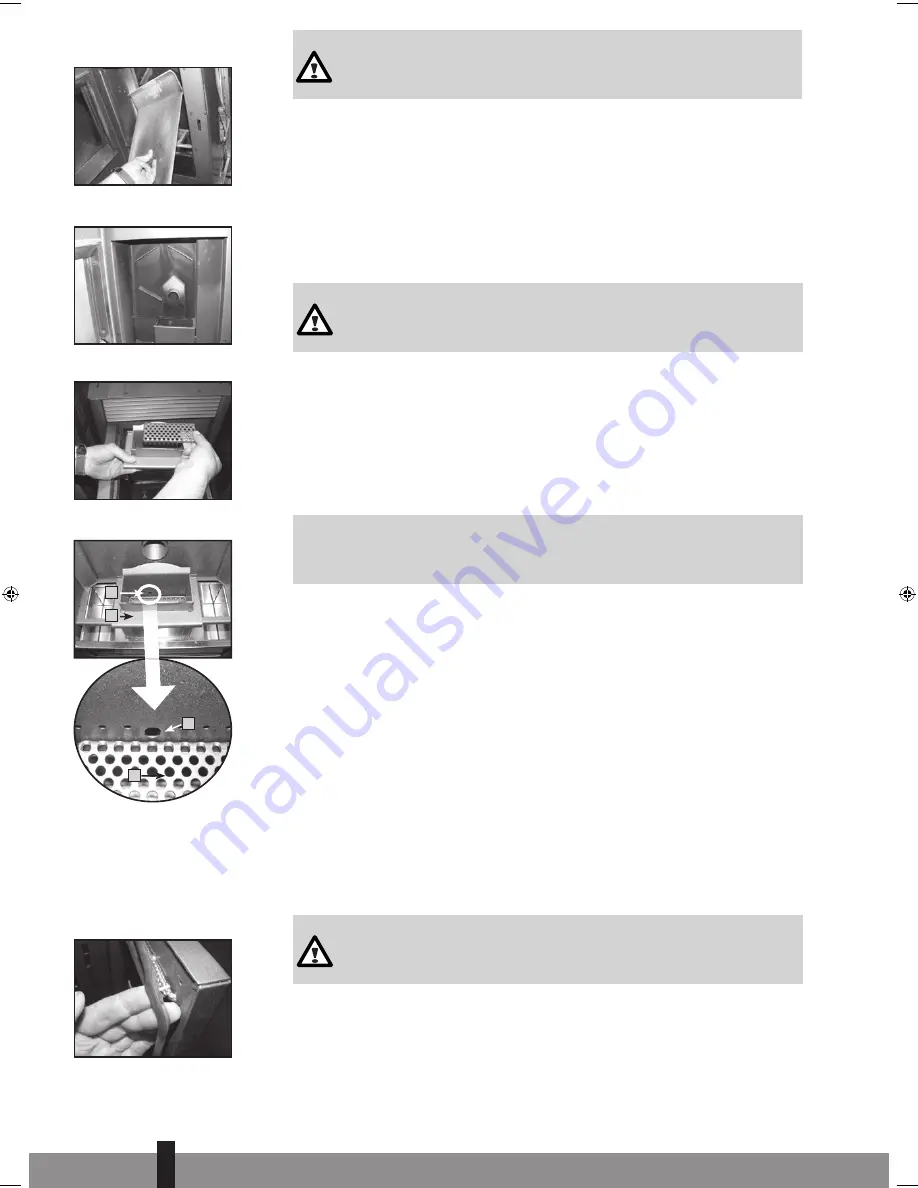
6. Replace the fi rebox back side wall.
7. Replace the ash draw
8. Replace the burning pot.
F.3.5 cleaning the burning pot
The burning pot needs cleaning at least before each start up and once every two
days of consecutive burning.
Only clean the burning pot when the stove has cooled down completely!
1. Take out the burning pot by lifting it up from its seat.
2. Take out the burning pot grid from the burning pot. See pict. F8.
3. Empty all the ash and residues from the burning pot and the burning pot grid.
If the holes at the bottom of the burning pot are obstructed use a sharp poin-
ted tool to open the holes. Clean the burning pot and burning pot grid further
using a brush and a vacuum cleaner.
G
Open holes and a clean burning pot grid are
eXTReMeLy
important for a
good combustion of the pellets.
Replace the burning pot and the grid to its seat. Make sure that the ignition open-
ing is pointing toward the back side of the unit, see pict. F9.
F.3.6 cLeAnIng The Ash DRAW
The ash draw needs cleaning when its full and before each start up.
The ash draw is positioned underneath the burning pot and can be taken out by
sliding it towards you. See pict. F4.
It is advised to empty the ash draw in a metal container with airtight lid. As it is
known that ash keeps lighted/hot coal for a long period.
Make sure the ash does not get into contact with combustible materials (such as for
example a wooden fl oor)
Only clean the ash draw when the stove has cooled down completely!
F.3.7 checKIng The FIRe DOOR seAL
At least twice per year, fi rst time before the heating season starts, check the
chargingdoor seal on leakage and outlook. See pict. F10. Have it replaced by a by
Zibro authorized technician if needed. Only use original Zibro spare parts.
4
Picture F10: checking the
fi re door seal
Picture F9: A = ignition
opening, opening needs
to be pointing towards the
back of the unit.
B = burning pot
C = burning pot grid. The
grid needs to be positioned
with the fl at side pointing
upwards
A
A
b
c
Picture F6
Picture F7
Picture F8
man_Aida ('09).indd 104
17-09-2009 16:50:02


